
Adobe Fresco is revolutionizing the digital art experience by seamlessly combining the organic fuel of traditional craftsmanship with the limitless possibilities of digital tools. Fresco provides artists with tools that mimic the properties of authentic materials such as watercolors, oils, and pencils. Consequently, it turned out to be an exceptional platform for artists seeking to move from the physical medium to the digital sphere, while preserving the basic spirit of their artistic expression.
The unique strength of Fresco lies in its versatility, which serves as a valuable tool for both novice artists and experienced creators. While it will be easy for beginners to understand its user-friendly design and helpful hints, advanced artists can use powerful features such as vector painting tools and sophisticated layer masks. In this article, we’ll take a closer look at Fresco’s capabilities and give you an idea of how to use them effectively.
You’ll learn:
- How to set up your workspace for maximum efficiency.
- The differences between Pixel Brushes, Live Brushes, and Vector Brushes—and when to use them.
- A step-by-step guide to creating a complete illustration from scratch.
- Advanced techniques like blending modes, masking, and exporting files for various purposes.
- Real-world examples of projects created in Fresco, from portraits to character designs.
By the end of this article, you’ll have a solid understanding of how to harness the full potential of Adobe Fresco.
Getting Started with Adobe Fresco
Understanding the Interface
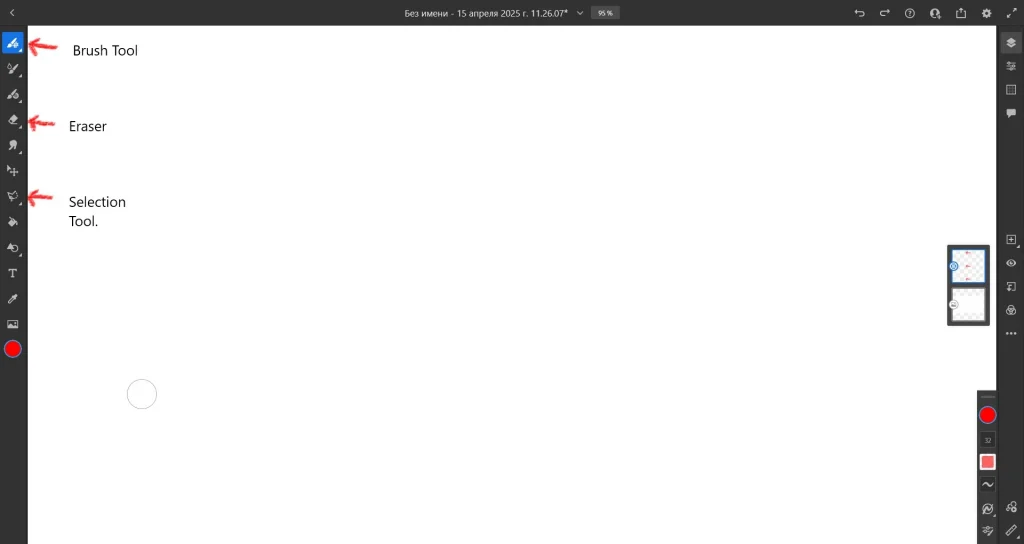
Upon launching Adobe Fresco, you’ll be greeted by its sleek and uncluttered design. The interface is structured into three core areas: the toolbar, the brush panel, and the layers panel, each dedicated to a distinct function:
- Toolbar: Located on the left side, it houses essential tools like the Brush Tool, Eraser, and Selection Tool. These are the backbone of your workflow, allowing you to paint, erase, and select elements effortlessly.
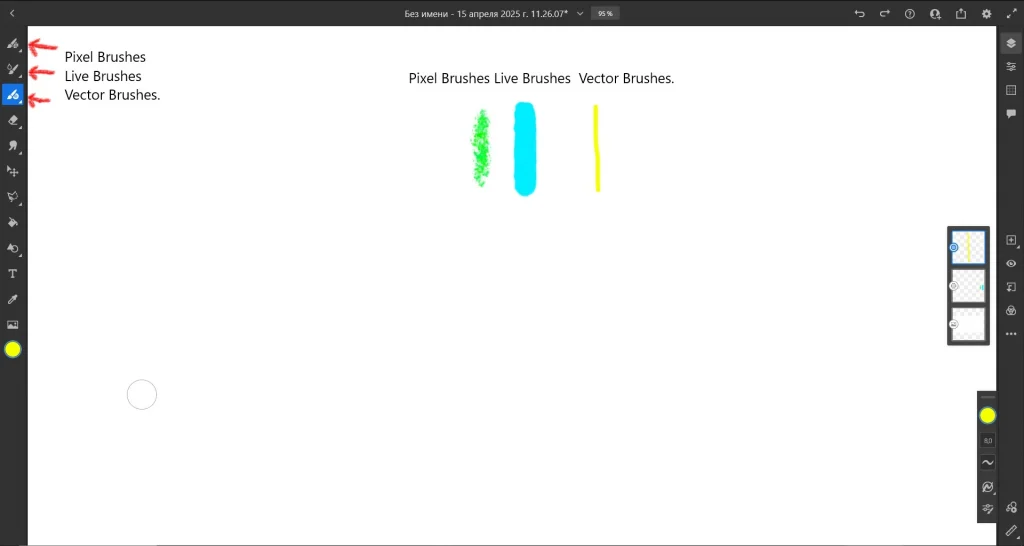
- Brush Panel: This is where the magic happens. Fresco offers three types of brushes:
- Pixel Brushes: These behave like traditional digital painting tools, allowing you to create textures, add details, and simulate pencil sketches.
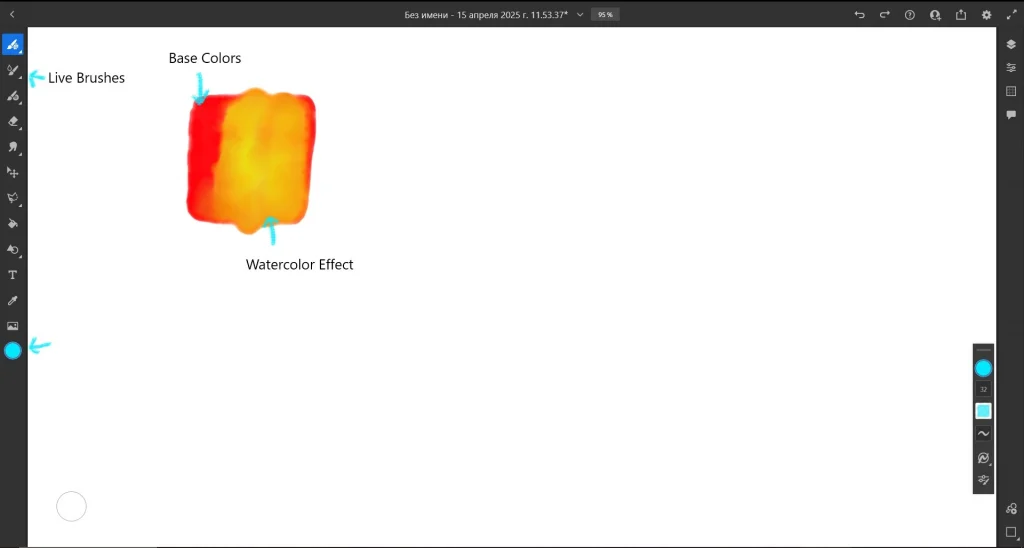
- Live Brushes: These are unique to Fresco. They replicate the behavior of real-world materials. For example, the Watercolor Brush blends colors on the canvas just like real watercolors, while the Oil Brush creates textured, layered strokes.
- Vector Brushes: These are perfect for clean, scalable lines and shapes. Unlike pixel-based brushes, vector brushes allow you to resize and adjust your work without losing quality.
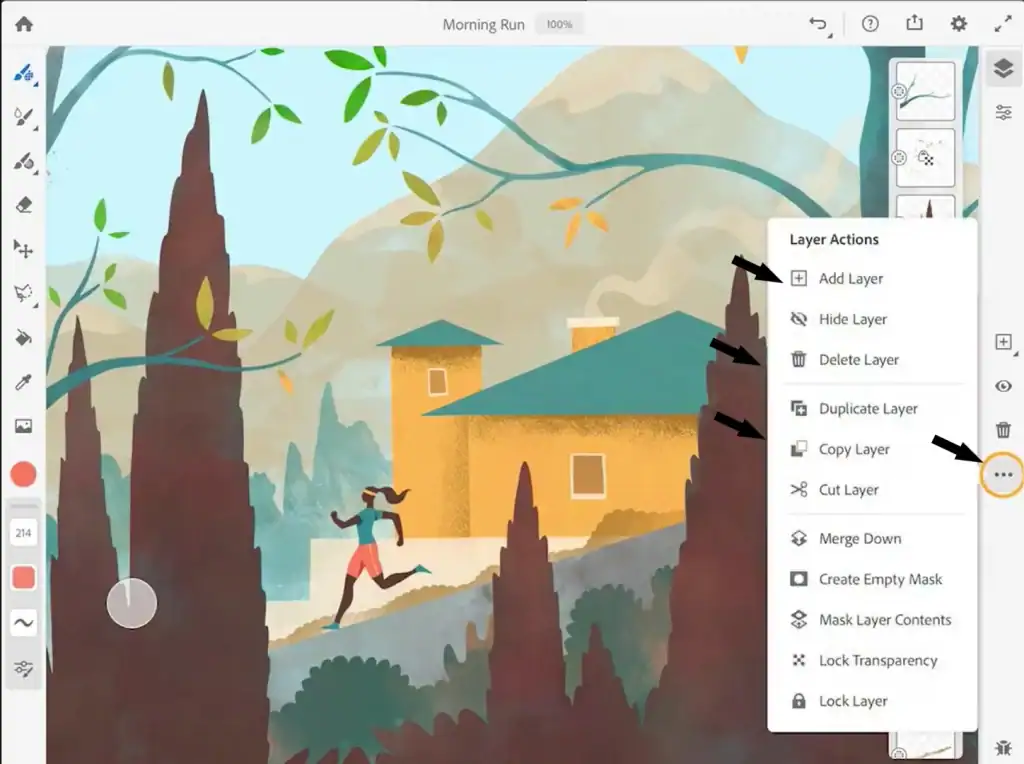
- Layers Panel: Layers are crucial for organizing your project. You can group related elements, apply blending modes, and use masks to refine your work.
Setting Up Your Document
Before you start drawing, it’s important to configure your document settings:
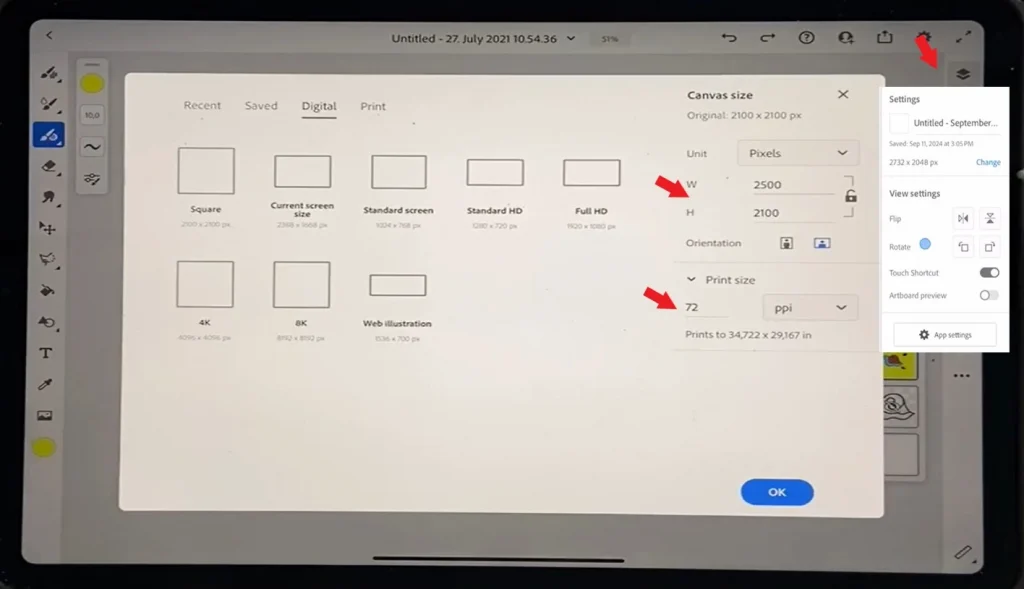
Canvas Size
Choose a size that suits your project. For print, go with 300 DPI and dimensions like 8.5×11 inches (standard letter size). For web graphics, 72 DPI and smaller dimensions (e.g., 1920×1080 pixels) are sufficient.
Orientation
Decide whether your canvas will be portrait, landscape, or square. This decision depends on the nature of your illustration. For example, character designs often work best in portrait orientation, while landscapes benefit from a wider canvas.
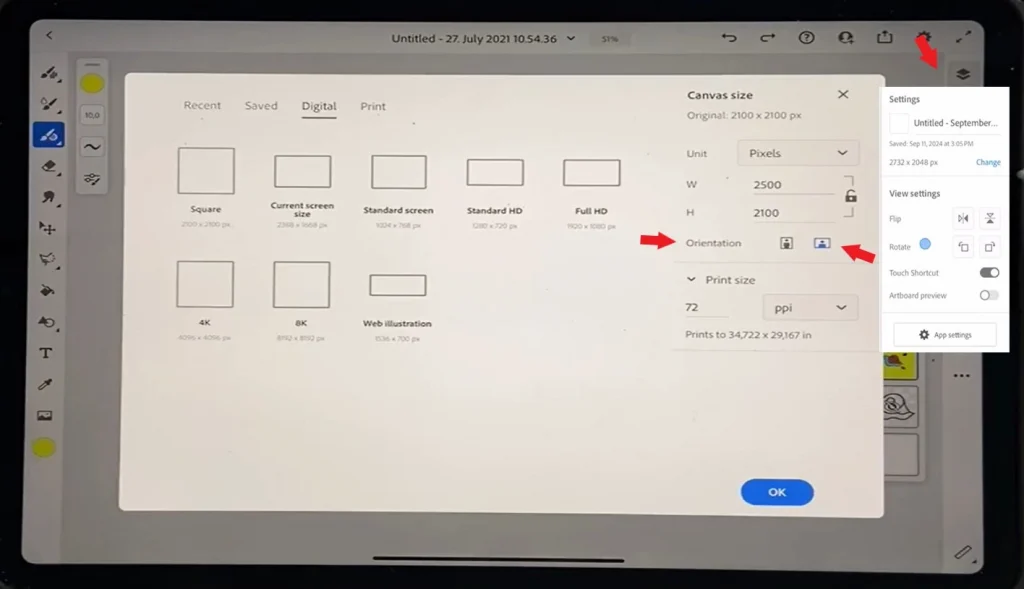
Color Mode
Fresco supports RGB for digital projects and CMYK for print. If you’re unsure, stick with RGB—it’s more versatile and widely supported.
Customizing Your Workspace
Fresco allows you to customize your workspace to suit your preferences. You can rearrange panels, save custom brush presets, and even import brushes from Photoshop. This flexibility ensures that your workflow remains efficient and tailored to your needs.
Tools and Brushes for Digital Illustrations
Pixel Brushes: Adding Texture and Detail
Pixel Brushes are versatile tools for adding depth and texture to your illustrations. They work by applying color directly to the canvas, pixel by pixel. Here’s how to use them effectively:
- Pencil Brushes: Ideal for sketching and outlining. Use these brushes to create rough drafts or detailed line art.
- Texture Brushes: These brushes simulate materials like charcoal, chalk, or ink. For example, the Charcoal Brush adds gritty textures, making it perfect for shading.
- Custom Brushes: Fresco allows you to create and save your own brushes. Experiment with different settings like opacity, flow, and texture to develop a unique style.
Live Brushes: Bringing Realism to Digital Art
- Live Brushes are what make Fresco stand out. They replicate the behavior of real-world materials, offering unparalleled realism:
- Watercolor Brushes: These brushes blend colors seamlessly, mimicking the way watercolors bleed and mix on paper. To enhance this effect, adjust the “Wetness” slider in the brush settings.
- Oil Brushes: These brushes create thick, textured strokes that resemble traditional oil painting. Use them for bold, expressive artwork.
- Tips for Using Live Brushes: Start with a light touch to build up color gradually. Layering strokes can create depth and richness, especially with oil brushes.
Vector Brushes: Precision and Scalability
Vector Brushes are perfect for clean, sharp lines and shapes. Unlike pixel brushes, they don’t lose quality when resized. Here’s how to make the most of them:
- Line Art: Use vector brushes for outlining characters or objects. Their precision ensures crisp edges.
- Shapes and Patterns: Combine vector brushes with shape tools to create geometric designs or repeating patterns.
- Combining with Pixel Brushes: For a mixed-media effect, layer vector elements over pixel-based textures. This technique works well for posters and infographics.
Step-by-Step Manu to Creating an Illustration
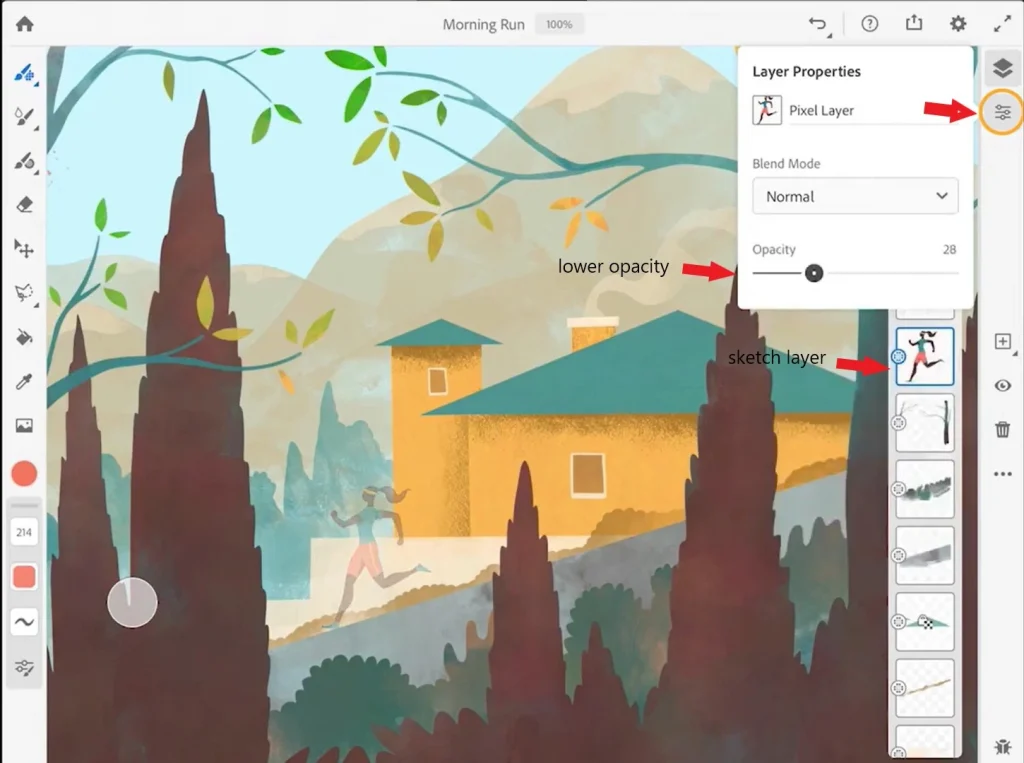
Step 1: Sketching Your Idea
Every great illustration starts with a rough sketch. Begin by selecting a Pencil Brush from the Pixel Brushes panel. Use loose, freehand strokes to map out your composition. Don’t worry about perfection at this stage—focus on capturing the overall idea.
Pro Tip: Lower the opacity of your sketch layer once you’re satisfied with the composition. This allows you to trace over it with cleaner lines later.
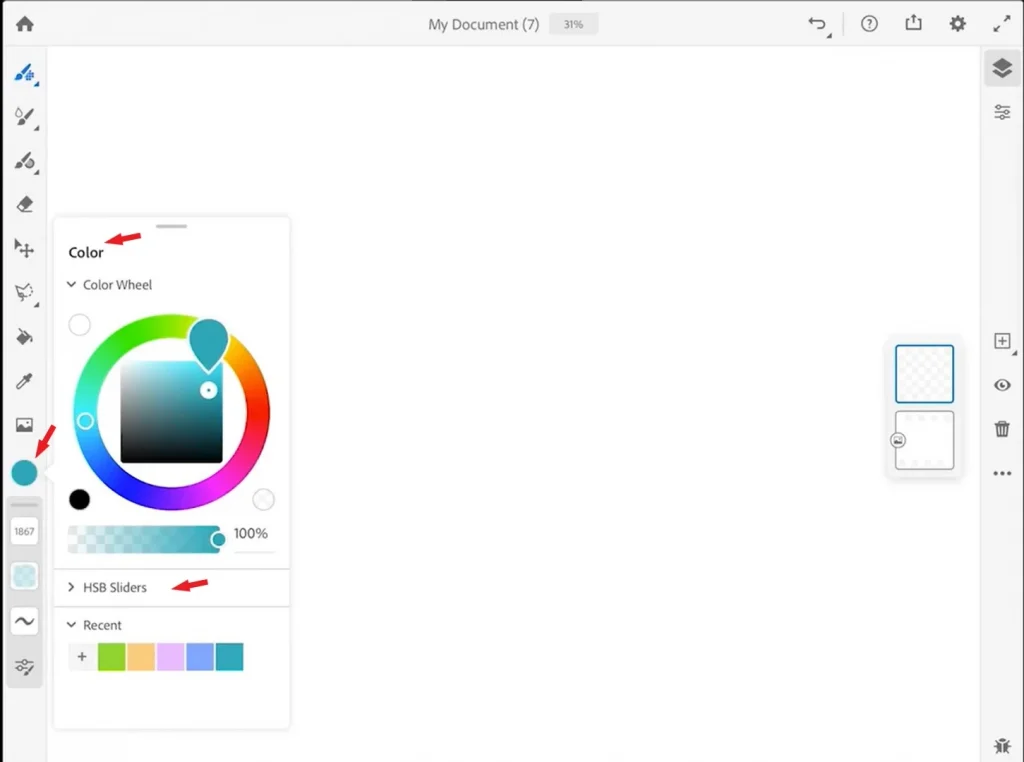
Step 2: Blocking in Colors
Once your sketch is ready, create a new layer for base colors. Use Live Brushes to fill large areas quickly. For example, the Watercolor Brush can help you achieve soft gradients, while the Oil Brush adds depth with textured fills.
Layer Organization: Keep your layers organized by grouping related elements. For instance, place all background elements in one folder and foreground elements in another.
Step 3: Adding Details
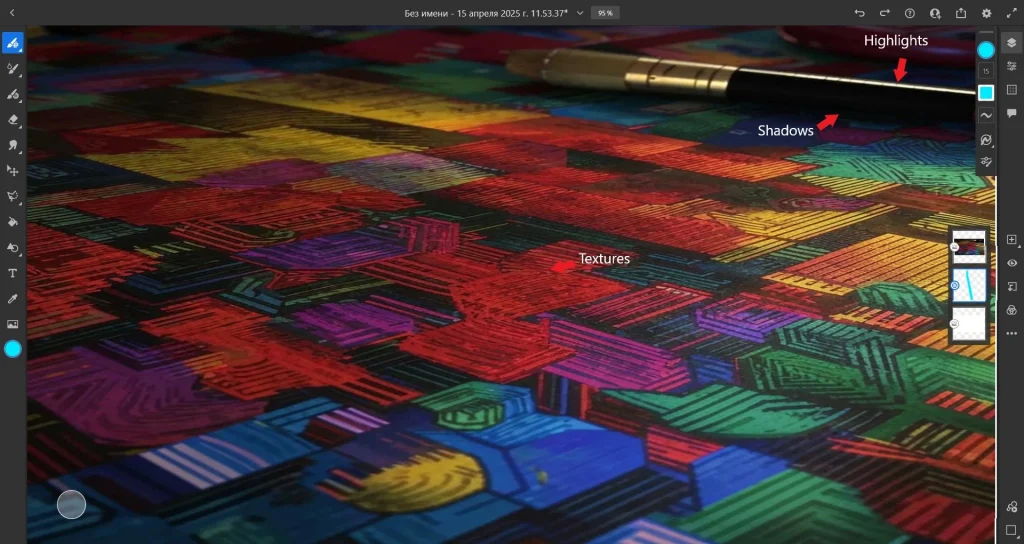
Switch to Pixel Brushes for fine-tuning. Use small, precise strokes to add highlights, shadows, and textures. For example:
- Add subtle highlights to eyes using a white Pixel Brush with low opacity.
- Enhance fabric textures with a Charcoal Brush.
Step 4: Final Touches
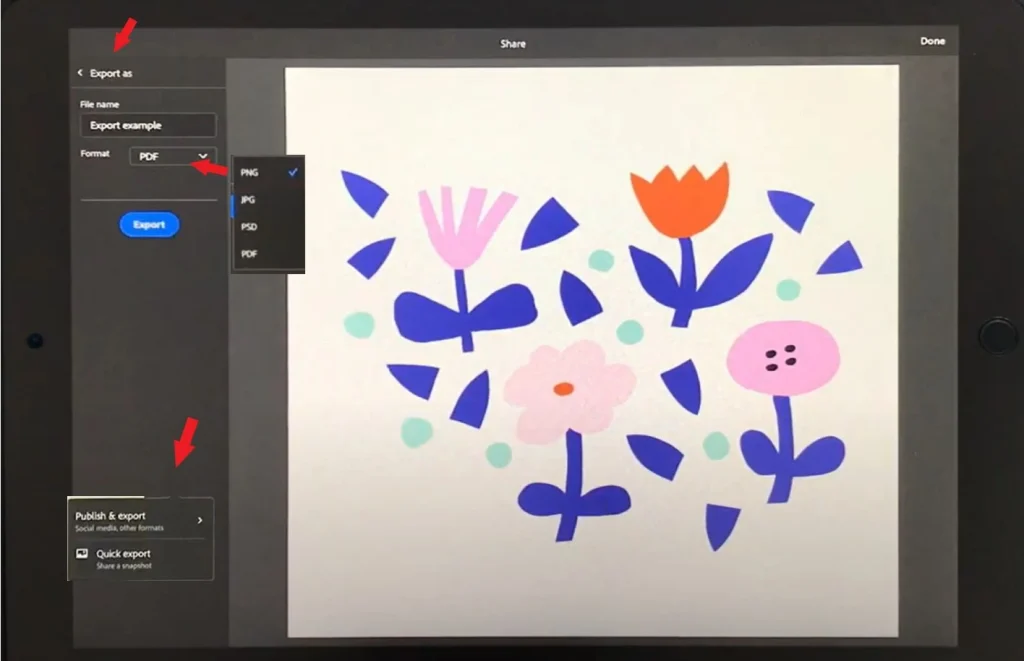
Review your illustration and make any necessary adjustments. Add finishing touches like outlines, highlights, or decorative elements. Export your work in the desired format:
- PSD: For further editing in Photoshop.
- PNG: For high-quality images with transparent backgrounds.
- SVG: For scalable vector graphics.
Advanced Techniques
Blending Modes
Blending modes allow you to experiment with layer interactions. For example:
- Multiply: Darkens underlying layers, making it ideal for shadows.
- Screen: Lightens layers, useful for highlights.
- Overlay: Combines Multiply and Screen effects for enhanced contrast.
Layer Masks
Masks let you hide or reveal parts of a layer non-destructively. Use them to refine edges, create transitions, or apply selective adjustments.
Export Settings
When exporting, consider the intended use of your illustration. For web graphics, PNG is usually sufficient. For print, always choose high-resolution formats like PSD or TIFF.
Real-Life Examples
Portraits
Use Live Brushes to create lifelike skin tones and soft transitions. For example, the Watercolor Brush can simulate blush effects on cheeks.
Landscapes
Combine Pixel Brushes for textures and Live Brushes for skies. Experiment with gradients to create dynamic lighting.
Character Designs
Use Vector Brushes for clean outlines and Pixel Brushes for shading. Add details like clothing patterns or accessories to bring characters to life.
Tips and Recommendations
- Experiment Freely: Don’t be afraid to try new brushes and techniques. Fresco’s undo feature makes experimentation risk-free.
- Use References: Study real-world textures and lighting to improve accuracy.
- Save Custom Brushes: Develop a library of brushes tailored to your style.
Summarized
Adobe Fresco empowers digital artists with limitless creative potential. Through a deep understanding of its brushes, layers, and sophisticated features, you can produce breathtaking illustrations that stand alongside traditional masterpieces. With your Fresco knowledge solidified, it’s time to embark on your artistic journey. Share your work online—we’d love to see what you’ve made!


Leave a Reply