
Why After Effects is Perfect for Animation
Adobe After Effects has become the industry standard for video production and motion design. It allows you to create professional animations, effects, and transitions that can be used in advertisements, films, presentations, and even social media. With basic knowledge, you can bring text, logos, graphics, and other elements to life by adding dynamism and depth.
After Effects is especially popular due to its flexibility. You can work with keyframes, adjust motion parameters, add complex effects, and export projects in high quality. Even if you’re a beginner, mastering the basics will enable you to create appealing content.
What You’ll Learn in This Article
In this article, we’ll walk through the step-by-step process of creating a simple animation. We’ll explore the main tools of the program, learn how to set keyframes, and add effects. You’ll also discover how to prepare your project, animate text and objects, enhance animations with effects, and properly export the final result. At the end of the article, you’ll find useful tips to improve your workflow.
You’ll learn:
- How to set up your workspace for maximum efficiency.
- The differences between Pixel Brushes, Live Brushes, and Vector Brushes—and when to use them.
- A step-by-step guide to creating a complete illustration from scratch.
- Advanced techniques like blending modes, masking, and exporting files for various purposes.
- Real-world examples of projects created in Fresco, from portraits to character designs.
Preparing the Project
How to Get Started in After Effects
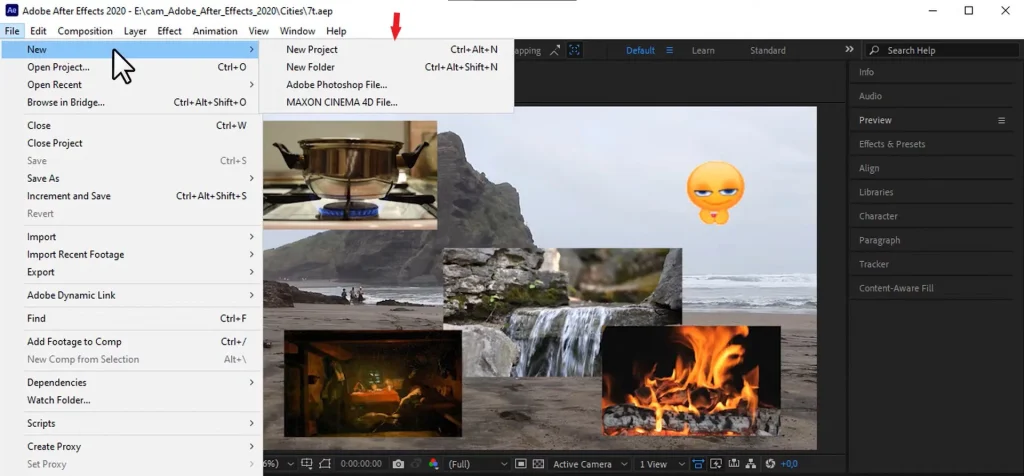
- Creating a New Project:
- Open Adobe After Effects and select File > New > New Project .
- This creates a new workspace where you can add compositions and materials. If you’re working on multiple projects, it’s a good idea to save each project separately to avoid confusion.
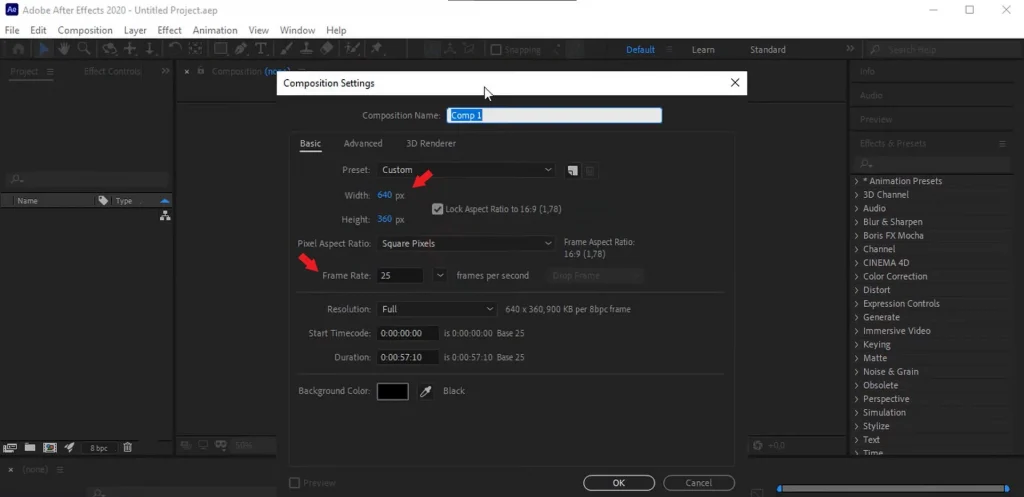
2. Setting Resolution and Frame Rate:
- Go to Composition > New Composition .
- Set the resolution (e.g., 1920×1080 for Full HD) and frame rate (30fps for most projects). Resolution determines the clarity of your video, while frame rate affects the smoothness of the animation. For example, 30fps is suitable for most platforms, while 60fps is used for more dynamic videos.
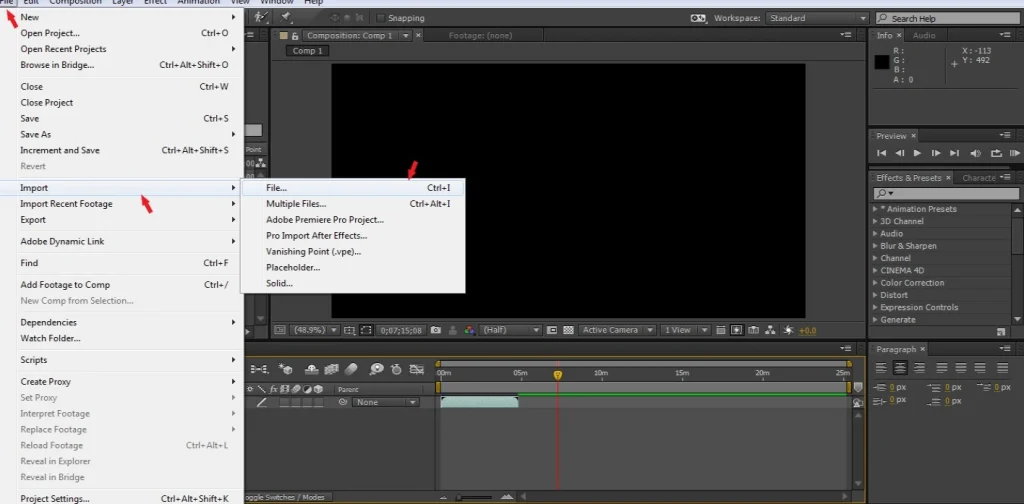
3. Importing Source Materials:
- Right-click in the “Project” panel and select Import > File .
- Add images, videos, or other files you want to use in your animation. For example, if you’re animating a logo, import the logo file in PNG format with a transparent background.
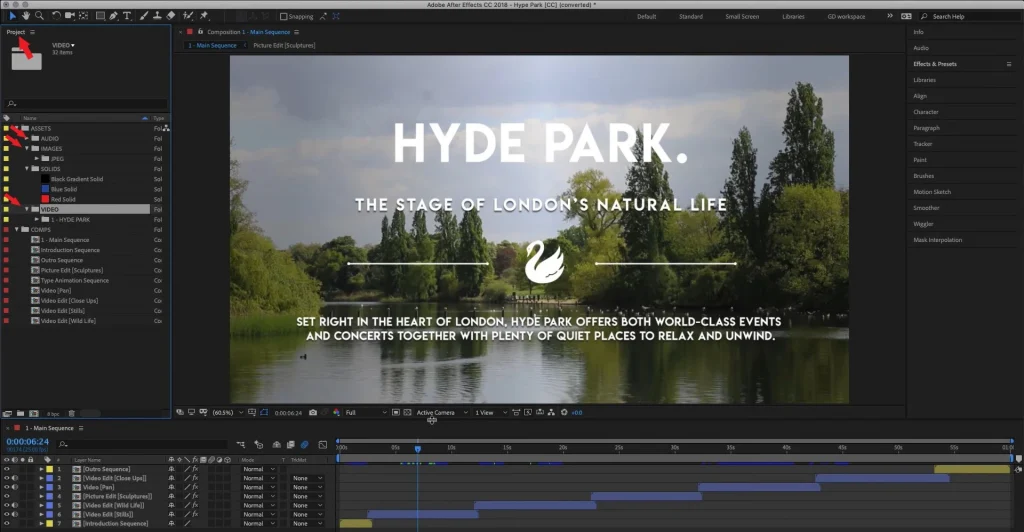
4. Organizing the Project:
- For convenience, create folders in the “Project” panel. For example, divide materials into categories like “Video,” “Images,” and “Audio.” This will help you quickly locate files, especially in large projects.
Key Tools for Animation
Essential Tools for Creating Animations
- Position Tool:
This tool moves objects across the screen. For example, you can make text or a logo move from left to right, top to bottom, or diagonally. To create an animation, set the object’s starting position, add the first keyframe, then move the object to another point and add a second keyframe. After Effects will automatically create smooth movement between them. - Scale Tool:
Use this tool to increase or decrease the size of an object. For example, a logo can start small and grow to full size. To make the animation more natural, use the Ease In/Out parameter, which adds smoothness at the beginning and end of the movement. - Rotation Tool:
This tool rotates objects. For example, you can animate the rotation of a clock hand or a business card. For more complex effects, combine rotation with scaling or opacity changes. - Opacity Tool:
Adjust the transparency of an object to make it appear or disappear smoothly. This is especially useful for creating Fade In/Out effects. For example, text can appear on the screen and then slowly fade away. - Keyframes:
Keyframes are the foundation of any animation. They allow you to set the starting and ending positions of an object, and After Effects will automatically create smooth movement between them. To create keyframes, find the parameter you want to animate (e.g., Position or Scale), click the stopwatch icon next to it, then move the time indicator forward and change the parameter value.
Step-by-Step Creation of a Simple Animation
Step-by-Step Animation Creation
1: Text Animation
- Adding Text:
- Select the Text Tool (T) and type your text in the composition.
- For example, write “Hello, World!” or the name of your project. You can customize the font, size, and color in the top panel.
- Setting Keyframes:
- In the “Timeline” panel, find the Position parameter for the text layer.
- Click the stopwatch icon next to the parameter to create the first keyframe.
- Move the time indicator forward (e.g., 2 seconds) and change the position of the text. After Effects will automatically create a second keyframe.
- Adding Effects:
- For a Fade In/Out effect, find the Opacity parameter.
- Set the value to 0% at the start of the animation and 100% at the end. This will create a smooth appearance of the text.
- Enhancing the Text:
- Add the Glow effect to make the text glow.
- Go to Effect > Stylize > Glow and adjust the glow intensity.
2: Object Animation (Logo or Shape)
- Adding an Object:
- Import a logo or create a shape using the Shape Tool (Q) .
- Animating Movement:
- Use the Position parameter to move the object across the screen.
- For example, make the logo appear from off-screen and stop in the center.
- Animating Scale and Opacity:
- Use the Scale parameter to enlarge the object as it appears.
- Add a Fade In effect using the Opacity parameter.
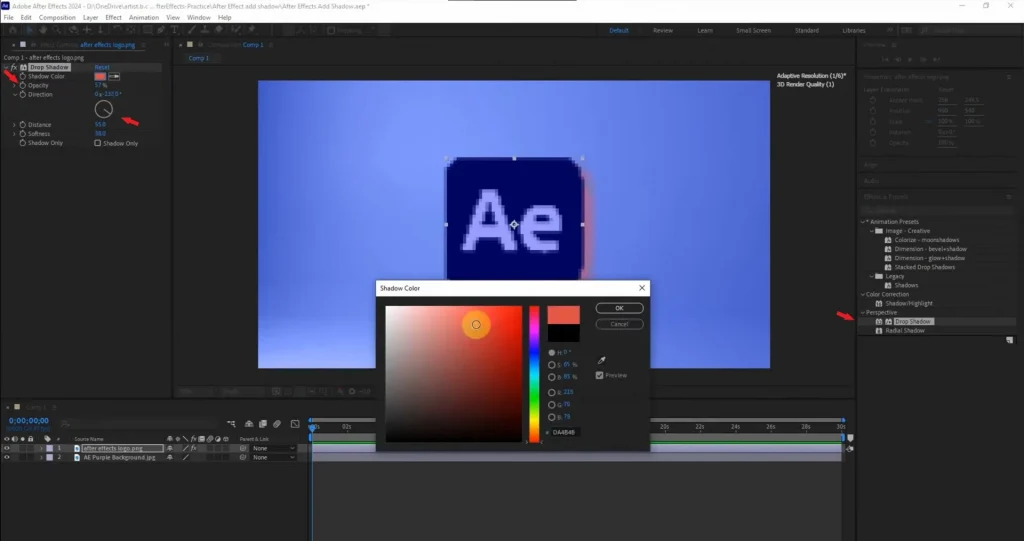
- Adding a Shadow:
- Go to Effect > Perspective > Drop Shadow and adjust the settings. This will make the object appear more three-dimensional.
3: Adding Background Elements
- Creating a Background:
- Add a new layer with a gradient or texture.
- Go to Layer > New > Solid and choose a color or gradient.
- Animating the Background:
- Use the Scale or Position parameter to add subtle movement to the background. For example, the background can gently move up or down, creating a floating space effect.
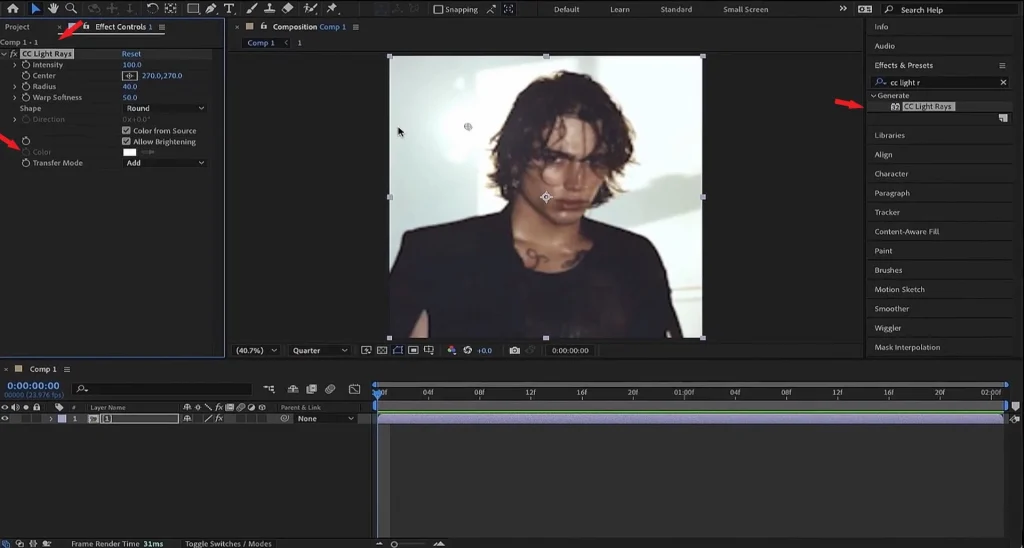
- Adding Effects:
- Use the CC Light Rays effect to create light rays in the background.
- Go to Effect > Generate > CC Light Rays and adjust the parameters.
Adding Effects and Textures
How to Enhance Animation with Effects
- Drop Shadow:
- This effect adds a shadow to an object, making it appear more three-dimensional.
- Go to Effect > Perspective > Drop Shadow and adjust the distance, blur, and opacity of the shadow.
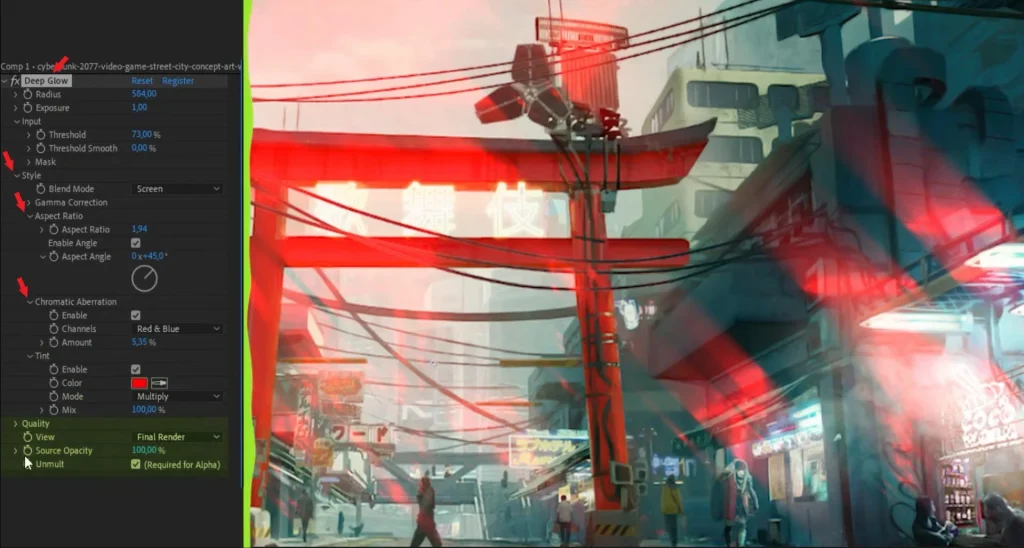
2. Glow:
- The Glow effect creates a glowing outline around an object.
- Go to Effect > Stylize > Glow and adjust the glow intensity. This is especially useful for text or logos.
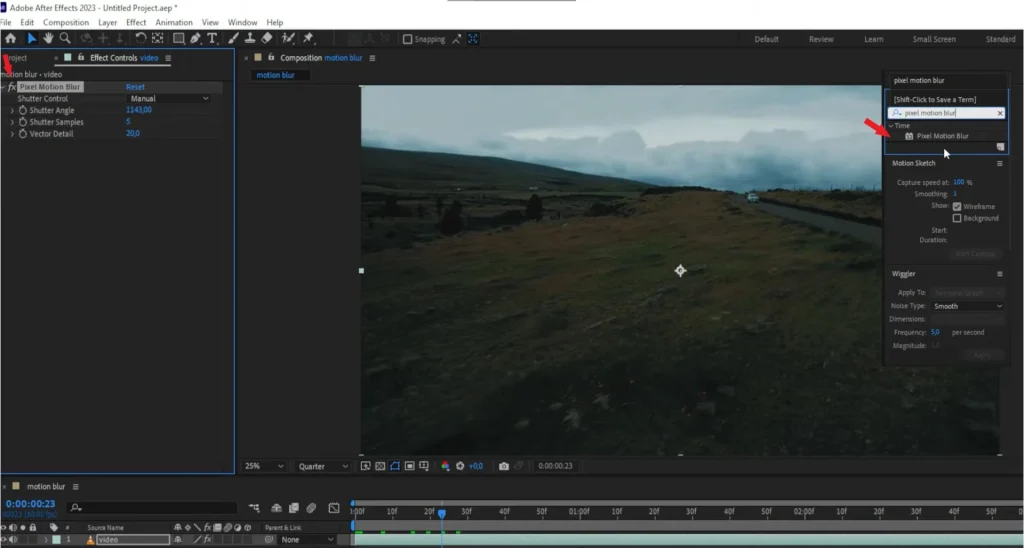
3. Motion Blur:
- Motion Blur adds motion blur, making the animation more realistic.
- Enable the Motion Blur option for the layer in the “Timeline.” For example, if an object is moving quickly, motion blur will make it look more natural.
4. CC Light Rays
- This effect creates light rays that can be used for backgrounds or accents.
- Go to Effect > Generate > CC Light Rays and adjust the color, intensity, and direction of the rays.
Exporting the Finished Animation
How to Export Your Animation
- Go to the Export Menu:
- After completing your animation, select Composition > Add to Render Queue . This adds your composition to the render queue.
- Set Export Parameters:
- In the Render Queue window, find the Output Module section and click on the current settings (usually “Lossless”).
- Choose the file format:
- MP4: Suitable for most platforms like YouTube or Instagram.
- MOV: Ideal for professional use, especially if you plan further editing in other programs.
- Ensure the resolution is set to 1920×1080 (Full HD) for standard projects or 3840×2160 (4K) for high-quality videos.
- Adjust the bitrate:
- For MP4, use H.264 with a bitrate of 8 Mbps for Full HD and 16 Mbps for 4K.
- Optimize for Platforms:
- For YouTube:
- Resolution: 1080p or 4K.
- Format: MP4 with H.264 codec.
- For Instagram Stories:
- Resolution: 1080×1920 (vertical video).
- Format: MP4.
- For TikTok:
- Resolution: 1080×1920.
- Bitrate: 5 Mbps.
- For YouTube:
- Export the File:
- Click the Render button and wait for the process to complete. For large projects, consider using Adobe Media Encoder to automate the export.
Tips and Recommendations
Useful Tips for Creating Animations
- Use Templates to Save Time:
- After Effects offers many ready-made templates that you can adapt to your needs. For example, you can find templates for logo animations, text titles, or background elements. This is especially helpful if you’re short on time or lack experience creating complex effects from scratch.
- Preview Before Final Export:
- Press the Space key to preview the animation in real-time. This helps you spot errors or issues, such as incorrect object placement, unnatural movements, or lack of smoothness.
- Experiment with Effects and Transitions:
- Don’t be afraid to try new effects and combinations. For example, combining Glow and Drop Shadow can make your animation more appealing. You can also add motion blur (Motion Blur ) for more realistic movements.
- Work Carefully with Keyframes:
- The more keyframes you have, the harder it is to control the animation. Try to minimize their number and use smooth transitions (Ease In/Out ). To do this, right-click on a keyframe and select Keyframe Assistant > Easy Ease .
- Use Adobe Media Encoder:
- For large projects, it’s better to use Adobe Media Encoder to free up After Effects for editing. Simply add the composition to the Media Encoder queue and adjust the export settings there.
- Save Backup Copies of Your Project:
- Regularly save your project to avoid data loss. Also, create backups of your source materials to always have access to the original files.
Would Like To Add
Now that you’ve learned the essentials of animating in After Effects, it’s time to put your skills into action. Start small, experiment with different tools, and gradually build up to more complex projects. With practice, you’ll be amazed at what you can create.
We’d love to see your progress! Share your animations on social media or leave a comment below—let us know how this guide helped you take your first steps into motion design.


Leave a Reply