
Why Adobe Rush is a Game-Changer for Quick Editing
Adobe Rush is a powerful yet user-friendly tool designed to make video editing fast and efficient, whether you’re working on a desktop or mobile device. Its intuitive interface and seamless integration with other Adobe products make it an ideal choice for creators who need to produce high-quality content quickly. Whether you’re editing a short clip for Instagram Reels, a YouTube vlog, or a TikTok video, Rush streamlines the process without sacrificing creativity.
What sets Adobe Rush apart is its accessibility. It’s available on multiple platforms, including Windows, macOS, iOS, and Android, allowing you to edit videos on the go. With features like automatic audio adjustments, one-click color correction, and customizable transitions, Rush empowers users to create professional-grade videos in minutes.
What You’ll Learn in This Article
In this guide, we’ll walk you through everything you need to know to master fast video editing in Adobe Rush. From setting up your workspace to exporting your final project
We’ll cover:
- How to import and organize your media files efficiently.
- The essential tools that will speed up your workflow.
- A step-by-step walkthrough of creating a polished video.
- Tips and tricks to enhance your editing process.
By the end of this article, you’ll have the skills to create engaging videos quickly and confidently.
Preparing Your Project
Setting Up Your Workspace for Maximum Efficiency
- Creating a New Project:
- Open Adobe Rush and select New Project from the home screen.
- Choose a name for your project that reflects its purpose (e.g., “Travel Vlog” or “Social Media Promo”). This will help you stay organized, especially if you’re working on multiple projects simultaneously.
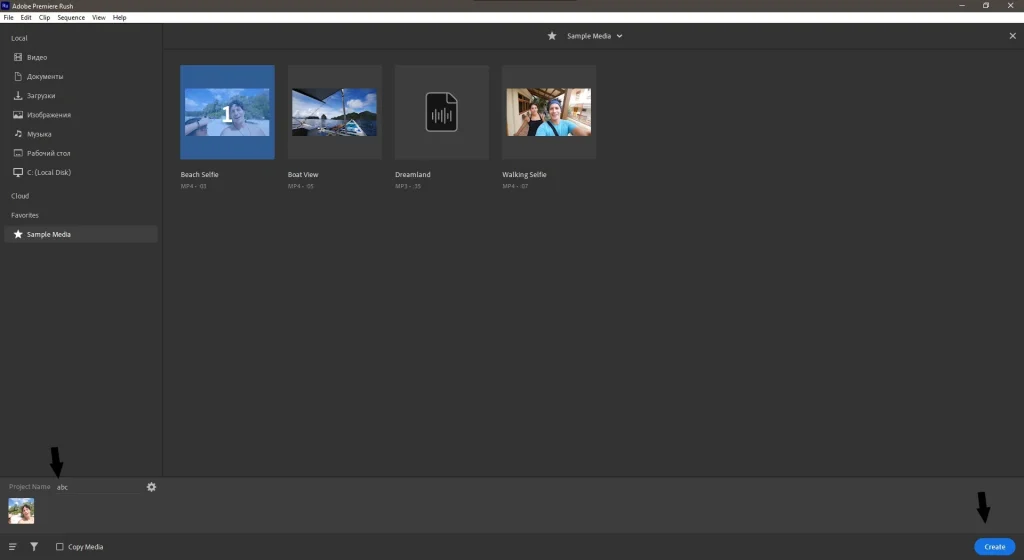
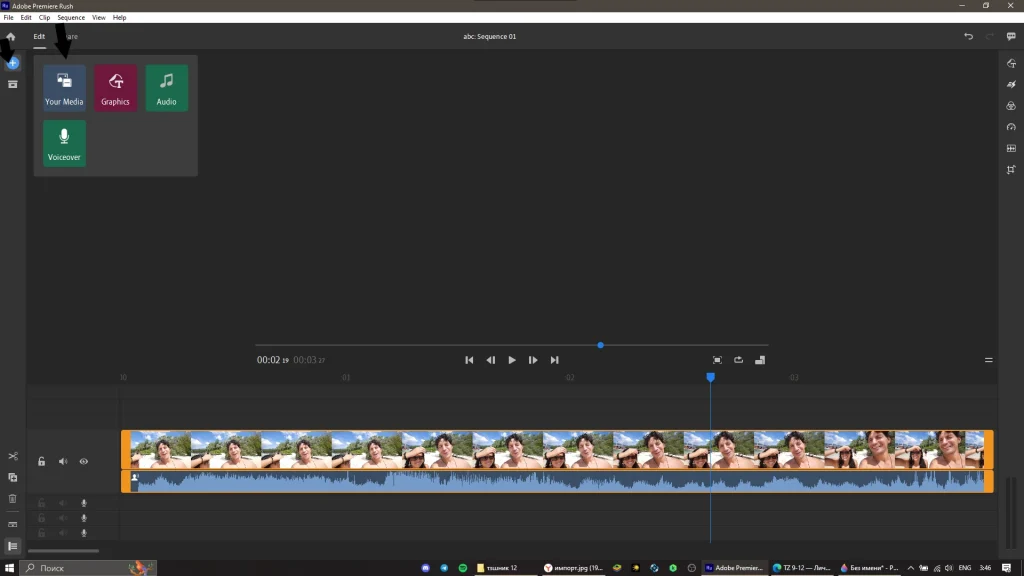
2. Importing Media Files
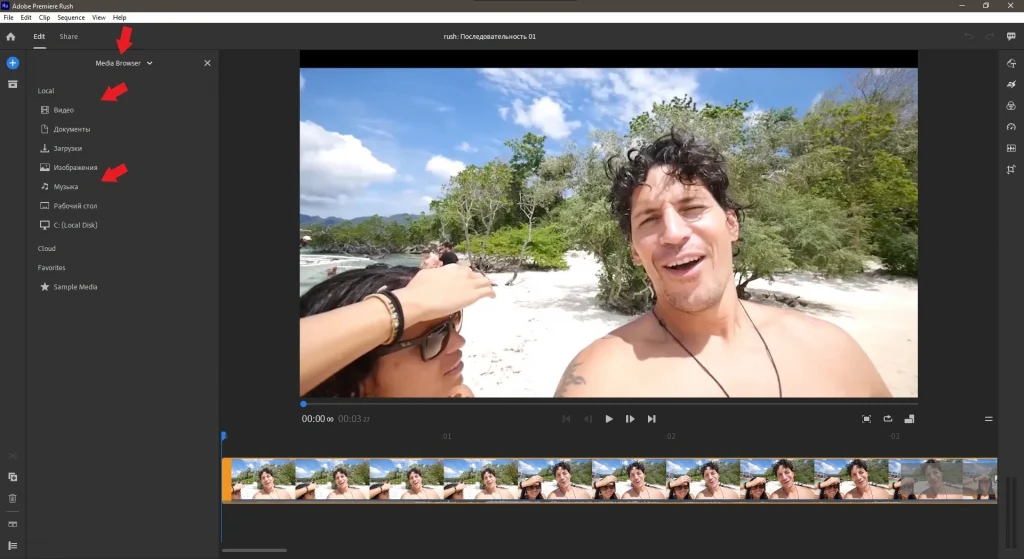
- Click the + icon in the media panel to import your clips, images, or audio files.
- You can pull media directly from your device, Creative Cloud, or even stock libraries integrated into Rush.
- For optimal performance, ensure your files are stored locally on your device before importing them.
3. Organizing Materials for Convenience
- Once your files are imported, take a moment to organize them. Use folders within the media panel to group related assets together. For example, separate your video clips from background music and sound effects.
- Label each file clearly so you can locate it easily during the editing process.
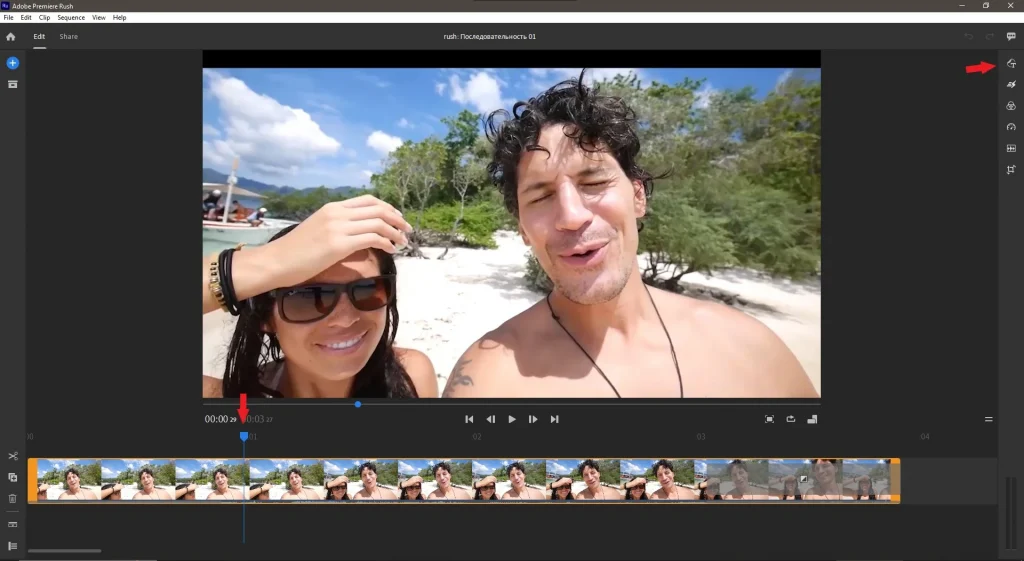
4. Structuring Your Timeline
- Before diving into editing, plan the structure of your video. Decide which clips will appear first, where text overlays should be placed, and how long each scene should last.
- This pre-planning step saves time and ensures your project flows smoothly.
Pro Tip: If you’re working on a large project, consider using Rush’s Auto Save feature to prevent data loss. Additionally, keep your media files organized outside of Rush by storing them in dedicated folders on your device.
Essential Tools for Speedy Editing
Essential Tools to Speed Up Your Editing Process
- Trim Tool:
The Trim Tool is your go-to for quick edits. Use it to cut unnecessary parts of a clip or adjust the length of a segment. Simply drag the edges of the clip in the timeline to trim it.- For precise trimming, zoom into the timeline and use the playhead to identify the exact frame you want to cut.
- Speed Adjustments:
Speed adjustments allow you to create dynamic effects like slow-motion or time-lapse sequences. To change the speed of a clip:- Right-click the clip and select Speed/Duration .
- Adjust the percentage slider to increase or decrease playback speed.
- Use the Maintain Audio Pitch option to avoid distortion when speeding up or slowing down audio-heavy clips.
- Transitions:
Transitions add polish to your video by smoothing out cuts between scenes. Rush offers a variety of built-in transitions, including crossfades, slides, and wipes.- Drag a transition effect onto the edge of a clip to apply it.
- Customize the duration of the transition by dragging its edges in the timeline.
- Audio Ducking:
Audio ducking automatically lowers background music when someone speaks, ensuring clear voiceovers. To enable this feature:- Select the audio track containing your voiceover.
- Go to the Essential Sound Panel and toggle the Ducking option.
- Adjust sensitivity and reduction levels to suit your preferences.
- Color Correction:
Basic color correction can significantly improve the look of your footage. Rush provides simple sliders for adjusting exposure, contrast, highlights, shadows, and saturation.- Use the Auto Color button for instant improvements.
- Fine-tune settings manually to achieve the desired aesthetic.
These tools form the foundation of efficient editing in Rush. By mastering them, you’ll be able to create polished videos in record time.
Step-by-Step Process of Fast Editing
From Raw Clips to Polished Video: A Detailed Walkthrough
1. Cutting and Stitching Clips
- Start with Rough Cuts:
- Drag your main clips onto the timeline in the order they’ll appear.
- Use the Trim Tool to remove unwanted sections and refine the pacing of your video.
- Refine Edits:
- Add small gaps between clips to give breathing room to your story.
- Ensure transitions feel natural and don’t distract from the content.
2. Adding Text and Titles
- Inserting Titles:
- Click the Text icon and choose a preset title style.
- Customize the font, size, color, and position to match your branding or theme.
- Animating Text:
- Apply animations like fade-ins or slide-outs to make text more engaging.
- Sync text appearance with key moments in your video for maximum impact.
3. Applying Color Correction
- Basic Adjustments:
- Start with Auto Color to fix exposure and white balance issues.
- Tweak individual sliders to enhance colors further.
- Creative Looks:
- Experiment with LUTs (Look-Up Tables) to give your video a cinematic or vintage vibe.
- Save custom color presets for consistent styling across multiple projects.
4. Setting Up Audio and Background Music
- Balancing Tracks:
- Lower background music volume during dialogue-heavy sections.
- Boost quieter sounds to maintain clarity throughout the video.
- Adding Sound Effects:
- Incorporate subtle sound effects (e.g., footsteps, keyboard clicks) to enrich the viewing experience.
5. Using Effects and Overlays
- Enhance Visuals with Effects:
- Add filters to unify the visual style of your clips.
- Use overlays like lens flares or light leaks sparingly for dramatic emphasis.
- Layering Graphics:
- Overlay logos, icons, or lower-thirds graphics to provide context or branding.
This detailed walkthrough demonstrates how to combine Rush’s tools effectively to create a cohesive and visually appealing video.
Enhancing Your Video with Minimal Effort
Enhancing Your Video with Minimal Effort
- Transitions:
While basic cuts work well for fast-paced videos, adding subtle transitions can elevate your production value. Avoid overusing flashy effects; instead, stick to clean, professional options like dissolves or fades. - Overlays:
Overlays are perfect for adding depth to your visuals. For example:- Use animated lower thirds to introduce speakers or topics.
- Add gradient overlays to soften harsh lighting in poorly lit clips.
- Sound Effects:
Sound design plays a crucial role in engaging viewers. Here are some tips:- Match sound effects to on-screen actions for realism.
- Layer ambient noise (e.g., crowd chatter, rain) to immerse viewers in the environment.
- Choosing the Right Effects:
Tailor your effects to the type of content you’re creating. For example, playful transitions suit lifestyle vlogs, while minimalist designs complement corporate videos.
Exporting Your Project
Exporting Your Project for Social Media and Beyond
- Choosing the Right Format:
- For social media, export as MP4 with H.264 encoding for compatibility.
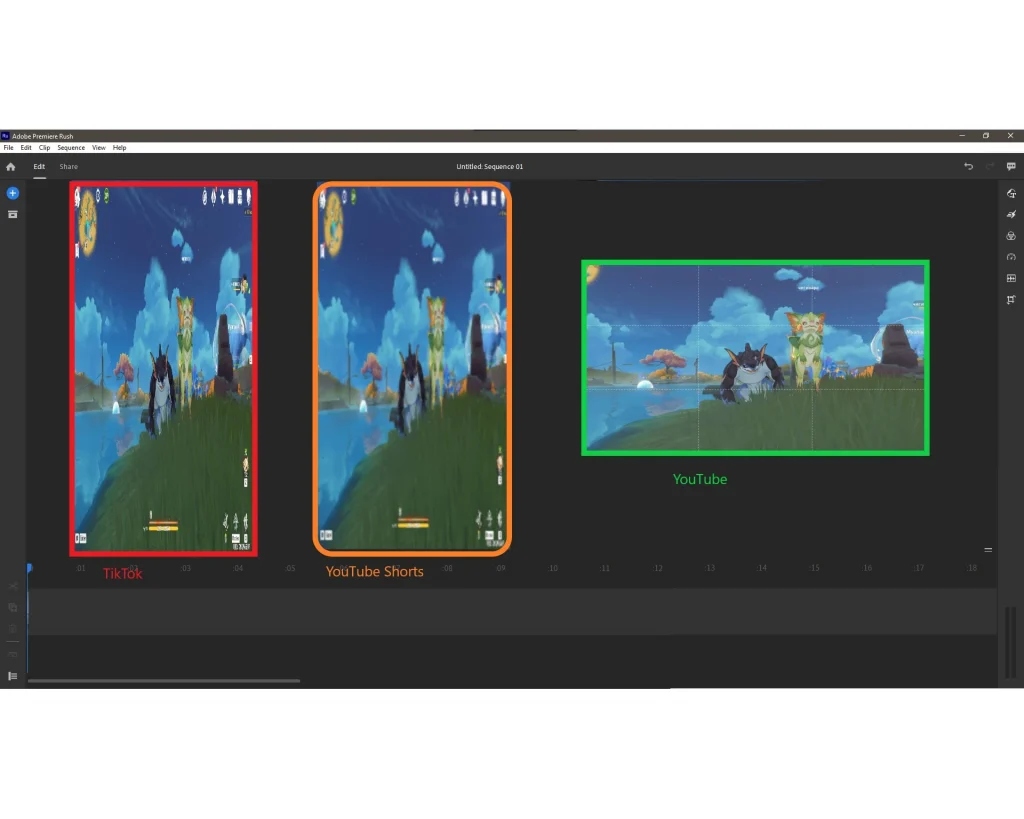
- Set the resolution based on platform requirements:
- Instagram/TikTok: 1080×1920 (vertical).
- YouTube: 1920×1080 (horizontal).
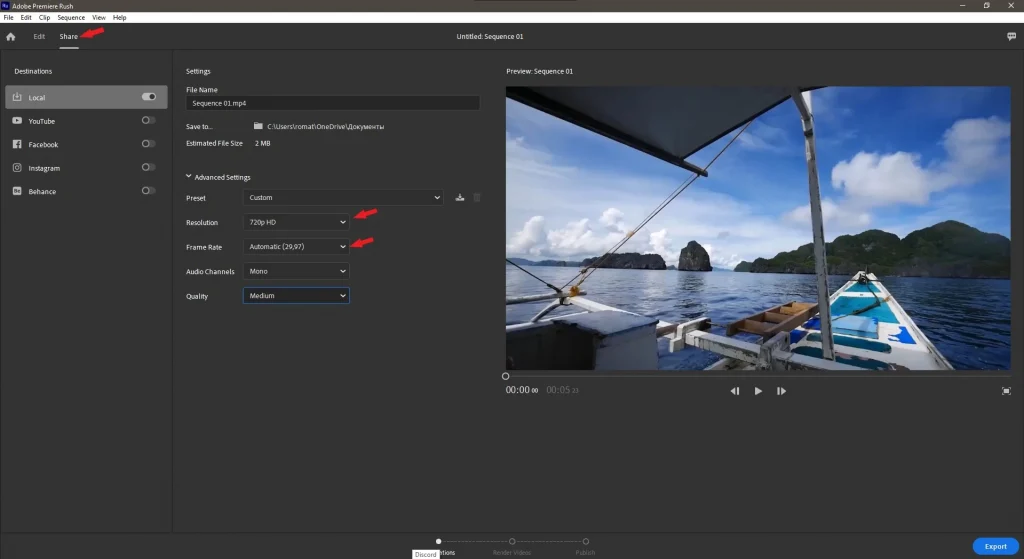
2. Optimizing for Mobile Devices:
- Reduce file size by lowering the bitrate without compromising quality.
- Enable hardware acceleration to speed up rendering times.
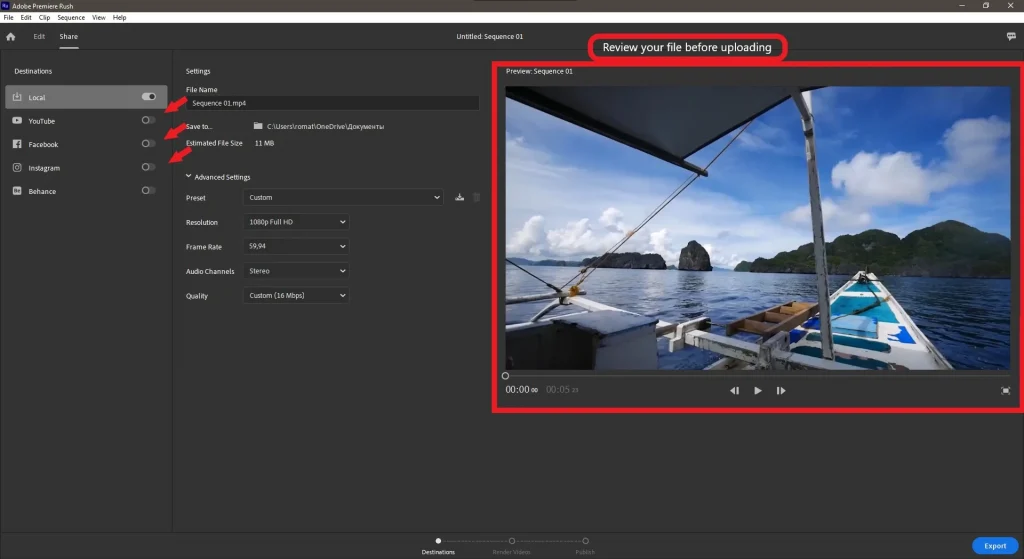
3. Final Checks:
- Preview your video post-export to ensure all elements render correctly.
- Make adjustments if necessary before sharing.
Pro Tips to Streamline Your Workflow
Pro Tips to Streamline Your Rush Workflow
- Use Templates:
- Save frequently used layouts as templates to save time.
- Automate Repetitive Tasks:
- Leverage Rush’s automation features, such as auto-synced audio and batch exports.
- Work Smarter, Not Harder:
- Edit on a powerful device if possible to reduce lag.
- Keep your workspace clutter-free for better focus.
- Stay Organized:
- Regularly back up your projects to avoid losing progress.
Ready to Edit Like a Pro?
Now that you’ve mastered the essentials of Adobe Rush, it’s time to put your skills into practice. Create your first video today and share it with us—we’d love to see what you’ve made!


Leave a Reply