
Why Organizing Your Image Library is Crucial
Managing a growing collection of images can quickly become overwhelming without a proper system. Disorganized files lead to wasted time searching for specific photos, missed deadlines, and frustration. Adobe Bridge offers a powerful solution for photographers, designers, and content creators who need an efficient way to organize their media libraries.
Bridge stands out with its intuitive interface and robust features like collections, metadata tagging, and integration with Adobe’s ecosystem. Whether you’re working on a single project or managing thousands of files, Bridge helps streamline your workflow and keep everything in order.
What You’ll Learn in This Article
In this article, we’ll guide you through organizing your image library in Adobe Bridge. You’ll learn:
- How to set up your workspace for maximum efficiency.
- Key features for managing and categorizing files.
- A step-by-step process for organizing your library.
- How Adobe Bridge compares to other tools for file management.
Setting Up Your Workspace in Bridge
Setting Up Your Workspace for Maximum Efficiency
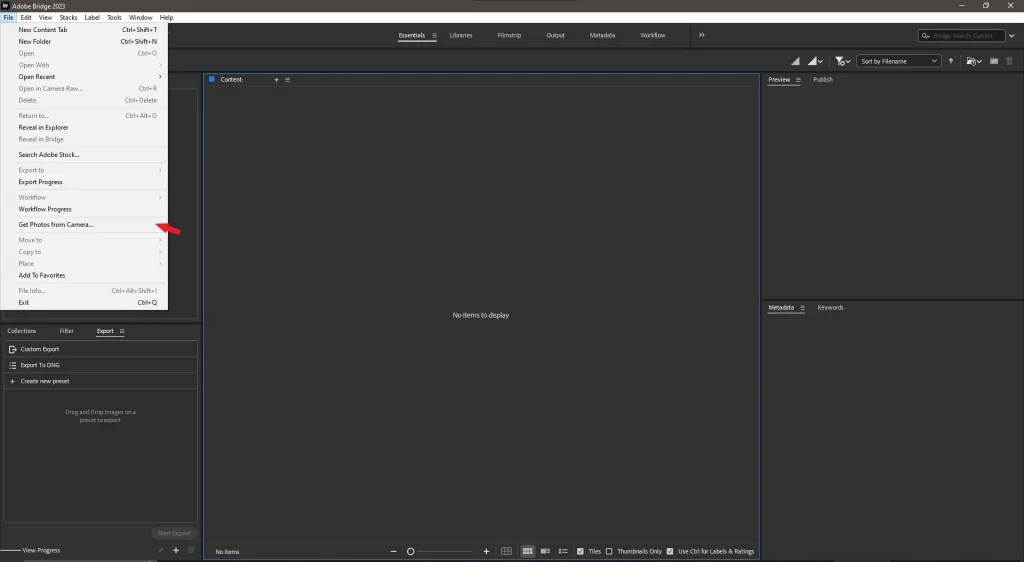
1. Importing Images into Bridge
- Open Adobe Bridge and navigate to the folder containing your images.
- Use the File > Get Photos from Camera option if importing directly from a camera or memory card.
- Alternatively, drag and drop files into Bridge from your desktop or external drives.
2. Configuring Panels and Interface
- Customize the layout by dragging panels to suit your preferences.
- Enable essential panels like Collections , Keywords , and Metadata for easy access.
- Resize panels to focus on the most important tools for your workflow. For example, expand the Metadata panel if you frequently edit tags.
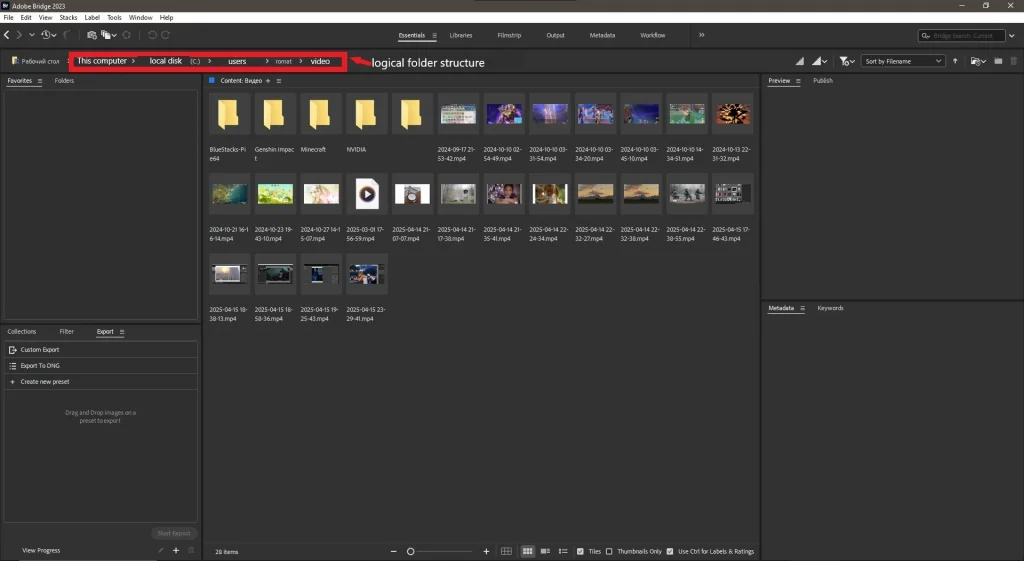
3. Organizing Files with Folders and Labels:
Create a logical folder structure based on projects, dates, or themes. For instance:
- Main Folder: “2023 Projects”
- Subfolders: “Client A,” “Personal Work,” “Stock Photography”
Use color labels to tag files for quick identification. For example:
- Red: Urgent files requiring immediate attention.
- Green: Completed or approved files.
- Yellow: Files awaiting review.
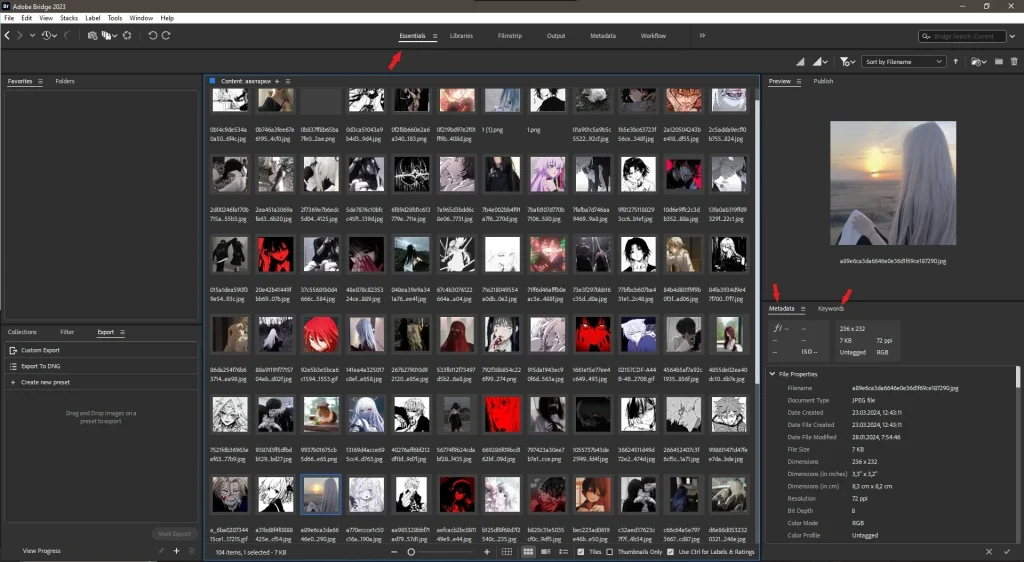
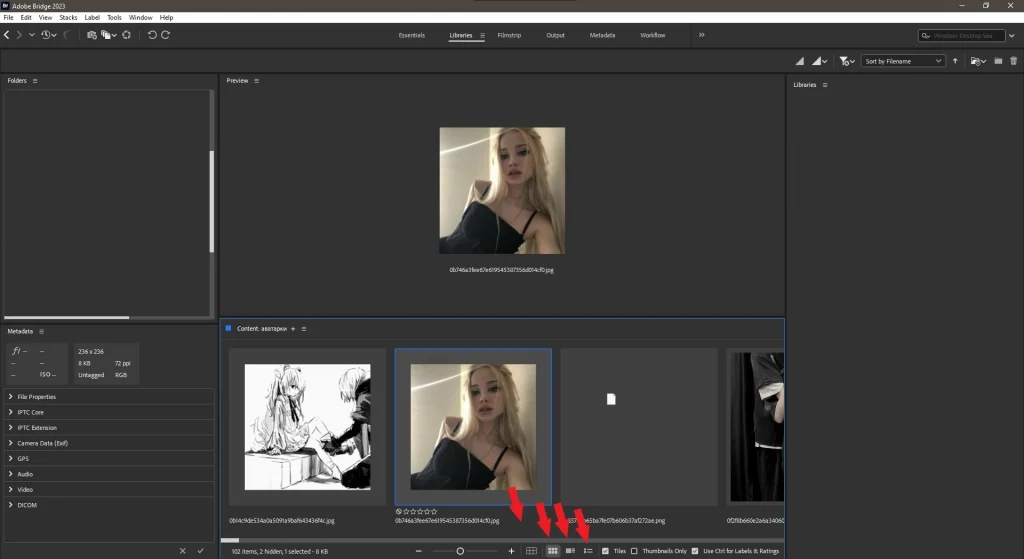
4. Previewing Files:
- Use the Preview Panel to view images in detail without opening them in an external editor.
- Adjust thumbnail sizes for better visibility using the slider at the bottom of the interface.
- Enable Filmstrip View to scroll through multiple images quickly.
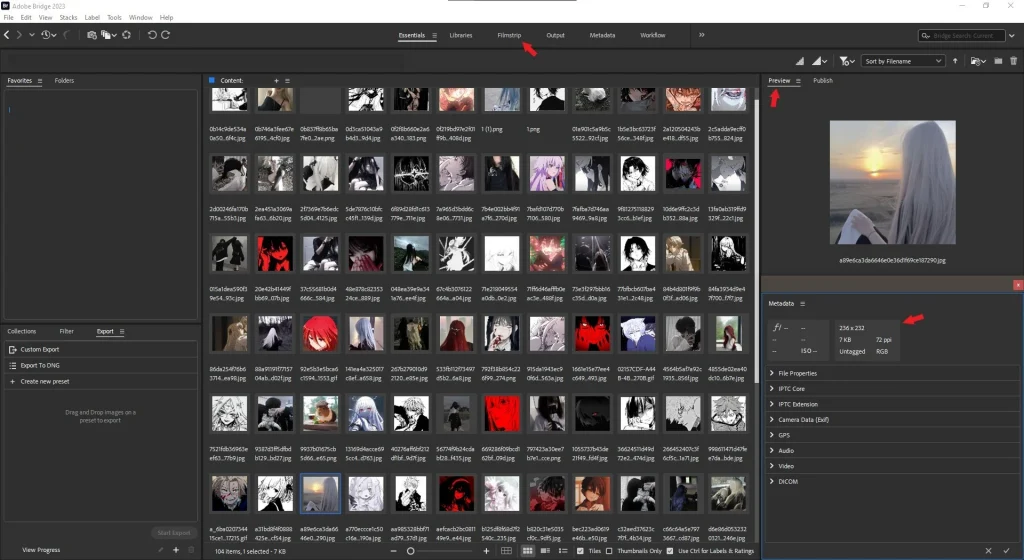
5. Customizing Views:
- Switch between Grid View , List View , and Filmstrip View depending on your needs.
- Use Loupe View to zoom in on specific details of an image.
- Sort files by name, date, size, or rating for easier navigation.
Key Features for Managing Your Image Library
Key Features for Managing Your Image Library
- Collections:
Collections allow you to group files virtually without moving them from their original locations.- Create a new collection by clicking the New Collection button and naming it (e.g., “Client Project”).
- Drag and drop files into the collection for easy access later.
- Use sub-collections to further organize files. For example:
- Main Collection: “Wedding Shoot”
- Subcollections: “Ceremony,” “Reception,” “Portraits”
- Keywords:
Keywords are tags that help categorize and search for files.- Add keywords by selecting an image, opening the Keywords Panel , and typing relevant terms (e.g., “landscape,” “portrait,” “wedding”).
- Save frequently used keywords as presets to save time. For example, create a preset for “Nature Photography” with tags like “forest,” “mountain,” and “sunset.”
- Use hierarchical keywords to create structured categories. For example:
- Parent Keyword: “Travel”
- Child Keywords: “Europe,” “Asia,” “North America”
- Metadata:
Metadata provides detailed information about each file, such as creation date, camera settings, and descriptions.- Edit metadata in the Metadata Panel to include captions, copyright info, or custom fields.
- Use batch editing to apply metadata changes to multiple files simultaneously. For example, add a copyright notice to all images in a folder.
- Export metadata templates for consistent tagging across projects.
- Rating System:
The rating system lets you prioritize important files.- Assign stars (1–5) or flags to rate images based on quality or relevance.
- For example:
- 5 Stars: Best shots suitable for client delivery.
- 1 Star: Rejects or low-quality images.
- Filter files by ratings to focus only on high-priority items.
- Batch Renaming:
Batch renaming allows you to standardize file names for consistency.- Select multiple files and choose Tools > Batch Rename .
- Use placeholders like date, sequence numbers, or custom text. For example:
- Original Name: “IMG_1234.jpg”
- New Name: “Wedding_Portrait_001.jpg”
- Filters and Smart Searches:
Use filters to narrow down your search results.- Filter by file type, rating, label, or keyword.
- Create smart searches to automatically find files matching specific criteria. For example:
- Search for all 5-star images tagged with “landscape.”
- Find all files edited within the last week.
From Chaos to Order: Step-by-Step Organization
From Chaos to Order: Step-by-Step Organization
1: Creating Collections for Different Projects
- Grouping Files Virtually:
- Open the folder containing your images and select all files related to a specific project.
- Click New Collection and name it after the project (e.g., “Spring Campaign”).
- Drag the selected files into the collection.
- Benefits of Collections:
- Collections keep files organized without duplicating them, saving disk space.
- You can create sub-collections within main collections for further organization.
2: Adding Keywords and Metadata
- Tagging Files with Keywords:
- Select multiple images and open the Keywords Panel .
- Add descriptive tags like “nature,” “cityscape,” or “product shot.”
- Editing Metadata:
- Open the Metadata Panel and fill in fields like title, description, and copyright.
- Use batch editing to apply the same metadata to groups of similar files.
3: Using the Rating System for Filtering
- Assigning Ratings:
- Review your images and assign star ratings or flags to indicate importance.
- For example, give 5 stars to the best shots and 1 star to rejects.
- Filtering by Ratings:
- Use the filter bar to display only files with specific ratings.
- This helps you focus on high-quality images during post-processing or client presentations.
4: Batch Renaming for Consistency
- Standardizing File Names:
- Select all files in a folder and choose Tools > Batch Rename .
- Use a consistent naming convention like “ProjectName_Date_SequenceNumber.”
- Benefits of Batch Renaming:
- Makes it easier to locate files later.
- Ensures professionalism when sharing files with clients.
5: Smart Searches for Efficiency
- Creating Smart Searches:
- Go to Edit > Find and specify criteria like file type, rating, or keyword.
- Save the search as a smart collection for future use.
- Using Smart Searches:
- Automatically find all files tagged with “wedding” and rated 4 stars or higher.
- Quickly locate files edited within a specific date range.
Adobe Bridge vs. Other Tools: Which One is Right for You?
To help you choose the best tool for organizing your image library, here’s a detailed comparison of Adobe Bridge with alternatives like Lightroom, Capture One, and File Explorer.
| FEATURE | ADOBE BRIDGE | LIGHTROOM | CAPTURE ONE | FILE EXPLORER |
|---|---|---|---|---|
| File Management | Advanced | Integrated catalog | Limited | Basic |
| Metadata Editing | Yes | Yes | Yes | No |
| Collections | Virtual collections | Smart collections | Albums | Folders only |
| Integration with Software | Photoshop, InDesign, etc. | Lightroom Ecosystem | Capture One Ecosystem | None |
| Ease of Use | Moderate | Beginner-friendly | Professional-focused | Simple but limited |
Analysis of Tools:
- Adobe Bridge:
- Best for users already in the Adobe ecosystem who need advanced file management without heavy editing capabilities.
- Pros: Free, integrates seamlessly with Adobe apps, supports batch operations.
- Cons: Requires manual organization, lacks built-in editing tools.
- Lightroom:
- Ideal for photographers who want integrated editing and organization tools.
- Pros: Powerful cataloging, non-destructive editing, cloud sync.
- Cons: Subscription-based pricing, steep learning curve for beginners.
- Capture One:
- Suitable for professionals focused on tethered shooting and RAW processing.
- Pros: Excellent RAW handling, customizable interface, strong tethering support.
- Cons: Expensive, less intuitive for casual users.
- File Explorer:
- Basic and straightforward but lacks advanced features for large-scale organization.
- Pros: Free, no learning curve, works with any file type.
- Cons: Limited functionality, no metadata editing, no collections.
Additional Insights:
- For Beginners: Lightroom or File Explorer may be more accessible due to their simplicity.
- For Professionals: Adobe Bridge or Capture One offer more advanced features tailored to specific workflows.
- For Teams: Lightroom’s cloud integration makes it ideal for collaborative projects.
Exporting and Sharing Your Organized Files
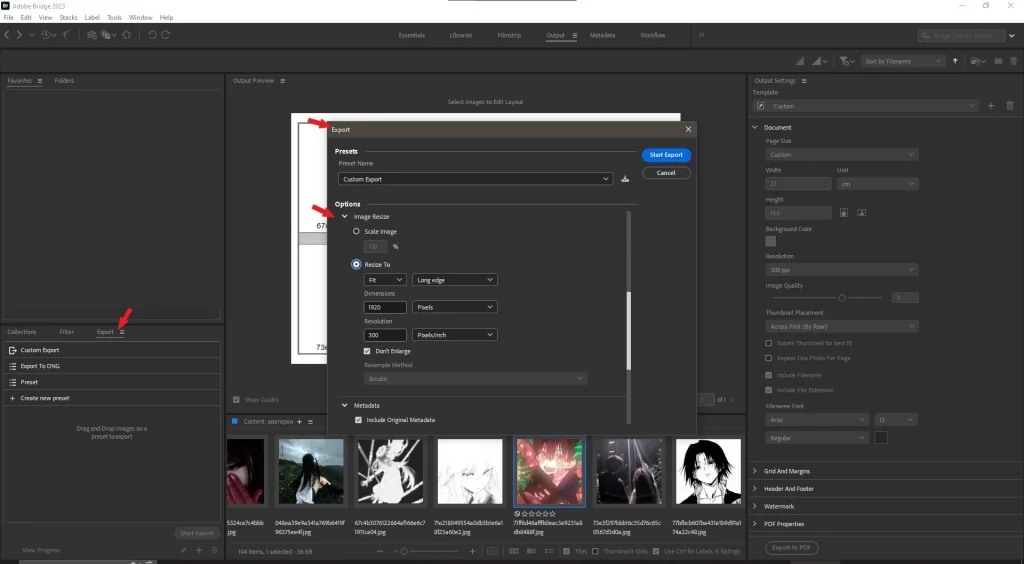
1. Exporting Files from Bridge:
- Select the files you want to export and right-click to choose Export > Export to Hard Drive .
- Set the destination folder, file format, and resolution before exporting.
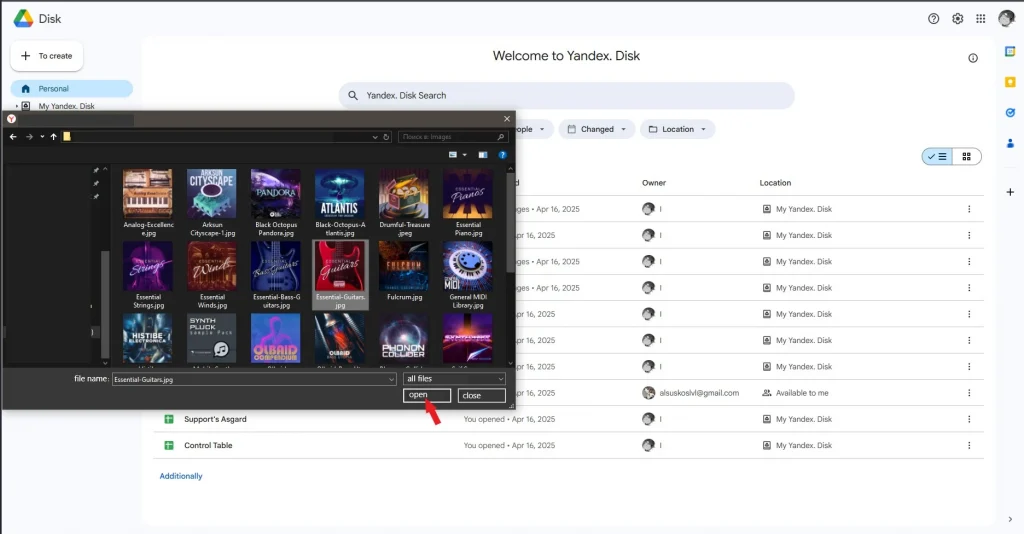
2. Using Cloud Storage:
- Upload your organized files to cloud services like Dropbox or Google Drive for backup and sharing.
- Share links with clients or collaborators directly from the cloud platform.
3. Printing and Presentation
- Use Bridge’s integration with Photoshop and InDesign to prepare files for printing or digital presentations.

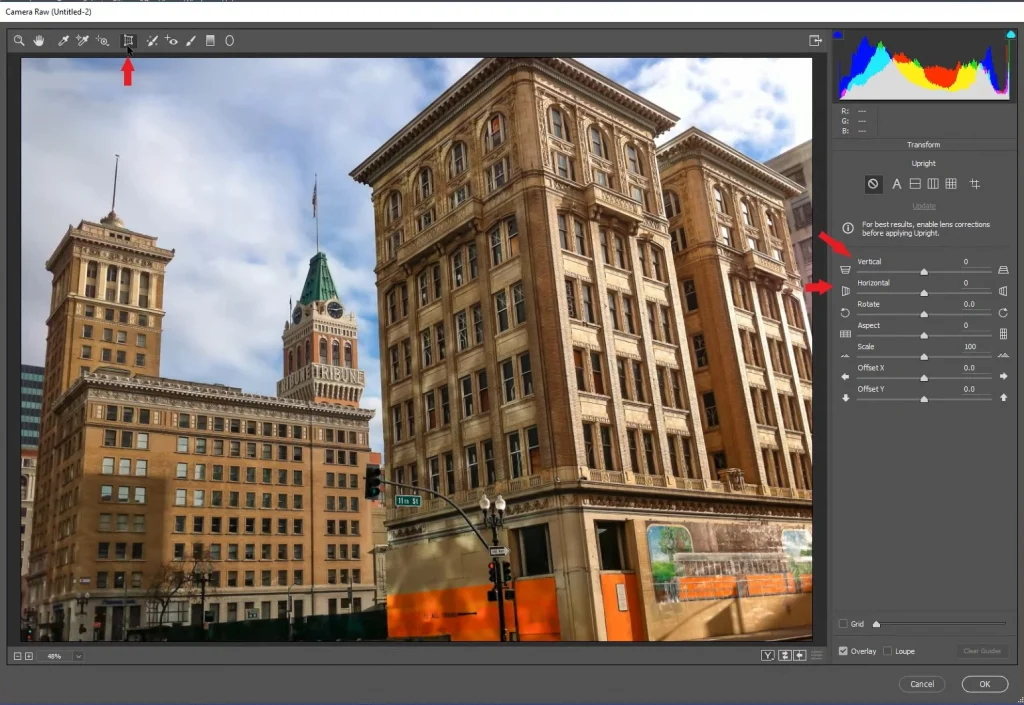
4. Correcting Perspective
- If the image has distortions, use the Transform tool.
- Adjust the Vertical and Horizontal sliders to straighten lines.
Pro Tips for Better File Management in Bridge
Pro Tips for Better File Management in Bridge
- Use Keyboard Shortcuts:
- Mastering keyboard shortcuts can significantly speed up your workflow. For example:
- Ctrl+R (Cmd+R on Mac): Assign ratings to images.
- Ctrl+K (Cmd+K on Mac): Add keywords.
- Ctrl+M (Cmd+M on Mac): Open the metadata panel.
- Create custom shortcuts for frequently used actions by going to Edit > Preferences > General and assigning hotkeys.
- Mastering keyboard shortcuts can significantly speed up your workflow. For example:
- Create Metadata Templates:
- Save time by creating reusable metadata templates. For example:
- Template Name: “Client A”
- Fields: Copyright notice, client name, project description.
- Apply these templates to batches of files using the Tools > Append Metadata option.
- Save time by creating reusable metadata templates. For example:
- Regular Maintenance:
- Periodically review your library to delete unnecessary files and free up space.
- Use the Find Duplicates feature to identify and remove redundant copies of images.
- Batch Processing for Efficiency:
- Use batch processing to apply changes to multiple files at once. For example:
- Rename 100 files with a single click.
- Add the same keyword or metadata to an entire folder.
- To batch process, select multiple files, right-click, and choose Batch Rename or Append Metadata .
- Use batch processing to apply changes to multiple files at once. For example:
- Backup Your Library:
- Regularly back up your files to an external drive or cloud storage to prevent data loss.
- Use Adobe Creative Cloud or third-party services like Dropbox or Google Drive for automatic backups.
- Leverage Smart Collections:
- Smart collections automatically group files based on criteria like keywords, ratings, or file type.
- For example, create a smart collection for all 5-star images tagged with “landscape.”
- Organize by Projects or Themes:
- Group files into folders based on projects, events, or themes. For example:
- Folder Name: “2023 Wedding Shoots”
- Subfolders: “Ceremony,” “Reception,” “Portraits.”
- Use descriptive names to make it easier to locate files later.
- Group files into folders based on projects, events, or themes. For example:
- Use Consistent Naming Conventions:
- Standardize file names to avoid confusion. For example:
- Format: “ProjectName_Date_SequenceNumber”
- Example: “Wedding_Portrait_20231001_001.jpg”
- Standardize file names to avoid confusion. For example:
- Filter Files for Quick Access:
- Use filters to narrow down your search results. For example:
- Filter by file type (JPEG, RAW, PNG).
- Filter by rating (e.g., show only 4-star and above images).
- Use filters to narrow down your search results. For example:
- Integrate with Other Adobe Tools:
- Bridge integrates seamlessly with Photoshop, InDesign, and Illustrator.
- Drag and drop files from Bridge into Photoshop for editing or InDesign for layout design.
Ready to Organize Your Image Library?
Now that you’ve learned how to organize your files in Adobe Bridge, it’s time to put these tips into practice. Start organizing your image library today and experience the benefits of a streamlined workflow.
Share your experience with organizing your image library—we’d love to hear your thoughts!


Leave a Reply