Why Use Adobe Camera Raw for RAW File Processing?
Adobe Camera Raw is an indispensable tool for photographers and designers who want to unlock the full potential of their RAW files. Unlike JPEGs, RAW files retain all the data captured by your camera’s sensor, giving you unparalleled control over exposure, color, and detail. Camera Raw simplifies the process of editing these files with its intuitive interface and powerful tools.
From adjusting white balance to fine-tuning colors and details, Camera Raw offers everything you need to transform a raw image into a polished masterpiece. Whether you’re a beginner or a seasoned professional, mastering Camera Raw will elevate your photo editing skills to the next level.
One of the key advantages of using Camera Raw is its non-destructive editing capabilities. This means that all adjustments are applied as layers, preserving the original file for future edits. Additionally, Camera Raw integrates seamlessly with other Adobe products like Photoshop, making it a versatile choice for creative workflows.
What You’ll Learn in This Article
In this article, we’ll guide you through the essentials of using Adobe Camera Raw. You’ll learn:
- Key tools for working with RAW files, including advanced features like noise reduction and sharpening.
- A step-by-step workflow for processing RAW images, from basic corrections to artistic effects.
- Advanced techniques for achieving professional results, such as local adjustments and split toning.
- Tips for exporting your edited images for web, print, and social media.
By the end of this article, you’ll have a comprehensive understanding of how to use Camera Raw to enhance your photos and streamline your editing process.
Key Tools for Working with RAW Files
1. Basic Panel:
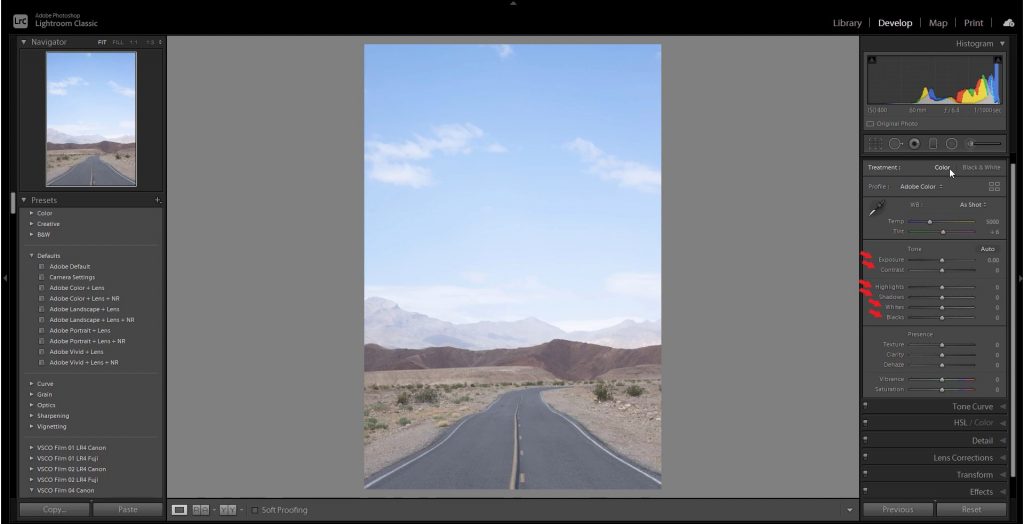
The Basic Panel is your starting point for RAW file processing. It allows you to adjust essential parameters like exposure, contrast, highlights, shadows, whites, and blacks.
- Exposure: Brighten or darken the overall image. For example, if your photo is underexposed, increase the exposure slider gradually to avoid losing details in highlights.
- Contrast: Add depth by increasing the difference between light and dark areas. However, be cautious not to overdo it, as excessive contrast can make the image look unnatural.
- Highlights/Shadows: Recover details in overexposed or underexposed areas. For instance, reduce highlights to bring back details in the sky or bright reflections. Similarly, increase shadows to reveal hidden elements in darker regions.
- Whites/Blacks: Fine-tune the brightest and darkest points in your image. Adjusting these sliders helps establish a balanced tonal range.
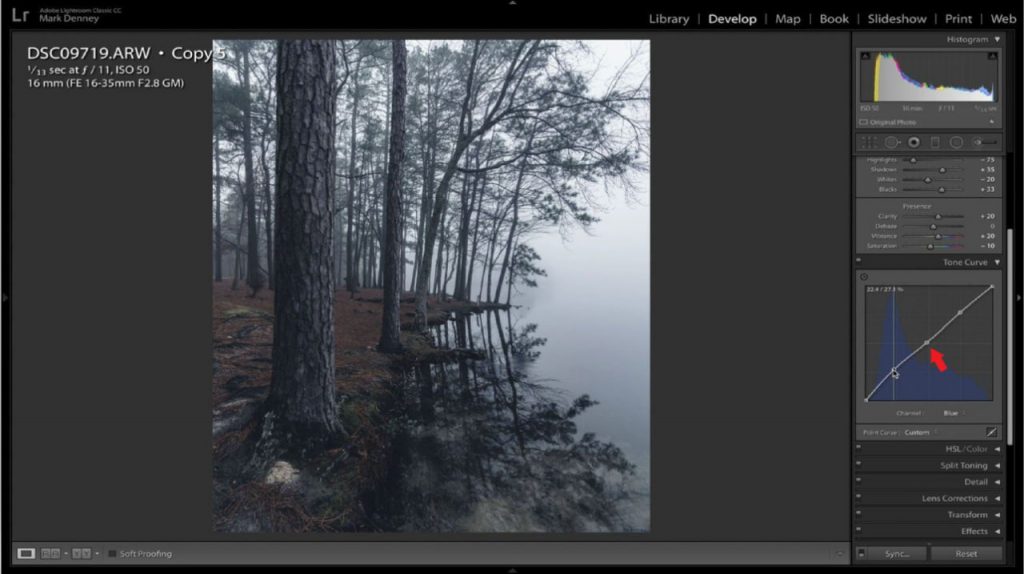
2. Tone Curve:
The Tone Curve provides precise control over brightness and contrast.
- Use the Point Curve to create custom adjustments. For example, drag the curve upward to brighten midtones and downward to darken them.
- Adjust the Highlights , Lights , Darks , and Shadows sliders for targeted corrections. This is particularly useful for creating cinematic looks or emphasizing specific areas of the image.
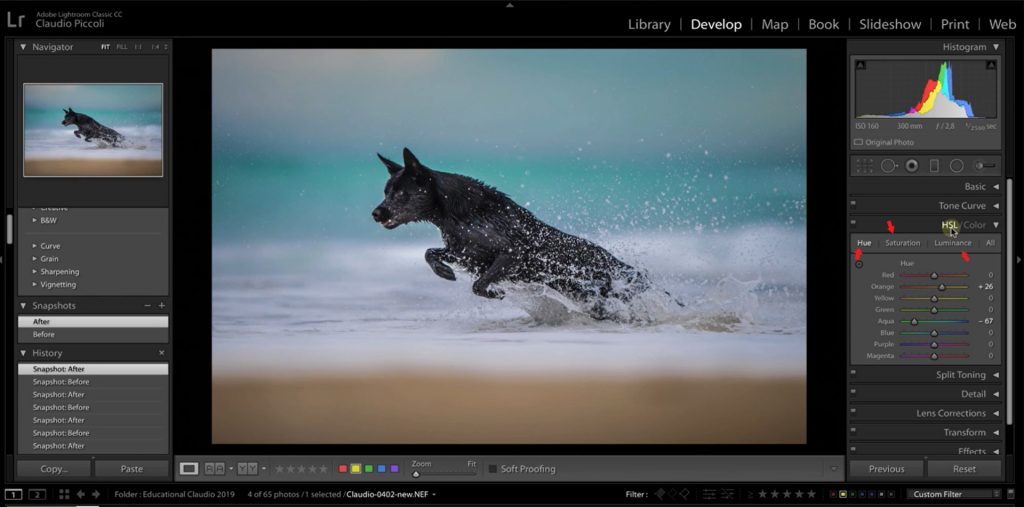
3. HSL/Color Panel:
The HSL (Hue, Saturation, Luminance) panel lets you manipulate individual colors.
- Hue: Change the color tone (e.g., make greens more vibrant or shift blues toward teal).
- Saturation: Increase or decrease color intensity. For example, boost saturation in skies to make them pop or reduce it in skin tones for a more natural look.
- Luminance: Adjust the brightness of specific colors. This is especially helpful for balancing colors without affecting the overall exposure.
4. Split Toning:
Split Toning adds color accents to highlights and shadows.
- For example, add warm tones (like orange or yellow) to highlights and cool tones (like blue or teal) to shadows for a cinematic effect.
- Ensure the transition between colors feels natural by adjusting the Balance slider.
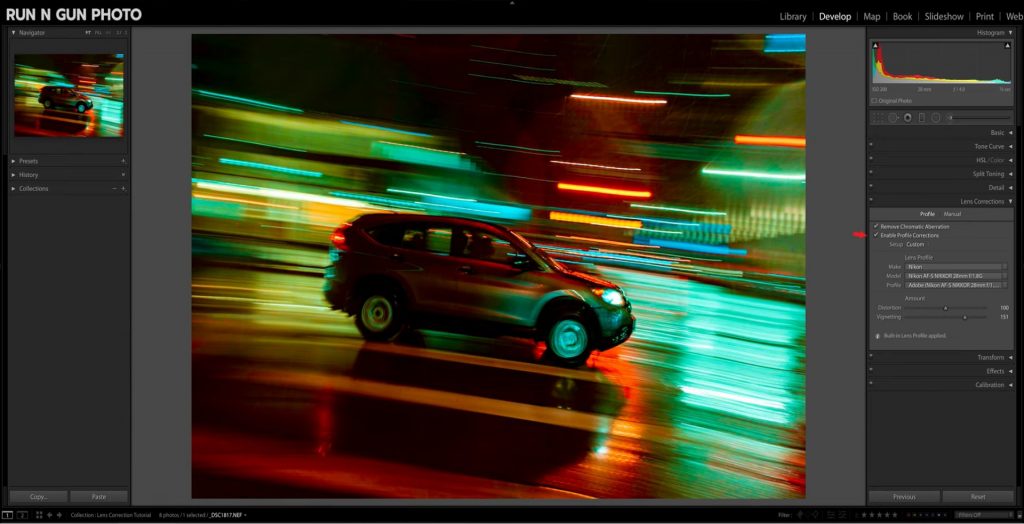
5. Lens Corrections:
Lens Corrections fix distortions caused by your camera lens.
- Enable Profile Corrections to automatically correct chromatic aberrations and vignetting. This is particularly useful for wide-angle lenses that often introduce barrel distortion.
- Use the Manual tab for custom adjustments, such as straightening horizons or removing unwanted vignettes.
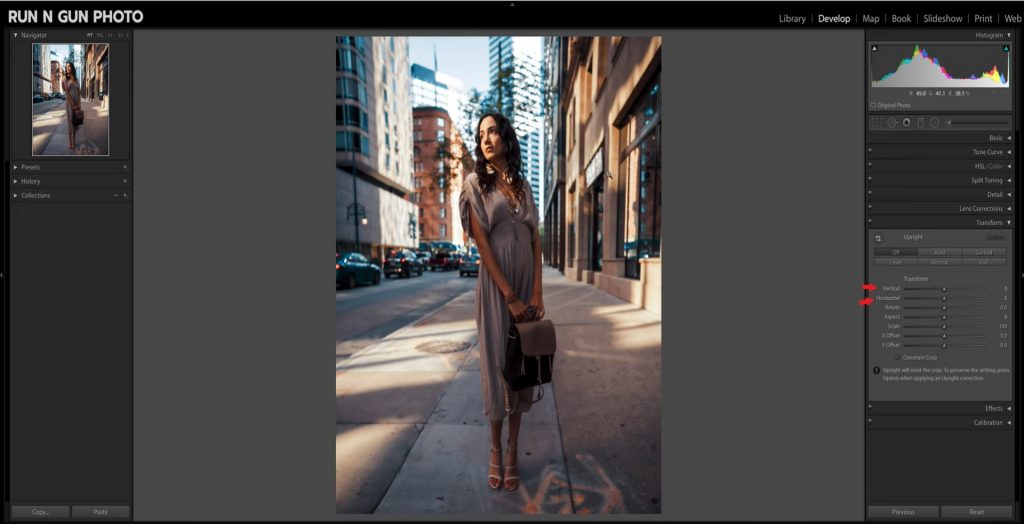
6. Transform Tool:
The Transform Tool helps correct perspective issues, such as converging lines in architectural photography.
- Use the Vertical slider to straighten buildings or the Horizontal slider to align horizons.
- For more precise control, use the Guided Upright Tool to manually adjust perspective by drawing reference lines.
From RAW to Masterpiece: Step-by-Step Workflow
Correcting White Balance
- Using the White Balance Tool:
- In the Basic Panel , adjust the Temperature and Tint sliders.
- If automatic settings don’t work, use the Eyedropper Tool to select a neutral gray area in the image.
- For example, click on a gray wall or a neutral surface to set the correct white balance.
- Checking Results:
- Ensure the colors look natural and match the scene’s lighting conditions.
- If the image still feels off, fine-tune the sliders manually until the colors feel balanced.
Adjusting Exposure and Contrast
- Fine-Tuning Exposure:
- Use the Exposure slider to brighten or darken the image.
- Adjust Contrast to add depth and dimension. For example, increase contrast slightly to make the image pop, but avoid overdoing it to maintain a natural look.
- Recovering Details:
- Use the Highlights slider to recover blown-out areas, such as bright skies or reflections.
- Adjust Shadows to bring out hidden details in darker regions, like trees or buildings in shadowed areas.
Working with HSL for Better Colors
- Adjusting Hue:
- In the HSL Panel , go to the Hue tab and tweak colors as needed.
- For example, make skies bluer or grass greener. Shift hues slightly to match your creative vision.
- Adding Saturation:
- Go to the Saturation tab and increase the intensity of desired colors.
- Be careful not to oversaturate, as this can make the image look artificial.
Using Split Toning for Artistic Effects
- Adding Color Accents:
- In the Split Toning panel, add warm tones to highlights and cool tones to shadows.
- For example, use orange highlights and teal shadows for a cinematic look.
- Balancing Colors:
- Use the Balance slider to ensure the transition between colors feels natural.
Applying Lens Corrections
- Fixing Distortions:
- Enable Profile Corrections to automatically correct lens distortions.
- Use the Manual tab to fine-tune adjustments, such as removing vignettes or straightening horizons.
Using the Transform Tool
- Correcting Perspective:
- Use the Vertical slider to straighten buildings or the Horizontal slider to align horizons.
- For more precise control, use the Guided Upright Tool to manually adjust perspective by drawing reference lines.
Advanced Techniques for Professional Results
1: Local Adjustments
Local adjustments allow you to apply changes to specific areas of the image.
- Use the Adjustment Brush to paint adjustments like exposure, clarity, or saturation onto selected areas. For example, brighten a subject’s face or add clarity to textures.
- Use the Radial Filter to create spotlight effects or draw attention to specific elements. For instance, create a soft glow around a portrait subject.
2: Noise Reduction
Noise Reduction helps eliminate graininess without losing details.
- Adjust the Luminance slider to reduce noise in the image.
- Use the Daetail slider to preserve sharpness. For example, increase detail slightly to retain textures in skin or fabric.
3: Sharpening
Sharpening enhances the clarity of your image.
- Use the Amount slider to increase sharpness.
- Adjust the Radius and Detail sliders for finer control. For example, use a small radius for subtle sharpening or a larger radius for dramatic effects.

4: Graduated Filter
The Graduated Filter creates smooth transitions, such as darkening the sky.
- Drag the filter across the image and adjust parameters like exposure and contrast. For example, darken the sky to make it more dramatic or add warmth to a sunset.
5: Color Grading
Color Grading allows you to add global or selective color effects.
- Use the Midtones , Shadows , and Highlights sliders to create cohesive color schemes.
- For example, add a warm orange tone to midtones for a cozy atmosphere or a cool blue tone to shadows for a moody effect.
Pro Tips for Better RAW File Processing
- Use Presets:
- Presets allow you to quickly apply pre-configured styles. Create your own presets for recurring tasks, such as portrait retouching or landscape enhancement.
- Save Backup Copies:
- Regularly save virtual copies to preserve previous versions of your edits. This ensures you can always revert to an earlier version if needed.
- Check Results on Multiple Devices:
- Preview your edited image on different screens to ensure consistent quality. Colors may vary across devices, so test your image on multiple monitors and smartphones.
- Work Non-Destructively:
- Use adjustment layers and masks to preserve the original file for future edits. This is especially important when experimenting with new techniques.
- Experiment Freely:
- Don’t be afraid to try new combinations of tools. Some of the most interesting results happen by accident.
- Optimize for Specific Outputs:
- Adjust settings based on the intended use of the image. For example, reduce sharpness for web images to avoid artifacts or increase resolution for prints.
- Use Histograms for Guidance:
- The histogram in Camera Raw provides valuable insights into exposure and tonal distribution. Use it to identify areas that need adjustment.
Exporting Your Edited Image for Web and Print
1. Setting Export Parameters:
- Select File > Save As or Export > Export As in Camera Raw.
- Choose the file format: JPEG for web, TIFF for print.

2. Optimal Resolutions:
- For web: 72 DPI and dimensions suitable for social media (e.g., 1080×1080 pixels for Instagram).
- For print: 300 DPI and dimensions matching the physical format.
3. Final Review
- Preview the image on multiple devices to ensure colors and quality are consistent.

Ready to Process Your RAW Files?
Now that you’ve learned how to use Adobe Camera Raw, it’s time to start processing your RAW files and see the difference! With practice, you’ll achieve professional-quality results that enhance your photography.
Share your edited photos with us—we’d love to see your results!


Leave a Reply