How Does Augmented Reality Work?
Augmented reality (AR) is a technology that overlays digital objects onto the real world through device cameras. To understand how it works, it’s important to explore the basic principles and technologies behind AR.
Technologies Behind AR: From Cameras to Algorithms
The foundation of AR technologies lies in the interaction between the device’s hardware and software algorithms. Here are the key components:
- Camera: Captures the environment to create a base for overlaying digital objects.
- Sensors: Accelerometer, gyroscope, and other sensors help the device determine orientation and position in space.
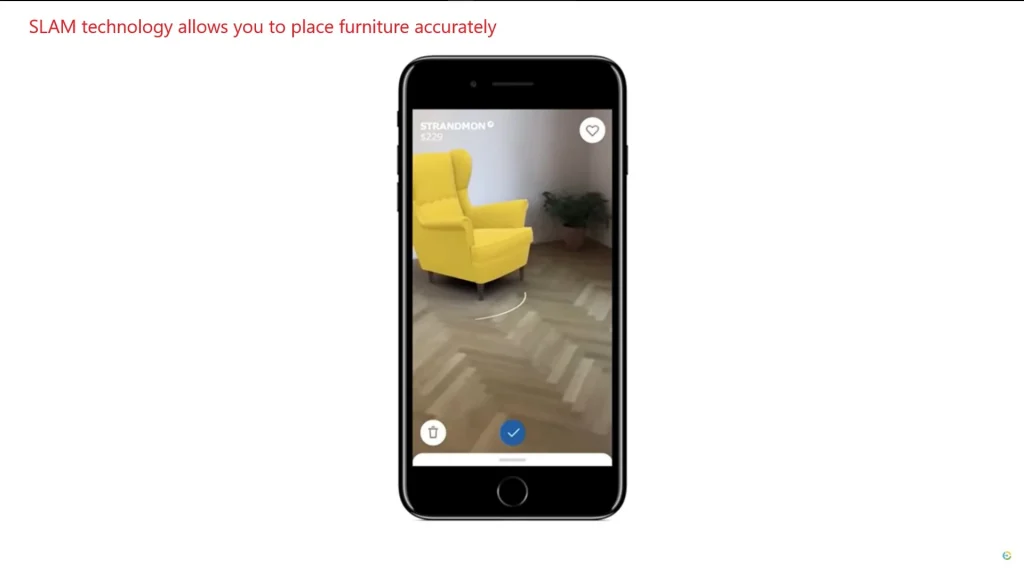
- SLAM (Simultaneous Localization and Mapping): This technology allows the device to create a map of the space in real time and track its position relative to this map.
“If you’re a beginner, don’t dive into the technical details of SLAM right away. Instead, focus on how to use ready-made tools like ARKit or ARCore.”
“The IKEA Place app uses SLAM to accurately place furniture in your room.”
Types of AR Content
AR content can be divided into two main categories: marker-based and markerless.
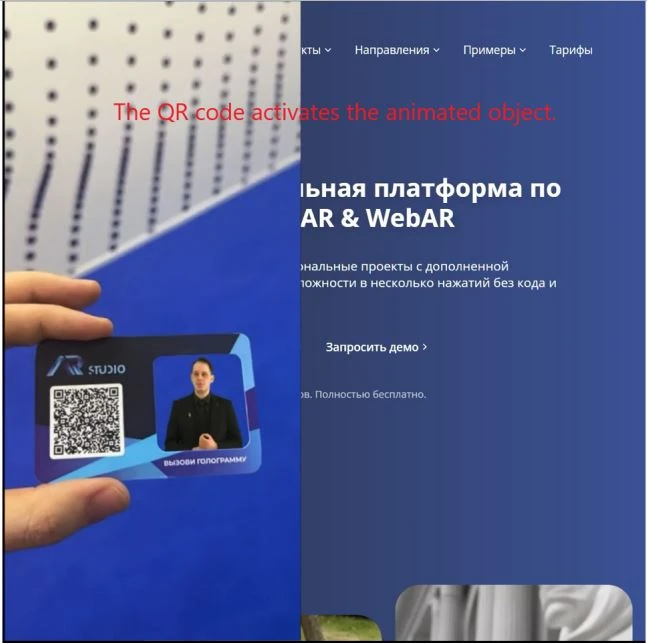
- Marker-based AR:
Uses QR codes or images to trigger content.
Example: “An app recognizes a QR code and plays an associated animated object.”
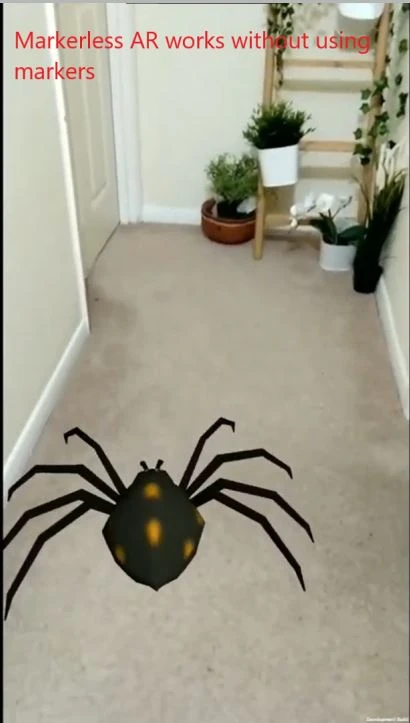
- Markerless AR:
Works based on the environment, using technologies like ARKit and ARCore.
Example: “ARCore allows you to place 3D objects in real space without the need for markers.”
“Start with marker-based AR if you’re just learning. It’s simpler and requires fewer resources.”
What Adobe Tools to Use for Creating AR Content?
Adobe offers several tools that are ideal for creating AR content. Let’s explore how they work and how you can integrate them into your workflow.
Adobe Aero: The Main Tool for AR Development
Adobe Aero is Adobe’s flagship product for creating AR content. It allows designers to create interactive AR scenes without the need to write code.
- Key Features:
- Import 3D models, 2D images, and animations.
- Intuitive interface for setting up object interactions.
- Export ready AR projects for iOS and Android.
- Example of Use:
“Create an interactive storefront where users can virtually try on clothes or see how furniture looks in their home.”

- Integration with Other Adobe Tools:
Import models from Adobe Photoshop , Illustrator , and Substance 3D Designer .
Use Behance to showcase your AR projects to the community.
“If you’re a beginner, start with simple projects in Adobe Aero to master the basics of AR content creation.”
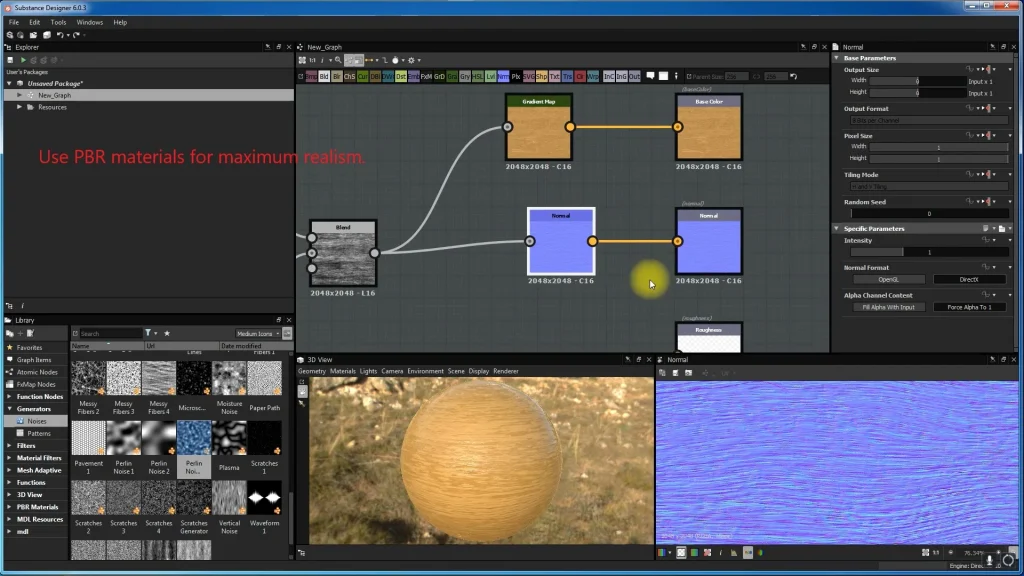
Substance 3D Collection: Creating Textures and Materials for AR
Although Substance 3D Collection is not an AR platform, it plays a key role in preparing realistic textures and materials for AR objects.
- Create procedural materials that can be used in AR scenes.
- “Create a wood texture for virtual furniture that will look realistic in AR.”

- Apply detailed textures to 3D models before importing them into Adobe Aero.
- “Use PBR materials for maximum realism.”
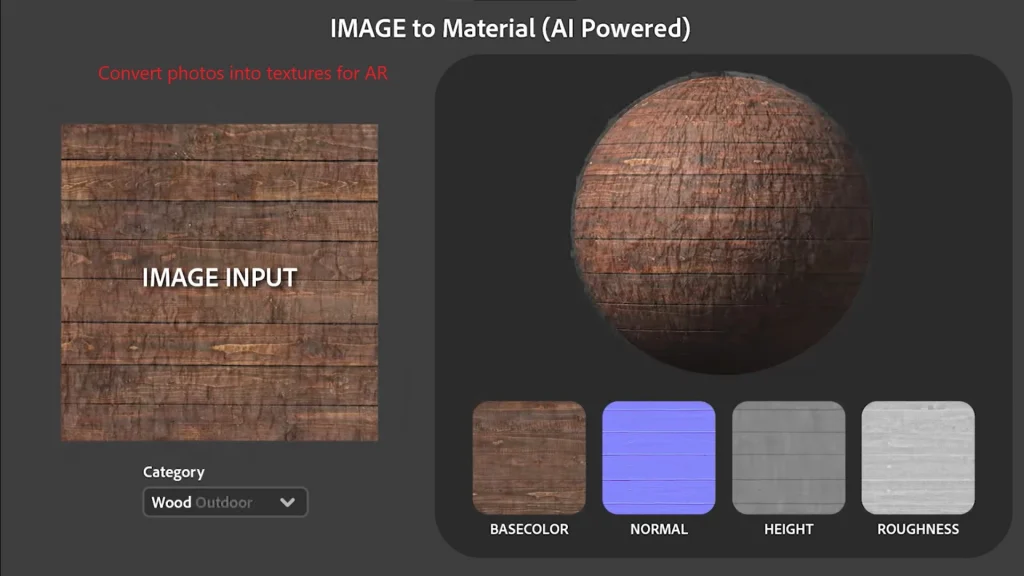
- Convert real photographs into textures for AR objects.
- “Take a photo of a wall texture and convert it into a material for a virtual background.”
Adobe Creative Cloud: Supporting AR Projects
Other Adobe tools can also be useful for preparing content:
- Create 2D graphics and textures for AR objects.
- “Add graphic elements to the surface of a 3D model before importing it into Aero.”

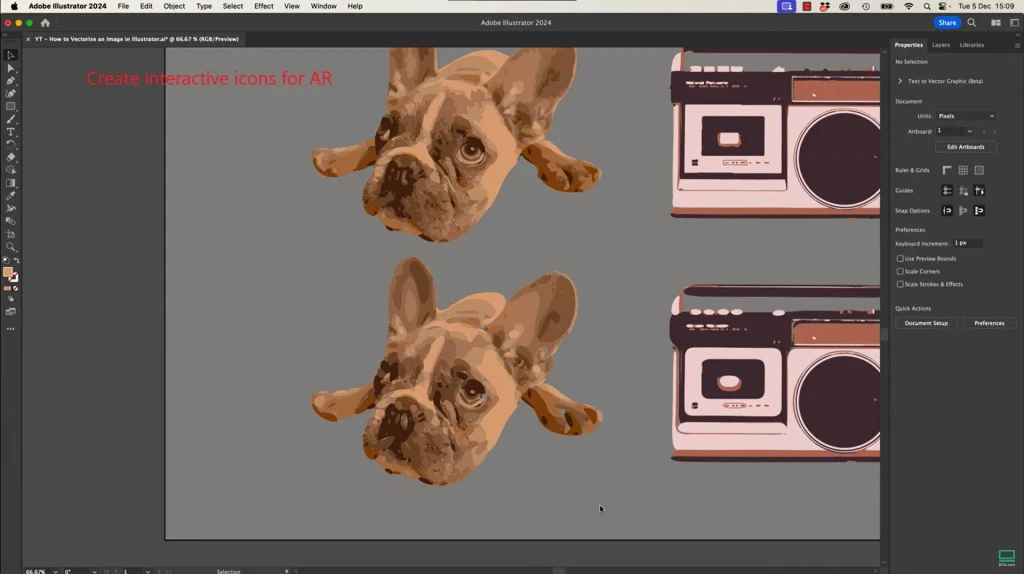
- Design vector elements that can be animated in AR scenes.
- “Use Illustrator to create interactive icons or interfaces.”
- Create animations that can be integrated into AR scenes.
- “Add moving elements like flying particles or light effects.”
How to Create Your First AR Project with Adobe Aero?
Creating an AR project may seem challenging, but with Adobe Aero , the process becomes intuitive. Let’s break down the step-by-step process of creating an AR scene, from preparing content to testing the final application.
Preparing 3D Models and Textures
The first step is to prepare the visual elements you want to use in your AR scene. Here’s how to do it:
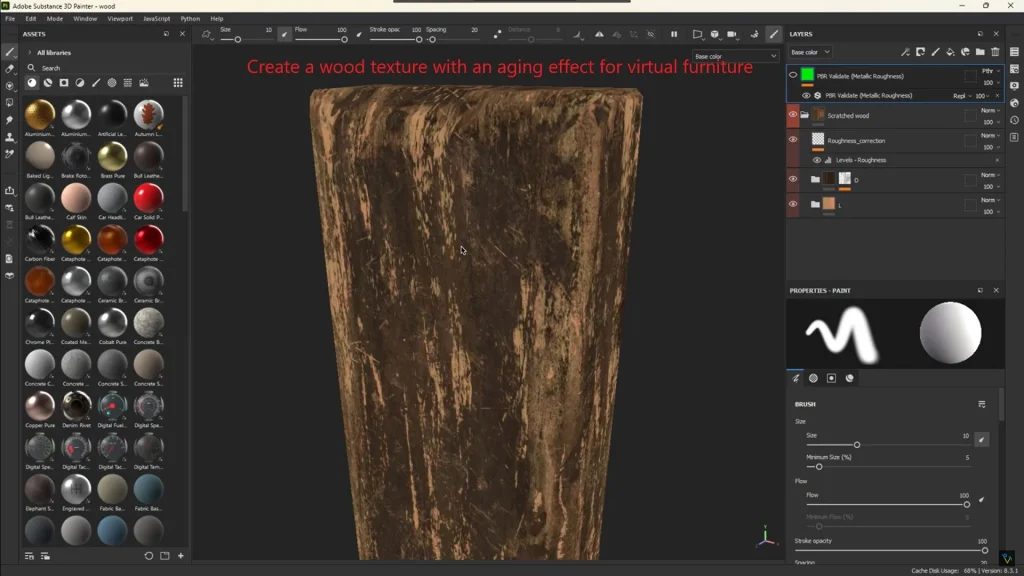
- Use Substance 3D Collection to create materials:
- Create textures in Substance 3D Designer or Painter .
- “For virtual furniture, I created a wood texture with an aging effect.”
- Prepare a 3D model:
- Use third-party programs (e.g., Blender) or download a ready-made model from the Adobe Stock library.
- “Make sure the model is optimized for mobile devices — too high polygon density can slow down performance.”
- Add animations (optional):
- Use After Effects to create simple animations, such as object rotation or particle movement.
Setting Up the Project in Adobe Aero
After preparing the content, you can start creating an AR scene in Adobe Aero :
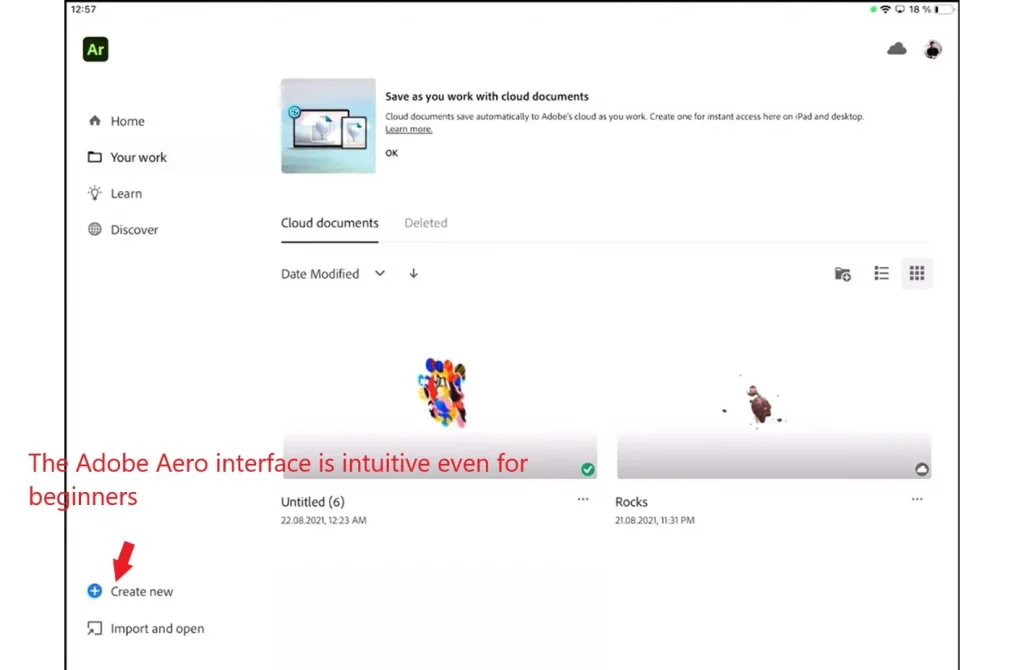
- Launch Adobe Aero and create a new project:
- The program’s interface is intuitive, even if you’re a beginner.
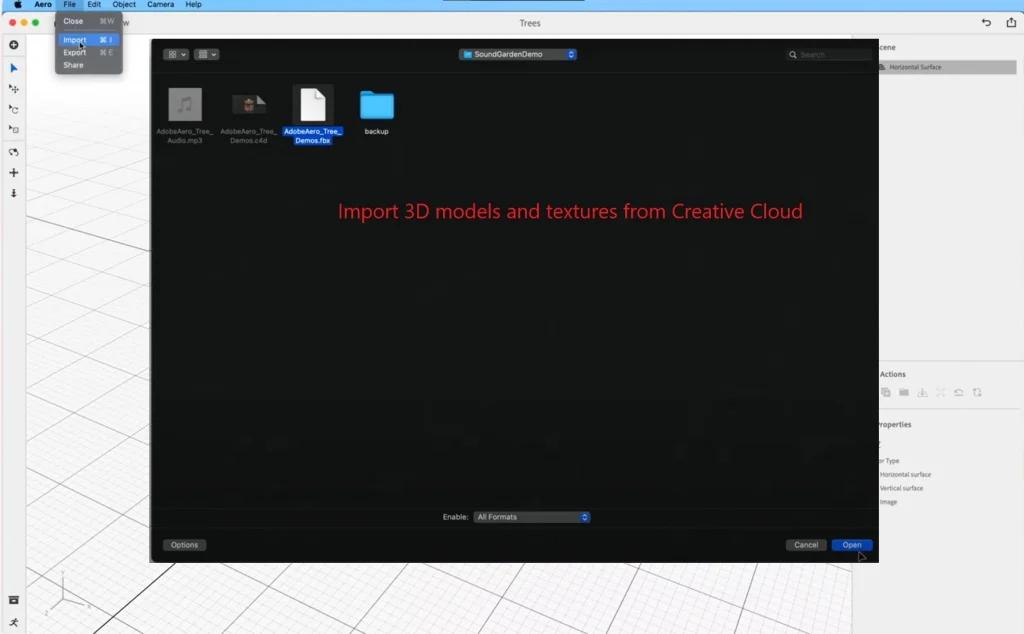
- Import 3D models and textures:
- Click the import icon and select files from your computer or Creative Cloud.
- “I imported a 3D table model and added a wood texture created in Substance 3D Painter.”
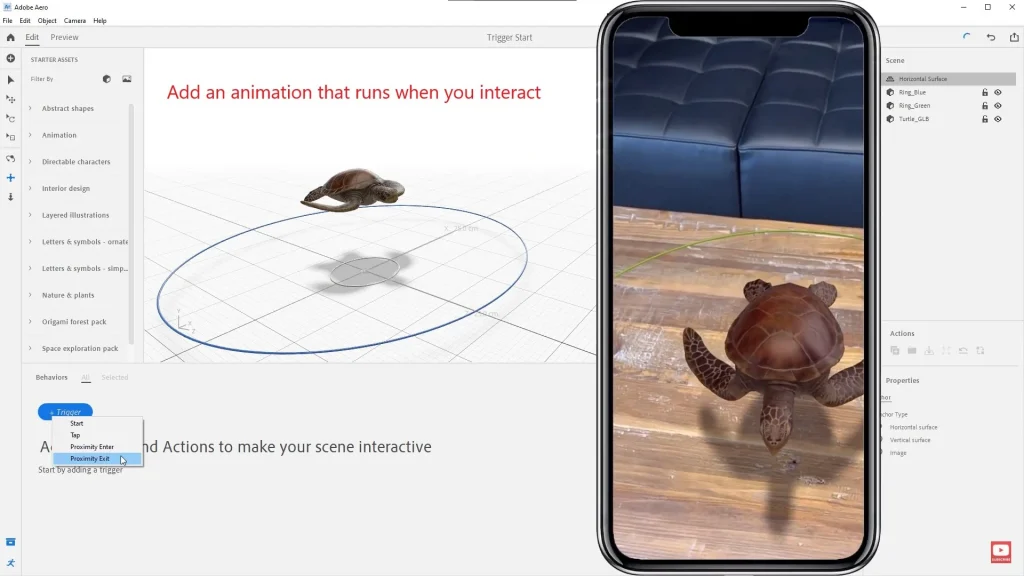
- Set up object interactions:
- Use the toolbar to add triggers (e.g., tap or proximity).
- Add an animation that starts when the user taps on the object.”
- Adjust lighting and materials:
- Aero automatically adapts lighting to the real environment, but you can adjust settings manually.
Testing the AR Application
After completing the setup, it’s important to test the project:
- Export the project:
Click the “Share” button and create a link or file for testing.
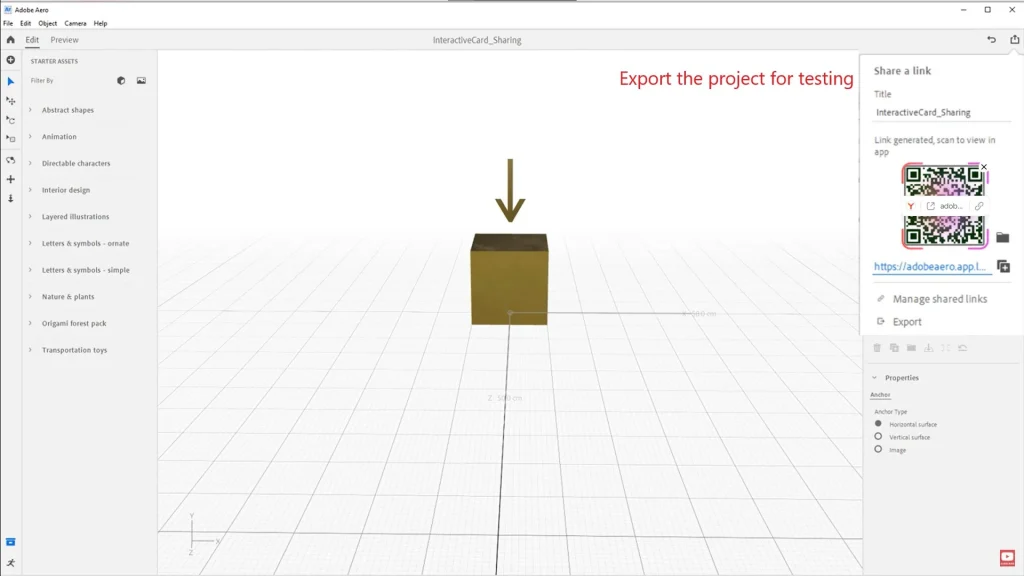
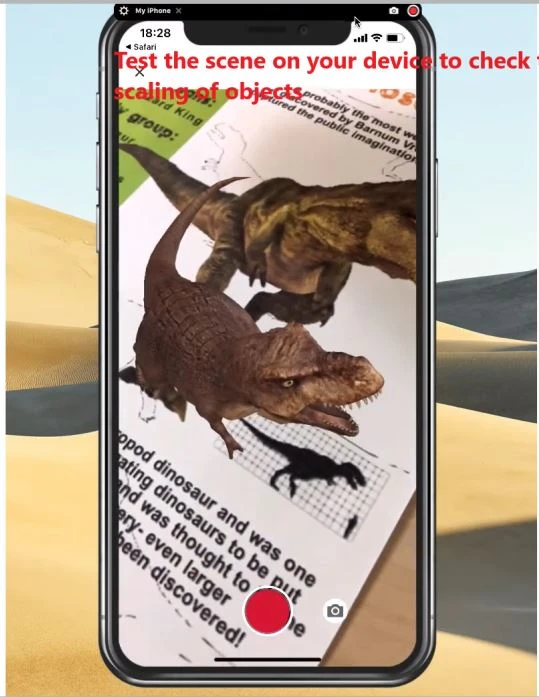
2. Test on a device:
- Install Adobe Aero on your smartphone and open the project via a link or QR code.
- “I tested the scene on an iPhone and confirmed that all objects scale correctly.”
3. Gather feedback:
- Show the project to friends or colleagues to get their input.
How to Optimize AR Content for Better Performance?
Optimizing AR content is a key step that affects performance and user experience. Let’s explore how to improve the quality of your project while maintaining high performance on mobile devices.
Optimizing 3D Models
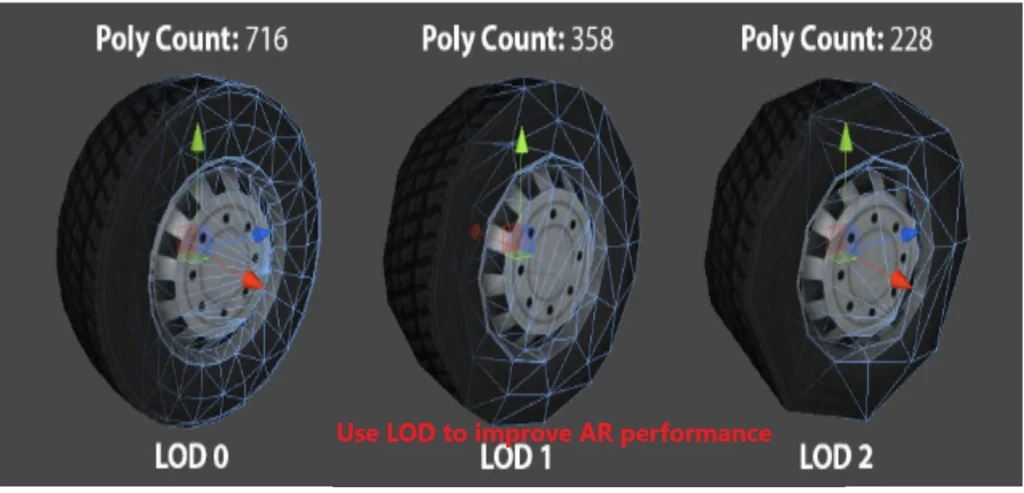
- Reducing Polygon Count:
- High polygon density can slow down AR applications.
- “Use LOD (Level of Detail) to create multiple versions of the model with varying levels of detail.”
- “For virtual furniture, I created two versions: one with high detail for static viewing and another with low detail for dynamic scenes.”
- Optimizing Textures:
- Use textures with resolutions suitable for mobile devices (e.g., 1024×1024 or 2048×2048).
- “Compress textures without losing quality using tools like Substance 3D Sampler.”
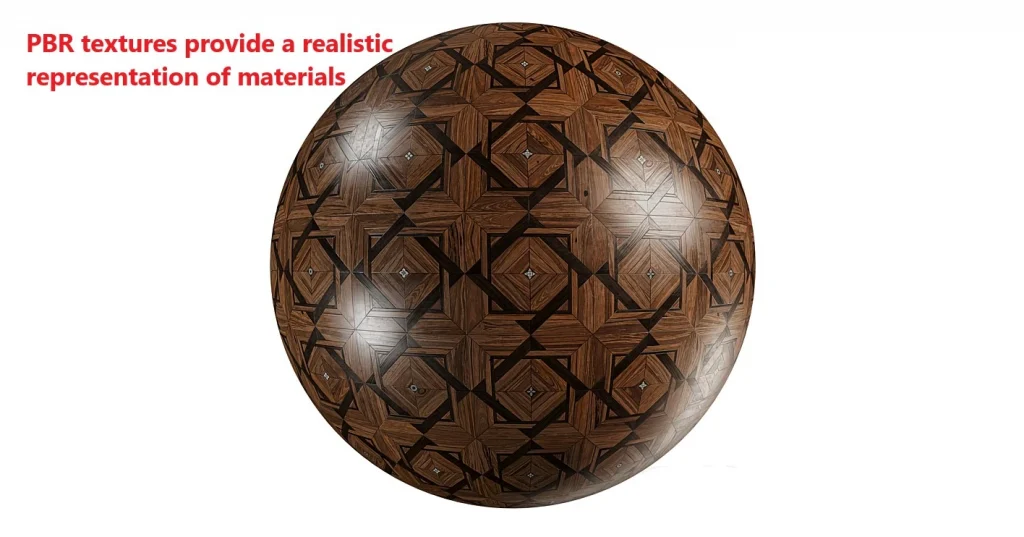
- Using PBR Materials:
- PBR (Physically Based Rendering) ensures realistic material representation.
- Example: “I used PBR textures for wood to achieve natural light reflection.”
Adjusting Lighting and Materials
- Automatic Lighting in Adobe Aero:
- Aero automatically adjusts lighting to match the real environment, but you can tweak settings manually.
- “If the object looks too dark, increase the light intensity.”
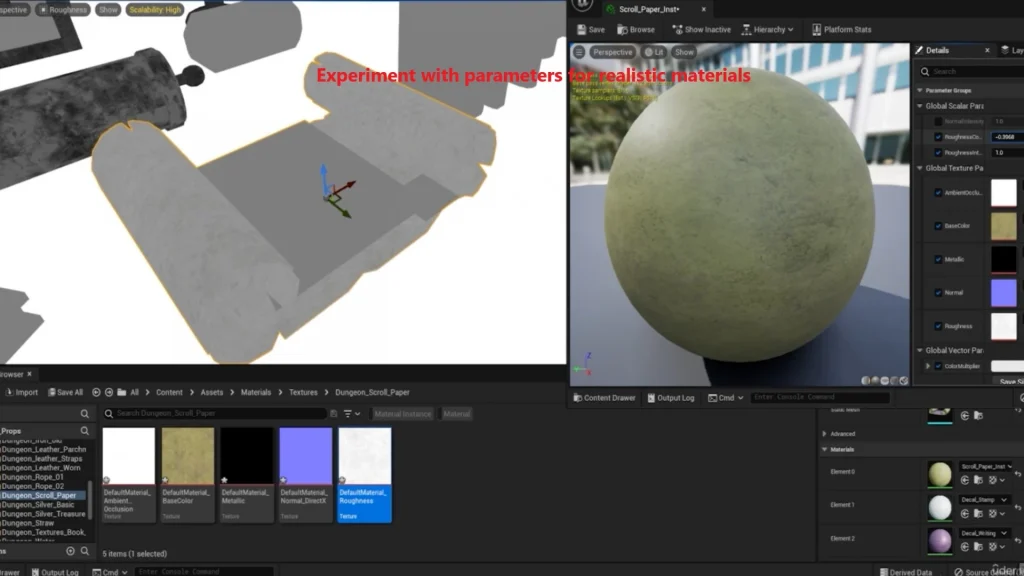
- Adjusting Materials:
- Experiment with roughness and metallic parameters to achieve a realistic effect.
- “For metallic surfaces, I reduced roughness and increased metallicity.”
Enhancing User Experience
- Intuitive Interface:
- Add simple controls, such as buttons or gestures.
- “Use triggers that launch animations when tapped or approached.”
- Minimalism in Design:
- Don’t overload the scene with too many objects.
- “I left only key elements so the user could focus on the main object.”
- Testing on Different Devices:
- Check performance on devices with varying capabilities.
- “If the app runs slowly, try reducing texture size or polygon count.”
Where Is Augmented Reality Used?
Augmented reality (AR) is becoming increasingly popular across various industries. Let’s explore real-world examples where AR is used to solve business challenges, entertain, and educate.
AR in Games and Entertainment
- Games:
- Pokémon GO: One of the most famous AR games that allowed millions of users to “catch” Pokémon in the real world.
- “If you want to create an AR game, start with simple mechanics like searching or interacting with objects.”
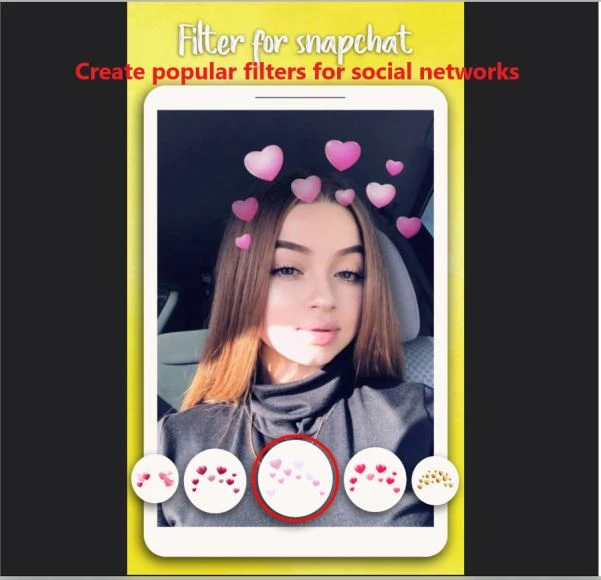
- Social Media Filters:
- Snapchat and Instagram use AR to create interactive filters that alter the user’s appearance.
- “I created a virtual hat filter that became popular among followers.”
AR in Marketing and Retail
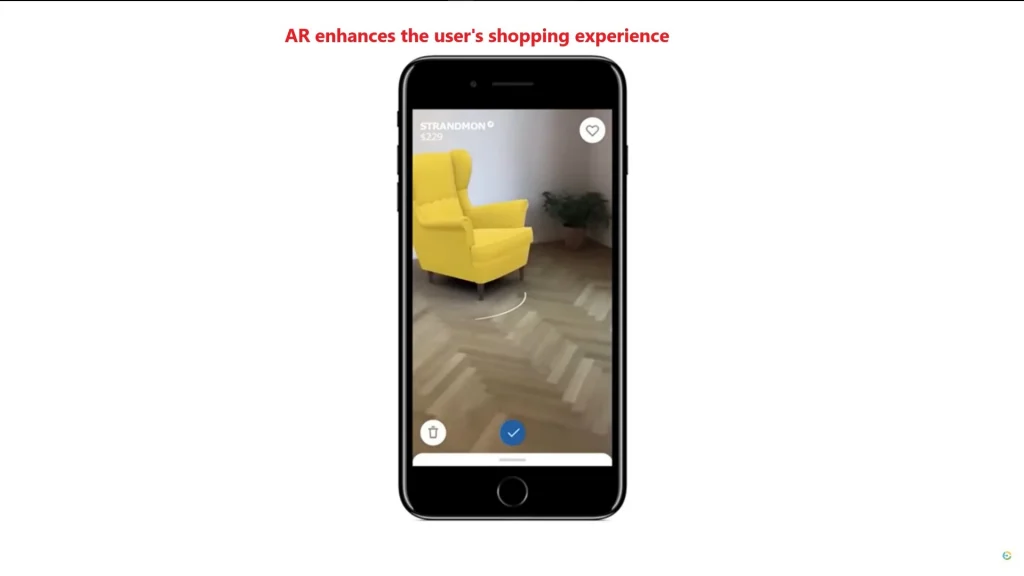
- Virtual Try-On:
- IKEA Place: Allows users to virtually place furniture in their home before purchasing.
- “Use AR to enhance the shopping experience and increase conversions.”
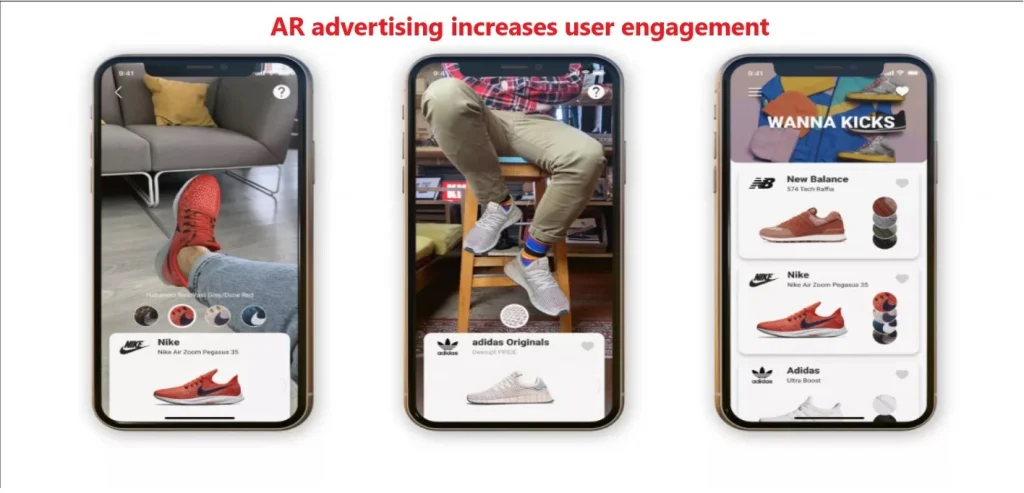
- Advertising Campaigns:
- Brands like Coca-Cola and Nike use AR for interactive advertising campaigns.
- “Nike created an AR app that lets users ‘try on’ sneakers through their smartphone camera.”
AR in Education and Medicine
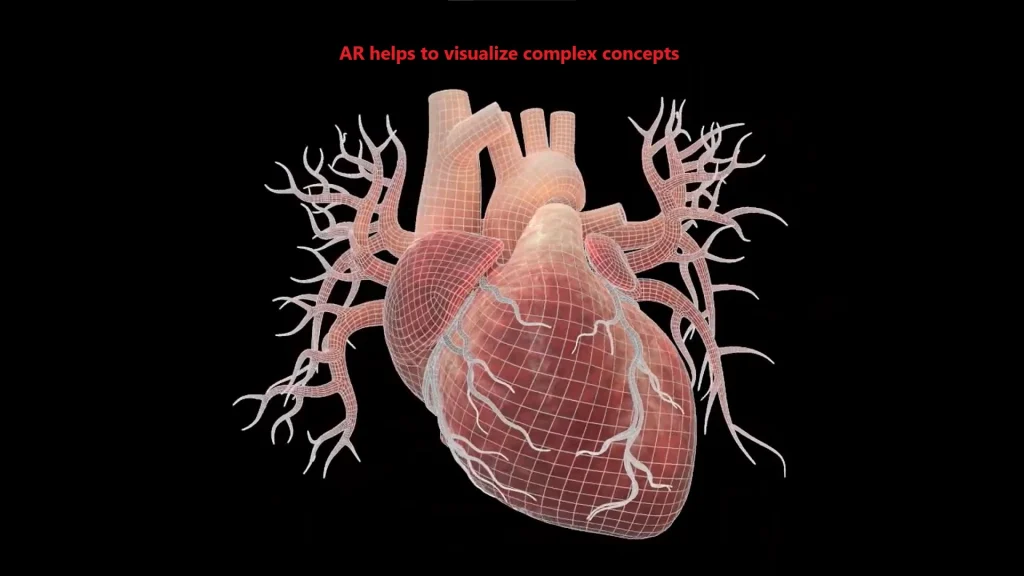
- Education:
- AR helps students visualize complex concepts like human anatomy or molecular structures.
- “I used an AR app to demonstrate how the human heart works during a biology lesson.”
- Medicine:
- Doctors use AR for surgery planning and training.
- “AR simulations allow doctors to practice in a safe environment.”
Useful Tips for Successful AR Content Development
Creating AR content is a process that requires attention to detail and consideration of platform specifics. Here are some tips to help you avoid common mistakes and make your project more effective.
Avoid Common Mistakes
- Overloading the Scene with Objects:
- Adding too many objects can slow down the application.
- “Leave only key elements so the user can focus on the main object.”
- Ignoring Optimization:
- High polygon density or large textures can lead to performance issues.
- “I faced slow loading because I used high-resolution textures.”
3. Incorrect Use of Lighting.
- Unrealistic lighting can ruin the impression of an AR scene.
- “Always check how lighting interacts with materials in the real environment.”
Learning Resources
- Official Adobe Aero Documentation:
- Start with the official guide to master the basic features of the program.
2.YouTube and Online Courses:
- Many free tutorials on creating AR content are available on YouTube.
- Forums and Communities:
- Join forums like Reddit or Behance to share experiences and get feedback.
How to Develop AR Skills?
- Practice Regularly:
- Create small projects to experiment with new ideas.
- “Spend at least 30 minutes every day experimenting with AR.”
- Participate in Competitions:
- Contests like Adobe Creative Jam help develop skills and gain recognition.
3. Stay Updated on Trends:
- Study new technologies and tools to stay informed about the latest developments.
Why You Should Start Creating AR Content Today
Augmented reality (AR) is not just a trend but a powerful tool that opens up new opportunities for business, education, and entertainment. Whether you’re a designer, developer, or entrepreneur, mastering AR technologies will help you stay ahead of the competition and offer unique solutions to your clients.
We’ve covered the key aspects of creating AR content:
- Basic principles of working with AR.
- Using Adobe tools like Aero and Substance 3D Collection.
- A step-by-step process for creating projects.
- Optimizing content for better performance.
- Examples of AR usage in various industries.
Now that you know the basics, it’s time to start practicing. Download Adobe Aero, create your first AR scene, and share it with the community. Remember, success comes through constant practice and experimentation.


Leave a Reply