What is Adobe Character Animator and Why Is It Useful?
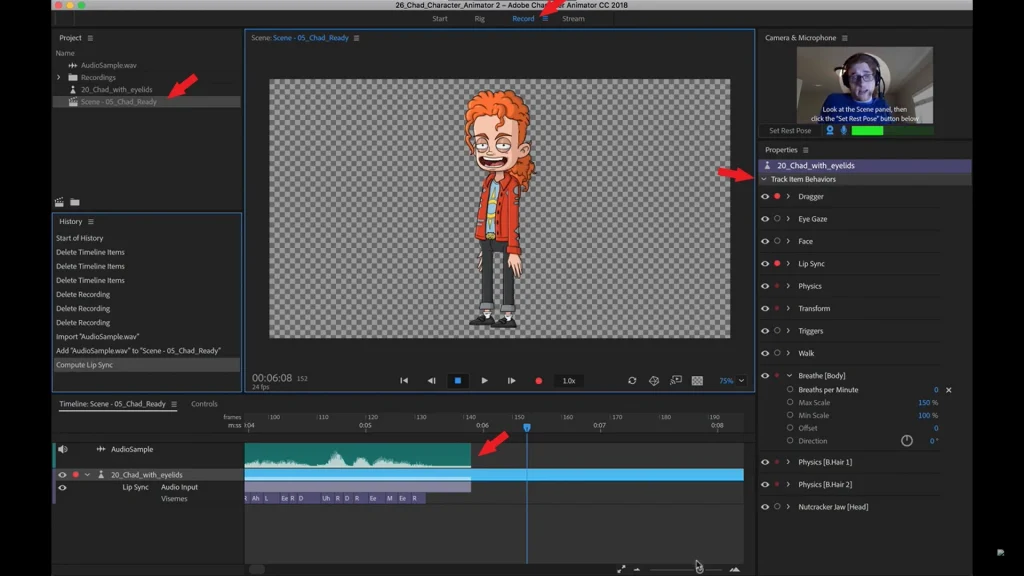
Adobe Character Animator is an innovative tool that brings 2D characters to life in real-time. The program uses a webcam and microphone to capture facial movements, voice, and even gestures, making the animation process fast and intuitive. It’s perfect for creating content for YouTube, advertisements, or social media platforms.
Character Animator is especially popular due to its flexibility. You can work with pre-made templates or create unique characters from scratch. Once you master the basics, you’ll be able to produce engaging content for various purposes.
The program is widely used not only by professional animators but also by bloggers, teachers, marketers, and even beginner artists. For instance, many popular YouTube channels use Character Animator to create entertaining content like interactive stories, educational videos, or promotional clips.
What You’ll Learn in This Article
In this article, we’ll walk through the step-by-step process of creating and animating characters. You’ll learn how to prepare characters, set up key tools, add effects, and export your finished project. We’ll also share useful tips to improve your workflow.
Preparing the Character
How to Create a Character for Animation
- Creating a Sketch of the Character
- Start with a drawing of your character. This can be a simple sketch on paper or a digital illustration created in programs like Adobe Illustrator or Photoshop.
- Ensure the character has clearly defined body parts: head, eyes, mouth, arms, and legs. Each part should be a separate element so they can be animated independently.
- When designing your character, consider their style. For example, if you want to create a cartoonish character, use bright colors and simplified shapes. If your goal is a more realistic style, add details like skin textures or hair strands.
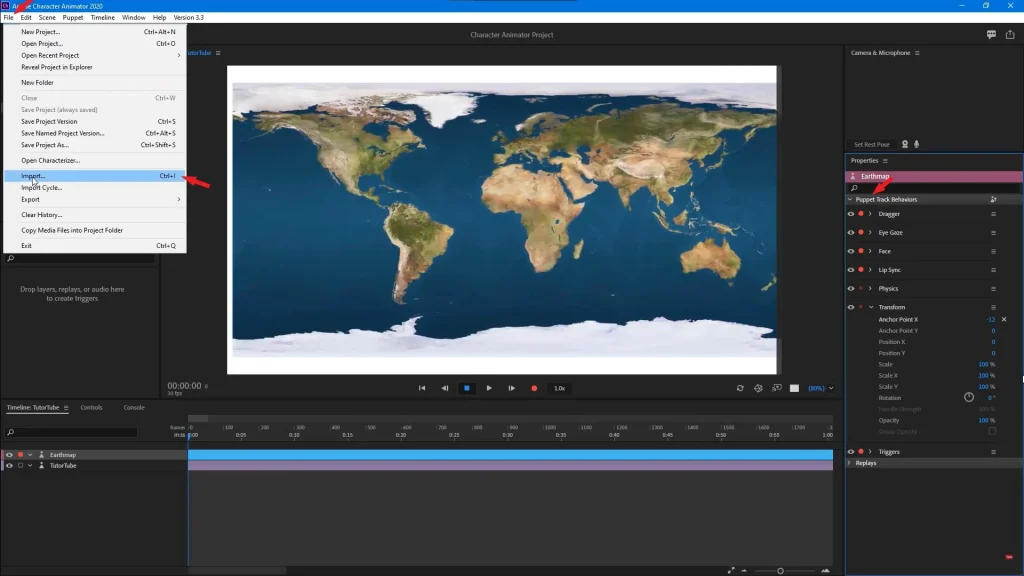
2. Importing the Image into Character Animato
- Open Adobe Character Animator and select File > Import > Puppet .
- Import your drawing or PSD file if you created it in Photoshop.
- If you’re using Photoshop, ensure each element of the character is on a separate layer. For example, the “Left Arm” layer should contain only the left arm, and the “Mouth” layer should contain only the mouth. This will allow you to easily animate each body part.
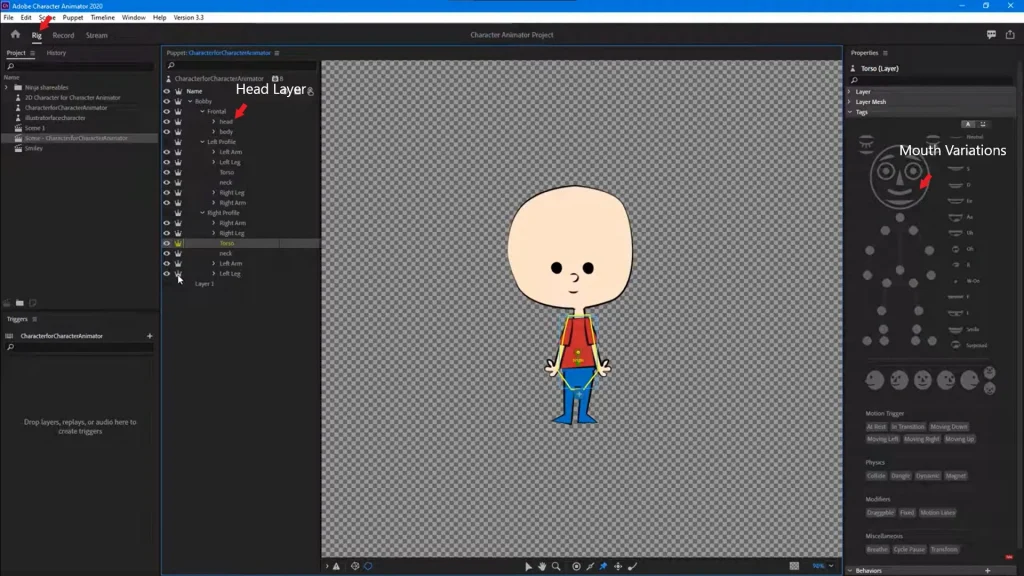
3. Setting Up Layers for the Body, Eyes, Mouth, and Other Elements
- Divide the character into layers: one for the head, another for the eyes, mouth, and body.
- For example, create separate layers for different facial expressions (smile, sadness, surprise).
- To create natural lip-syncing, it’s recommended to add several mouth variations that correspond to different sounds (e.g., “A,” “E,” “O”). This will help make lip-syncing more accurate.
4. Organizing the Project:
- Ensure each layer has clear boundaries and doesn’t overlap other elements.
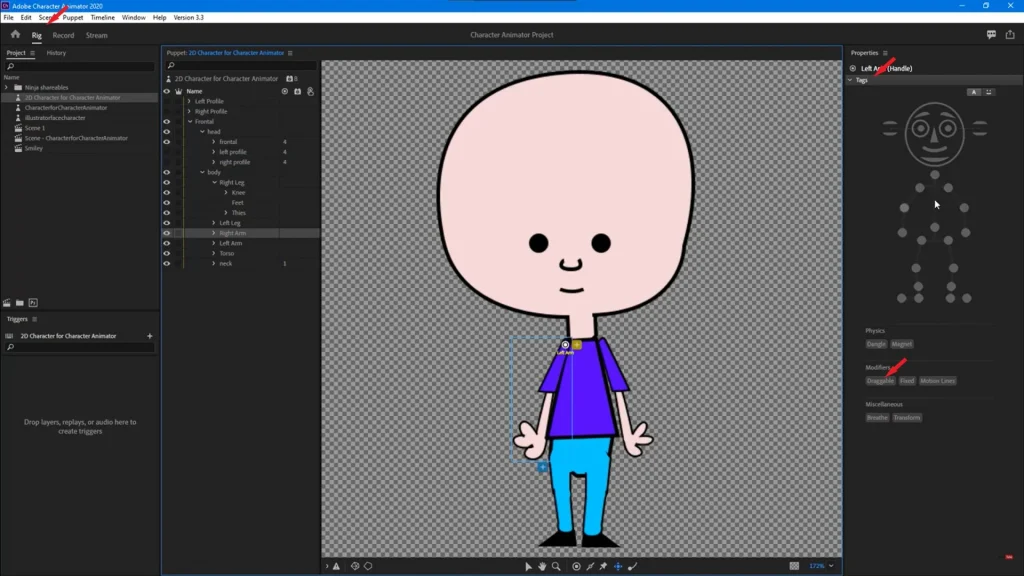
- If you’re using Photoshop, check that the layers are named correctly (e.g., “Left Arm,” “Right Eye”).
- Add tags to each layer to indicate how they should move. For example, you can add the tag “Draggable” to arms so they can be moved manually during animation.
Key Tools for Animation
Essential Tools for Animating Characters
- Rigging Tool:
This tool is used to set up the skeleton of the character. It helps link body parts so they move together. For example, you can set up the arms to move naturally while walking.- To do this, select the Rigging Tool and link the points on the arms to the body. For instance, you can configure the elbow to move only within a specific range of angles.
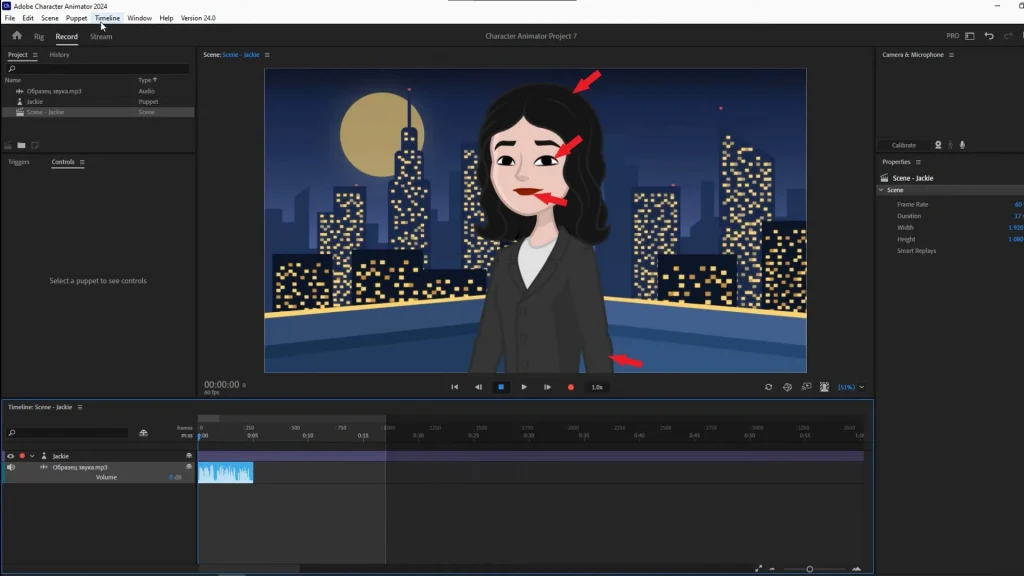
- Face Tracking:
Face Tracking captures the movements of your face through the webcam. For example, if you smile, the character will also smile.- To use this feature, enable the webcam and select the Face option in the Behaviors panel. The program automatically recognizes your eyebrows, eyes, mouth, and other facial features, transferring their movements to the character.
- Lip Sync:
This tool automatically synchronizes the character’s lip movements with your voice. For example, if you say the word “hello,” the character’s lips will move accordingly.- To set up Lip Sync, add several mouth variations (e.g., “A,” “E,” “O”) and assign them to corresponding sounds. The program will automatically select the correct mouth shape based on the sound being pronounced.
- Behaviors:
Behaviors add realistic actions, such as blinking, breathing, or nodding. These small details make the animation feel more alive.- For example, you can add the Breathe behavior to make the character’s chest move slightly, simulating breathing. This creates the illusion of life even in static scenes.
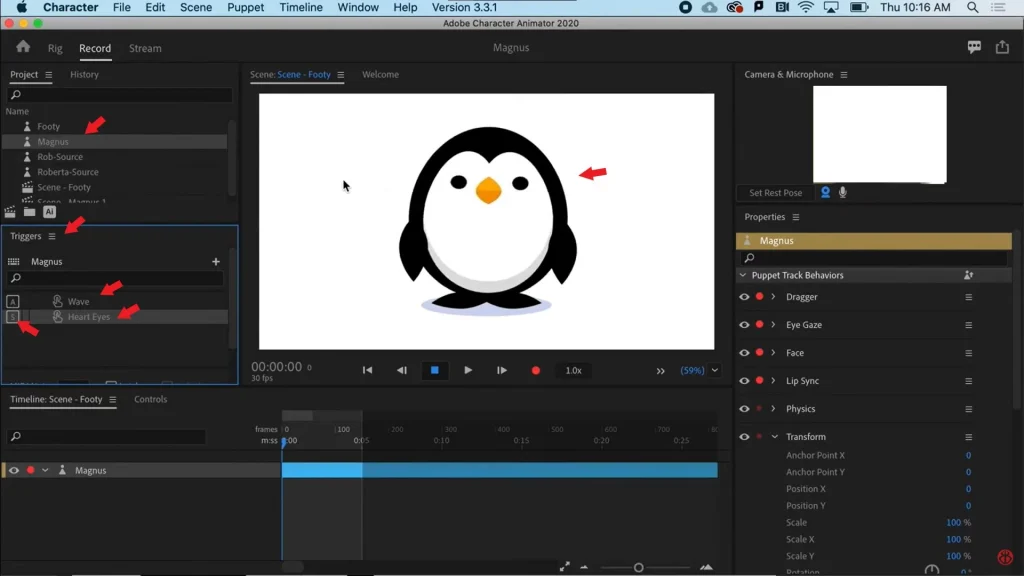
- Triggers:
Triggers allow you to quickly switch between different states of the character. For example, you can set up a trigger to change facial expressions or poses.- To create a trigger, assign a keyboard key (e.g., “1”) and link it to a specific action. For instance, pressing “1” can trigger a smile, while pressing “2” triggers sadness.
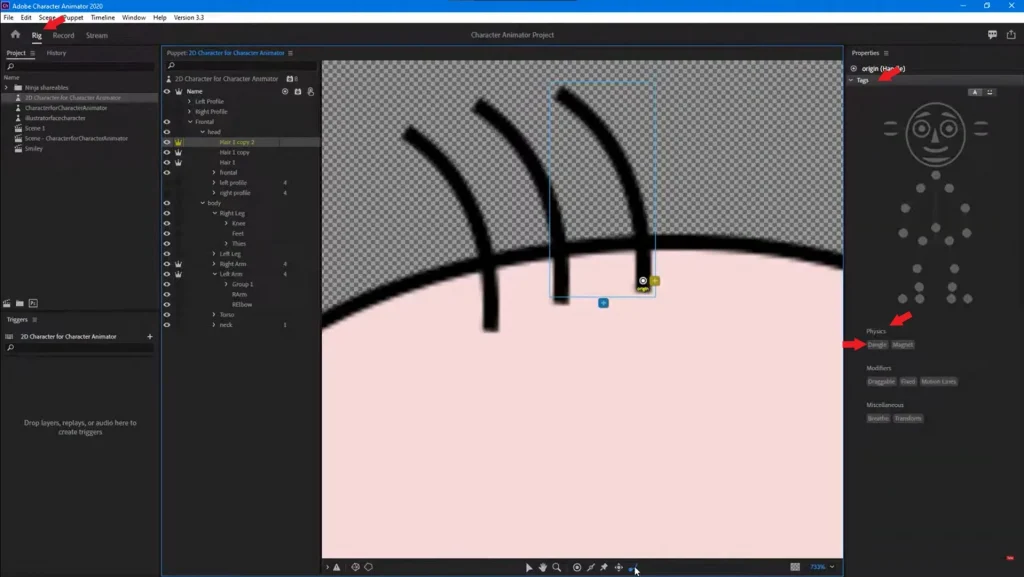
- Physics:
Physics adds physical effects, such as moving hair or clothing. This makes the animation more realistic.- For example, you can add the Wind behavior for hair or Dangle for clothing to make them move naturally while walking or turning.
Step-by-Step Creation and Animation of a Character
1. Creating a Simple Character with Basic Movements
- Adding the Character:
- Import your character into Character Animator.
- Ensure all layers are set up correctly (head, eyes, mouth).
- Setting Up Rigging:
- Select the Rigging Tool and link body parts. For example, connect the arms to the body so they move together.
- For more realistic movements, set angle limits. For example, the elbow shouldn’t move backward.
- Testing Movements:
- Enable the webcam and check how the character reacts to your movements.
- If the movements seem too abrupt, add the Smooth effect in the Behaviors panel. This will make the animation smoother.
2. Adding Facial Expressions and Emotions
- Creating Facial Expressions:
- Add several layers for different facial expressions (smile, sadness, surprise).
- Set up triggers to quickly switch between expressions.
- For example, you can add a trigger for laughter, activated by pressing the “S” key.
- Testing Lip Sync:
- Enable the microphone and speak a phrase. Check how the character’s lips synchronize with your voice.
- If synchronization isn’t accurate enough, add more mouth variations and adjust their correspondence to sounds.
3. Using Triggers to Change Facial Expressions
- Setting Up Triggers:
- Add triggers for each facial expression. For example, pressing “1” can activate a smile, while pressing “2” triggers sadness.
- You can also add combined triggers. For example, pressing “3” can trigger both a smile and raised eyebrows simultaneously.
- Testing Triggers:
- Check how quickly facial expressions switch when pressing keys.
- If triggers are too slow, reduce the delay in settings.

4. Adding Physics and Movements
- Setting Up Physics:
- Add physics for hair or clothing. For example, hair can move while walking.
- To do this, select the Dangle behavior and apply it to layers with hair or clothing.
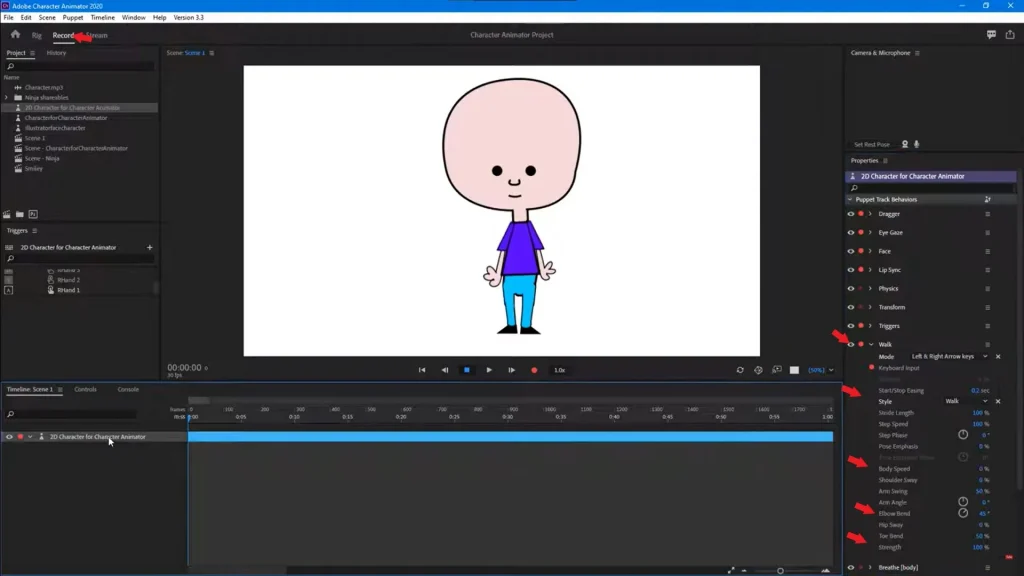
- Setting Up Walk Cycles:
- Use the Walk Behavior tool to set up a walking cycle.
- Adjust step parameters, such as step length, speed, and movement amplitude.
Adding Effects and Enhancing Animation
How to Enhance Animation with Additional Effects
Physics Behaviors:
- Add physics for clothing or hair. For example, hair can move while walking.
- To do this, select the Dangle behavior and apply it to layers with hair or clothing.
Walk Cycles:
- Set up a walking cycle for the character. This can be done using the Walk Behavior tool, which automatically creates realistic walking animations.
- Adjust step parameters, such as step length, speed, and movement amplitude.
Custom Triggers:
- Create unique interactions, such as raising a hand or nodding the head.
- For example, you can add a trigger for raising a hand, activated by pressing the “H” key.
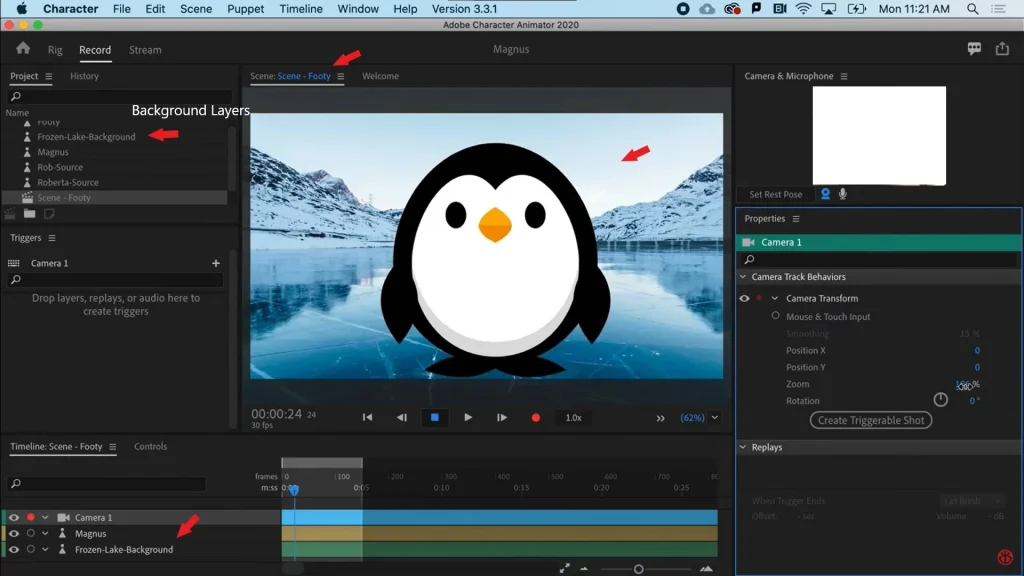
Backgrounds and Environments:
- Add background elements to bring the scene to life. For example, you can use simple gradients or complex textures.
- To create depth, add multiple background layers that move at different speeds.
Sound Effects:
- Add sound effects to enhance the atmosphere. For example, footsteps or environmental sounds.
- To do this, select the Audio option in the Behaviors panel and upload a sound file.
Exporting the Finished Animation
How to Export Your Animation
Go to the Export Menu:
- Select File > Export > Record Video .
Set Export Parameters:
- Format: MP4 or MOV.
- Resolution: 1920×1080 (Full HD).
- Bitrate: 8 Mbps for high quality.
Optimize for Platforms:
- For YouTube, use H.264 with a bitrate of 8 Mbps.
- For Instagram Stories, choose vertical resolution (1080×1920).
Export the File:
- Click the Export button and wait for the process to complete.
Tips and Recommendations
Useful Tips for Creating Characters
- Use Templates to Save Time:
- Character Animator offers many ready-made templates that you can adapt to your needs.
- For example, you can use the “Monster” template to create a funny monster or the “Businessman” template to create a business character.
- Preview Before Final Export:
- Press the Space key to preview the animation in real-time.
- This will help you spot errors or issues, such as incorrect object placement, unnatural movements, or lack of smoothness.
- Experiment with Effects and Triggers:
- Don’t be afraid to try new effects and combinations.
- For example, combining Glow and Drop Shadow can make your animation more appealing.
- Work Carefully with Triggers:
- The more triggers you have, the harder it is to control the animation. Try to minimize their number.
- For example, instead of using multiple triggers for different facial expressions, combine them into one combined trigger.
- Add Backgrounds and Environments:
- This will make the scene more interesting and engaging.
- For example, you can add a gradient or textured background to create an atmosphere.
- Use Sound Effects:
- Sounds like footsteps, breathing, or environmental noises add realism.
- To do this, select the Audio option in the Behaviors panel and upload a sound file.
Ready to Create Your First Character?
Now that you know the basics, it’s time to try creating your own character! After a few hours of practice, you’ll be able to produce professional projects
Share your results in the comments or tag us on social media—we’d love to see your work Character Animator!


Leave a Reply