Why Substance 3D Designer Is a Powerful Tool for Creating Materials
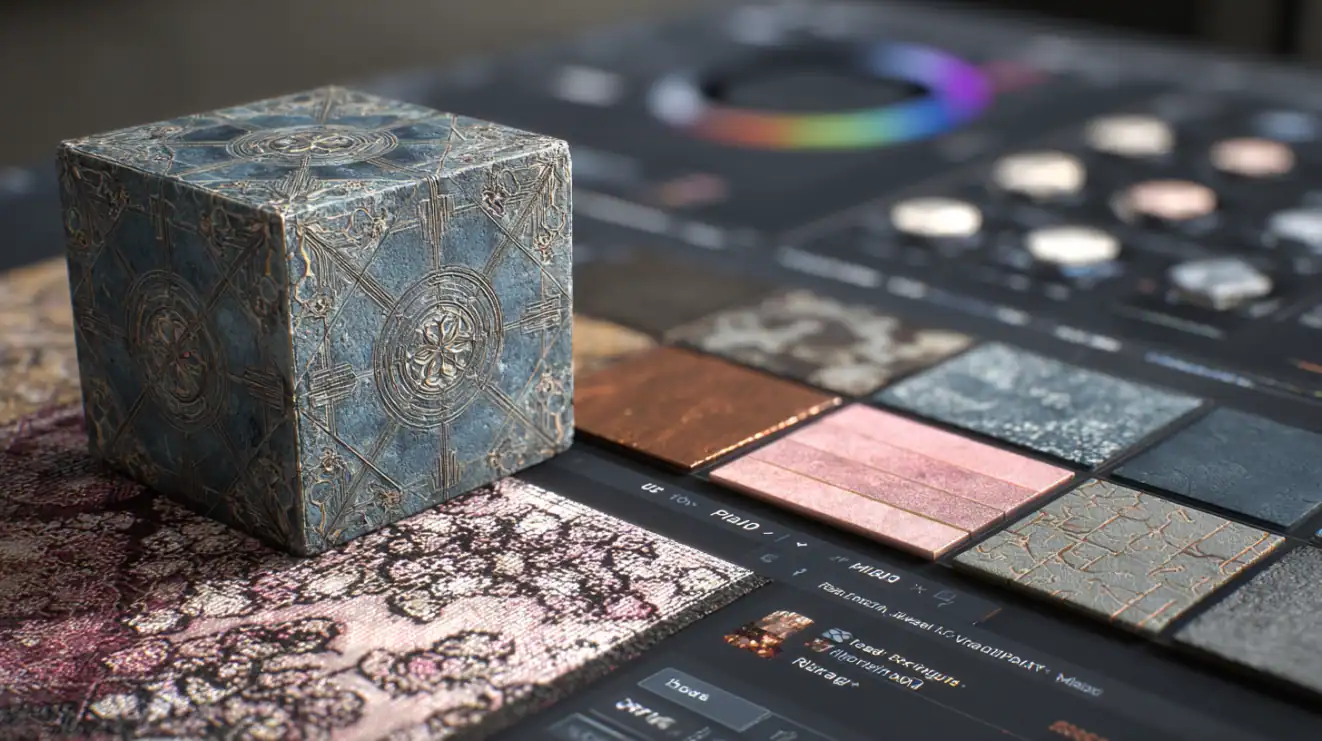
Modern 3D projects require high-quality textures that look realistic and function efficiently. This is where Substance 3D Designer comes in — a program that allows you to create procedural materials with unprecedented flexibility.
Procedural materials enable the creation of complex textures that can be easily customized and scaled. This is especially important for large projects where consistency and high detail are crucial.
This software is actively used in projects like Spider-Man: Miles Morales , Horizon Zero Dawn , and architectural visualization for films such as Blade Runner 2049 . It helps artists create unique textures that make models almost indistinguishable from reality.
In this article, we’ll cover the key aspects of working with Substance 3D Designer :
- How to install the program and set up your workspace.
- How to create your first procedural material.
- How to export materials and use them in other programs.
If you want to master texture creation, this tool will become your best ally.
How to Get Started with Substance 3D Designer
Getting started with Substance 3D Designer might seem challenging, especially if you’re a beginner. However, by understanding the basics — system requirements, program installation, and the interface — you’ll be able to confidently move forward. Let’s break down the key steps.
System Requirements: Is Your Hardware Enough?
Before you begin, it’s important to ensure that your computer meets the program’s requirements. The graphics card plays a key role, especially if you’re working with high-poly models or complex materials.
Tip: If your computer is lagging, try optimizing the program’s settings or upgrading your hardware. For example, increasing RAM or using a more powerful graphics card can significantly improve performance.
Minimum requirements:
- Operating system: Windows 10 or macOS 10.15.
- Processor: Intel Core i5 or equivalent AMD.
- Graphics card: NVIDIA GeForce GTX 1060 or higher.
- RAM: at least 8 GB (16 GB recommended).
Program Installation: It’s Simple If You Know the Nuances
Installing Substance 3D Designer is straightforward if you follow these simple steps:
- Download the installer from the official Adobe website.
- Run the installer and follow the on-screen instructions.
- After installation, be sure to register in Creative Cloud to access all the program’s features.
Don’t forget to check for the latest updates after installation. This ensures you’re using the most stable version of the software.
Program Interface: What to Click and Where?
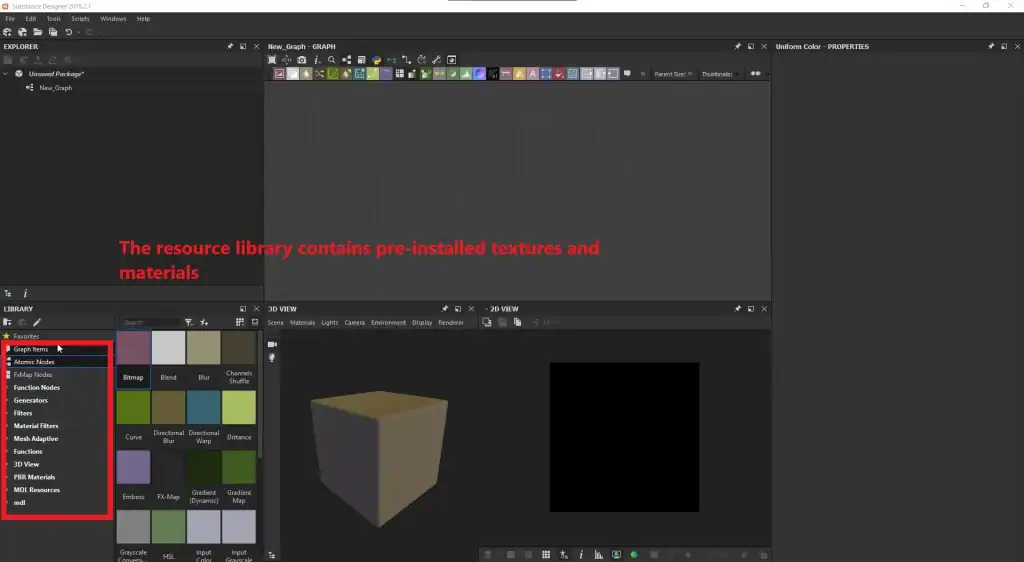
The Substance 3D Designer interface may seem complex at first glance, but it’s easy to master once you understand the main elements:
On the left: the Node Library, where you’ll find ready-made nodes for creating materials.
On the right: the Resource Library, containing pre-installed textures and materials.
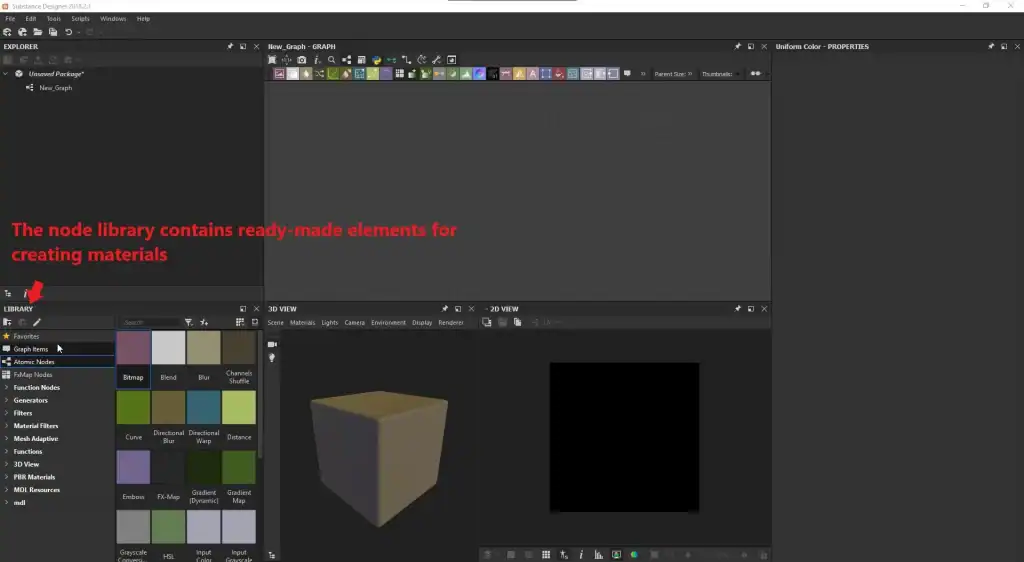
In the center: the Node Graph, where you create and link nodes to form a material.
Spend some time exploring the interface to get comfortable. Try experimenting with simple nodes to understand how they work.
How to Create Materials in Substance 3D Designer
Creating procedural materials is the main task that Substance 3D Designer is designed to solve. Let’s break down the key stages of this process: from understanding the node graph to setting up material parameters.
What Is a Node Graph and Why Is It Important?
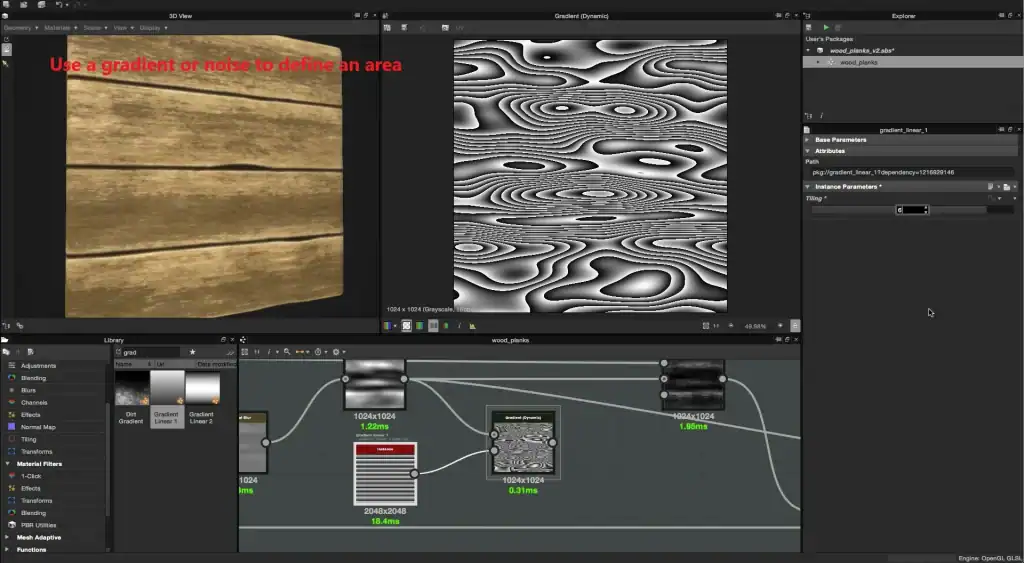
The Node Graph is the heart of Substance 3D Designer . It allows you to create materials by combining various operations and textures. Each node performs a specific function, such as generating noise, adding gradients, or modifying shapes.
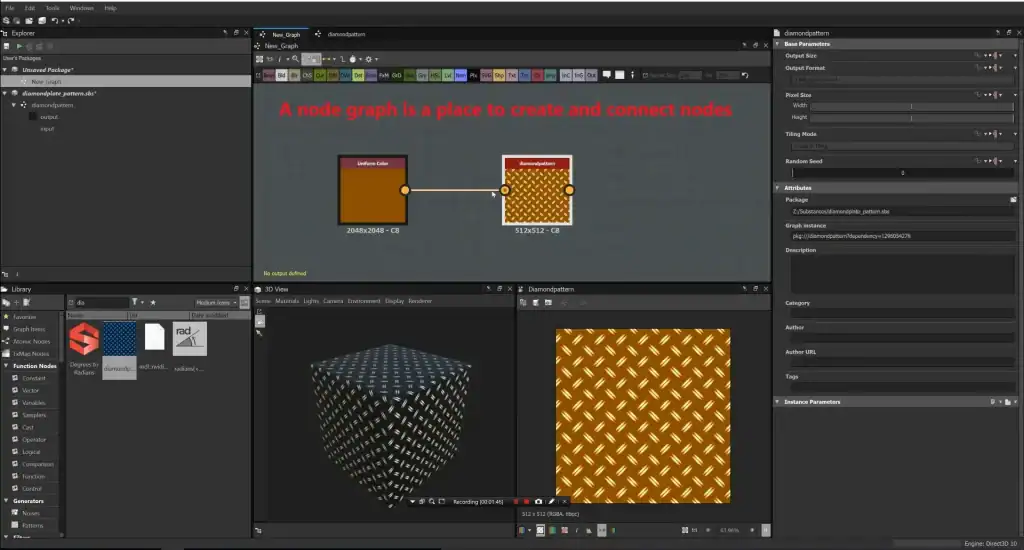
For instance, you can combine a noise node with a gradient to create a wood texture. This makes the material creation process flexible and powerful.
images.
Start with simple nodes and gradually complicate the graph to avoid confusion.
First Steps: Creating a Basic Material
To create your first material, follow these steps:
- Open a new project and add a starting node (e.g., noise or gradient).
2. Connect the node to the output node (Output Node) to see the result.
3. Adjust the node parameters to achieve the desired effect.
Use ready-made nodes from the library to speed up the process. For example, the “Tile Sampler” node helps create repeating patterns.
Setting Up Material Parameters
After creating a basic material, it’s important to adjust its parameters to make the texture more realistic:
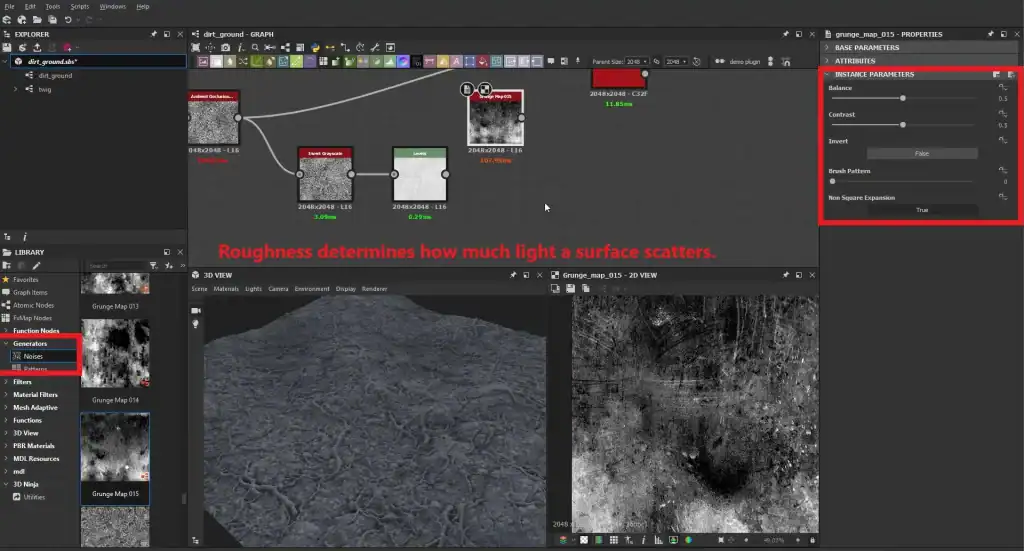
Roughness: Determines how much the surface reflects light.
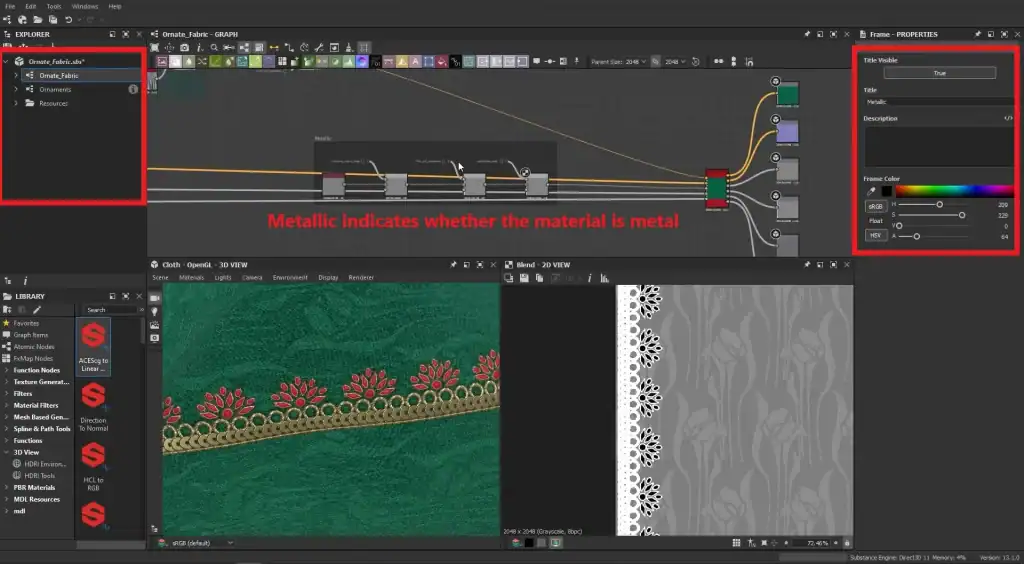
Metallic: Indicates whether the material is metal.
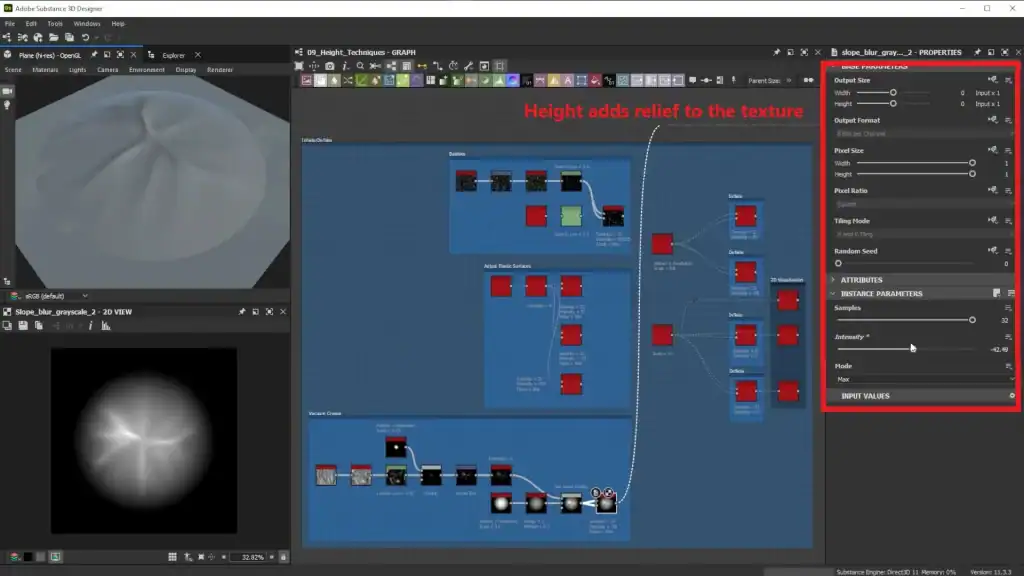
Height: Adds relief to the texture.
I often add details like scratches or wear marks to make the material more realistic. For this, I use nodes like “Scratches” or “Dirt”.
How to Use Nodes and Effects to Create Complex Materials
Substance 3D Designer offers a variety of professional tools that help create complex and realistic materials. Let’s explore the key ones: noise nodes, effects, and masks.
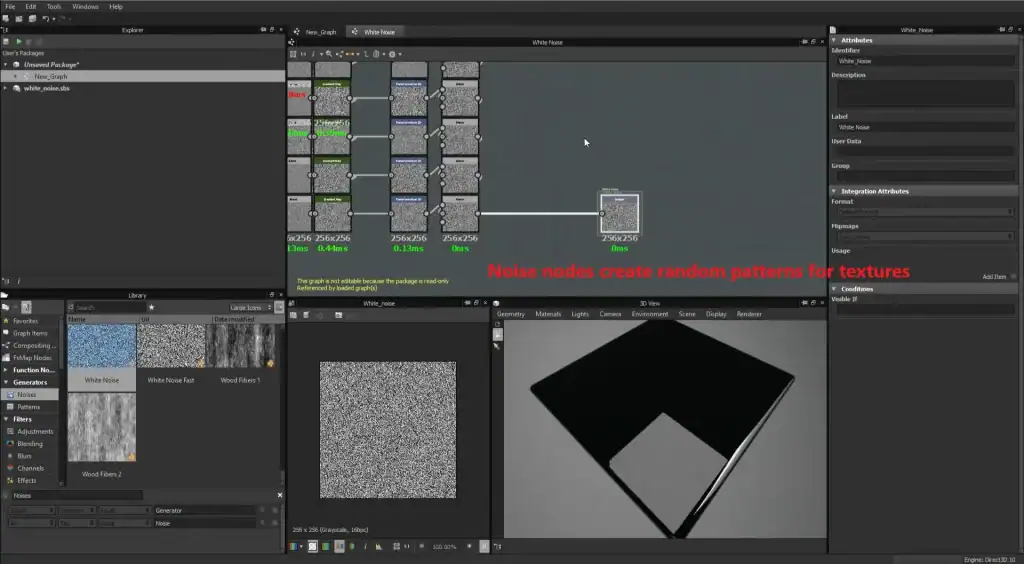
Noise and Pattern Nodes: The Secret to Realism
Noise nodes are the foundation for creating textures like stone, metal, or wood. They generate random patterns that can be customized and combined.
Example: I often combine several noise nodes to achieve a more complex effect. For instance, adding multiple layers of noise with varying intensity allows you to create a texture resembling natural stone.
Use the “Histogram Scan” node to transform noise into clear shapes, such as cracks or pores.
images
Effects and Filters: How to Add Details
Effects and filters allow you to add small details that make the material more realistic. Here are some popular effects:
Scratches: Creates scratches on the surface.
Dirt: Adds dirt or wear marks.
Blur: Blurs the texture for a soft effect.
Experiment with parameters to achieve a natural effect. For example, if you’re adding scratches, make them less noticeable on less accessible parts of the model.
images
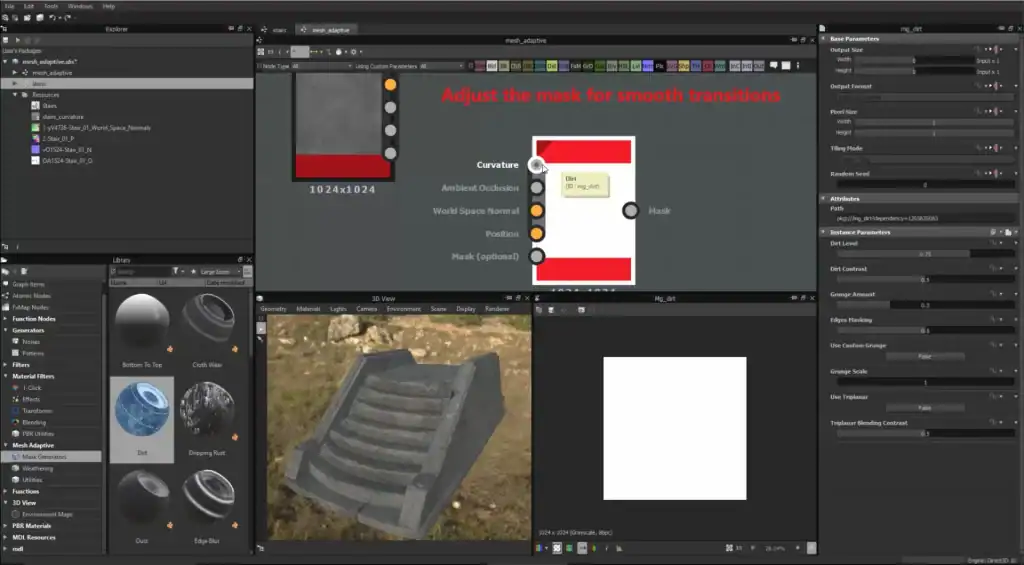
Masks: The Secret to Perfect Transitions
Masks allow you to apply textures or effects only to specific parts of the material. This is especially useful for creating smooth transitions between textures.
How it works:
- Create a mask on the texture node.
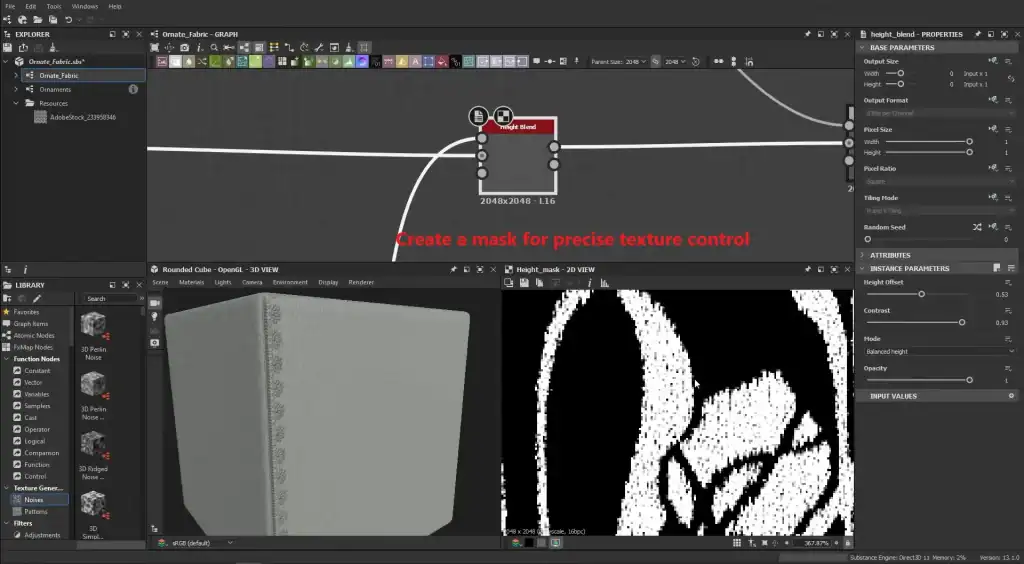
- Use a gradient or noise to define the area where the effect will be applied.
- Adjust the mask settings to achieve smooth transitions.
If you want to add dirt only to the bottom part of an object, use a mask to limit the texture’s application area.
How to Export Materials and Use Them in Other Programs
After creating a material in Substance 3D Designer , it’s important to export it correctly and integrate it into other programs like Unity , Unreal Engine , or Blender . Let’s explore the key aspects of this process: export formats, material integration, and quality checks.
Export Formats: Which One to Choose?
The choice of export format depends on your goals and the program you’re using. Here are the main formats to consider:
- SBSAR: A procedural format that allows you to tweak materials in real-time in programs like Unreal Engine .
- PNG/JPG: Suitable for textures with fixed parameters (e.g., normal maps or roughness maps).
- TGA/EXR: High-quality formats for professional work.
If you’re working in Unreal Engine , choose the SBSAR format — it’s the most supported and ensures flexibility in adjustments.
It’s also important to configure export settings:
Make sure all necessary maps (normals, roughness, metallic) are included.
Check the texture resolution: for games, values typically range from 1024×1024 to 4096×4096 pixels.
Integration with Unity and Unreal Engine
Importing materials into Unity or Unreal Engine is easier than it might seem. To do this:
- Drag and drop the texture files into the project.
- The program will automatically apply them to the model if the UV mapping is set up correctly.
In Unreal Engine , materials can be configured through the Material Editor. For example, you can combine different maps (normals, roughness, metallic) to create complex materials.
In Unity , the process is similar: simply assign the textures to a material, and they’ll appear on the model right away.
If the textures aren’t applied correctly, check whether the texture names meet the program’s requirements. For example, in Unreal Engine , normal maps often need to be named “NormalMap”.
Checking Material Quality
Before exporting, always check your materials for artifacts. Here are a few tips:
- Ensure that textures aren’t stretched or distorted. This could be due to poor UV mapping.
- Check transitions between layers: they should be smooth and natural.
- Zoom in on the model in a 3D editor to see fine details. For example, scratches or dirt should look realistic.
If you notice any issues, go back to Substance 3D Designer and adjust the material. It’s better to spend a little more time checking than to fix errors later.
Useful Tips for Working Effectively in Substance 3D Designer
Working in Substance 3D Designer can seem challenging, especially if you’re just starting out. To simplify the process and avoid common mistakes, we’ve compiled a few helpful tips that will make you a more efficient user of the program.
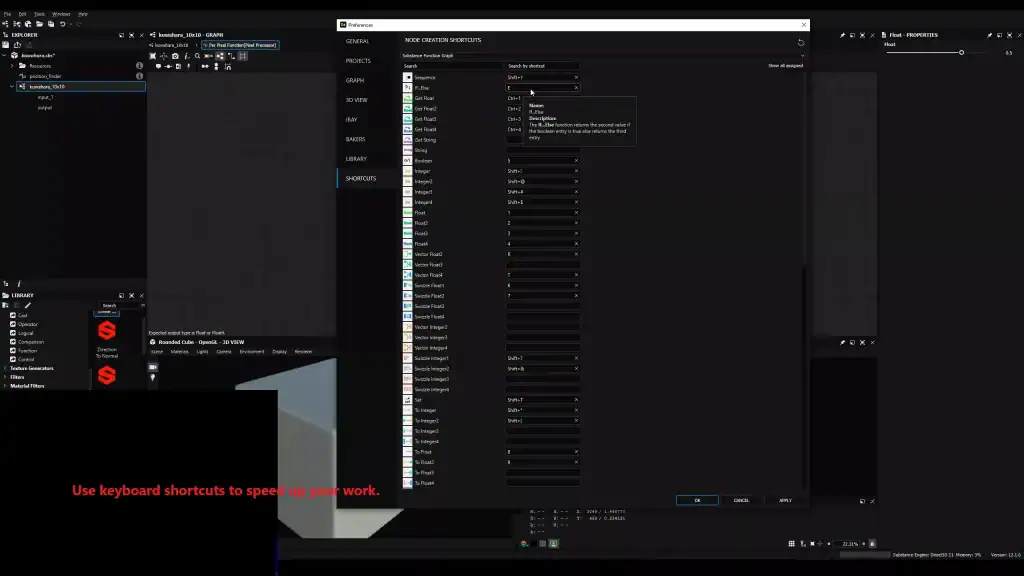
Hotkeys: How to Speed Up Your Workflow
Hotkeys are your best friend in Substance 3D Designer . They significantly speed up your workflow and allow you to focus on creativity rather than searching for tools. Here are some combinations worth memorizing:
- Ctrl + Z: Undo the last action. It’s basic but extremely important.
- Space: Rotate the model in viewing mode. This is handy when you need to inspect details from all angles.
- G: Switch between materials and masks.
- Shift + F: Quickly toggle between texture display modes (e.g., normals, roughness).
Write down a list of the most frequently used hotkeys and keep it near your workspace. Over time, they’ll become second nature.
Avoid Common Mistakes
Even experienced artists sometimes encounter issues while working in Substance 3D Designer . Here are a few tips to help you avoid common pitfalls:
- Don’t forget to save your project to avoid losing progress.
Example: “I once lost an hour of work because I forgot to hit Save . Since then, I always save my project every 15–20 minutes.” - If the material looks unnatural, try adjusting roughness parameters.
Tip: Sometimes even a small tweak to roughness or metallic settings can dramatically improve the appearance of the material. For example, a surface that’s too glossy might look artificial if it’s supposed to be matte. - Check your UV mapping before starting work.
A mistake in UV mapping can lead to stretched or distorted textures. Make sure all parts of the model are properly placed on the UV map. - Don’t overload the material with details.
Example: “I often add too many scratches or dirt marks, and the texture ends up looking overloaded. It’s better to start with minimal details and gradually enhance them.”
Why You Should Master Substance 3D Designer Right Now
Substance 3D Designer is a powerful tool that opens up endless possibilities for creating procedural materials. Whether you’re a beginner or an experienced professional, this program will become your trusted assistant in the world of 3D graphics.
We’ve covered the key aspects of working with the software:
- How to install and set up your workspace.
- How to create materials from scratch using the node graph and noise nodes.
- How to use professional tools like masks and effects.
- How to export materials and integrate them into other programs.
Now that you know the basics, it’s time to start practicing. Download the trial version of the program and create your first material today!
If you need more information, check out our other articles – BLOG


Leave a Reply