Why Photoshop is the Best Tool for Retouching
Adobe Photoshop has long been the gold standard in the world of image editing. Its versatility and wide range of tools make it an indispensable resource for both beginners and professionals. Whether you’re working on portrait photography, landscapes, or commercial projects, Photoshop offers everything you need to achieve professional-quality results.
Photo retouching is not just about fixing flaws; it’s an art form that enhances composition, adds artistic touches, and highlights key details. With Photoshop, you can remove blemishes, adjust lighting, add textures, or create background blur effects. The software also supports multi-layered projects, allowing you to edit each element separately while preserving the original file. This is especially important for commercial projects where precision and high quality are critical.
What You’ll Learn in This Article
In this article, you’ll discover 10 practical tips for retouching photos in Photoshop. We’ll cover essential tools, step-by-step instructions for common tasks, and advanced techniques to help you achieve professional results. Additionally, we’ll discuss common mistakes to avoid and provide extra recommendations to improve your workflow.
Key Tools in Photoshop for Retouching
Photoshop provides a variety of tools, each designed to address specific tasks. Here are the most important ones:
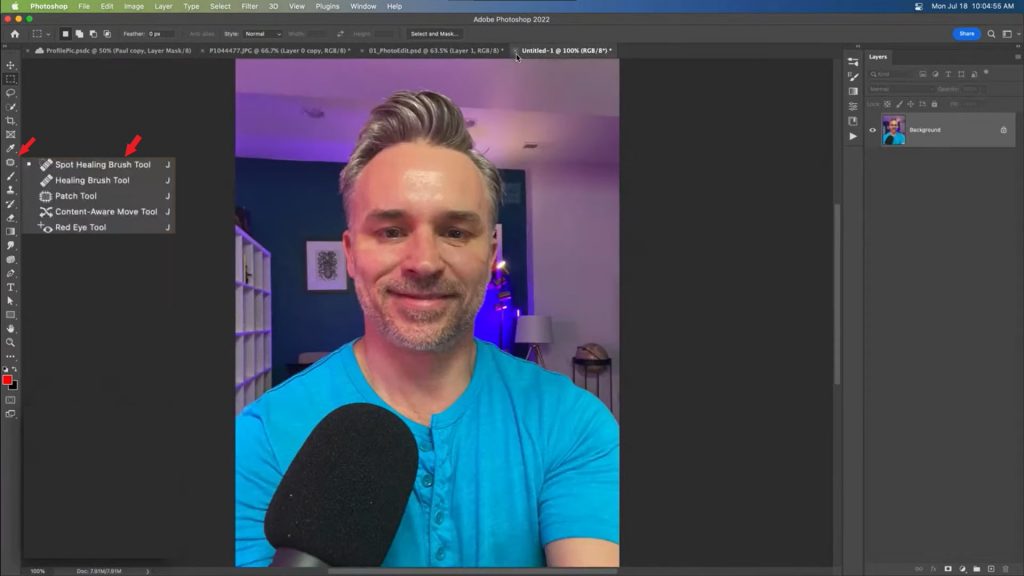
Spot Healing Brush Tool
This tool is perfect for removing small imperfections like pimples, spots, or dust from photos. Simply select the tool, adjust the brush size, and click on the defect—Photoshop will automatically fix it using surrounding pixels. For example, if there are minor blemishes on the skin, the Spot Healing Brush Tool can resolve them in seconds. It’s particularly useful for portraits where maintaining natural skin texture is crucial.
Clone Stamp Tool
The Clone Stamp Tool allows you to copy parts of an image to fix more complex areas. For instance, if you need to remove a background object, this tool will be your best ally. To use it, select a sample area you want to clone and apply it to the desired location. This tool is especially helpful when working with textures like grass, trees, or fabric. However, be cautious: overuse can make the image look artificial.
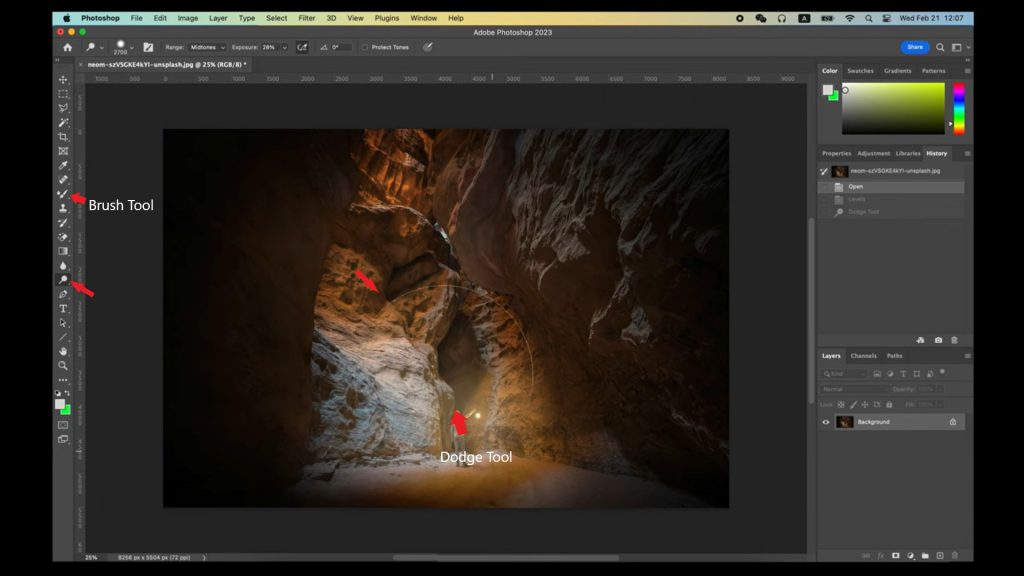
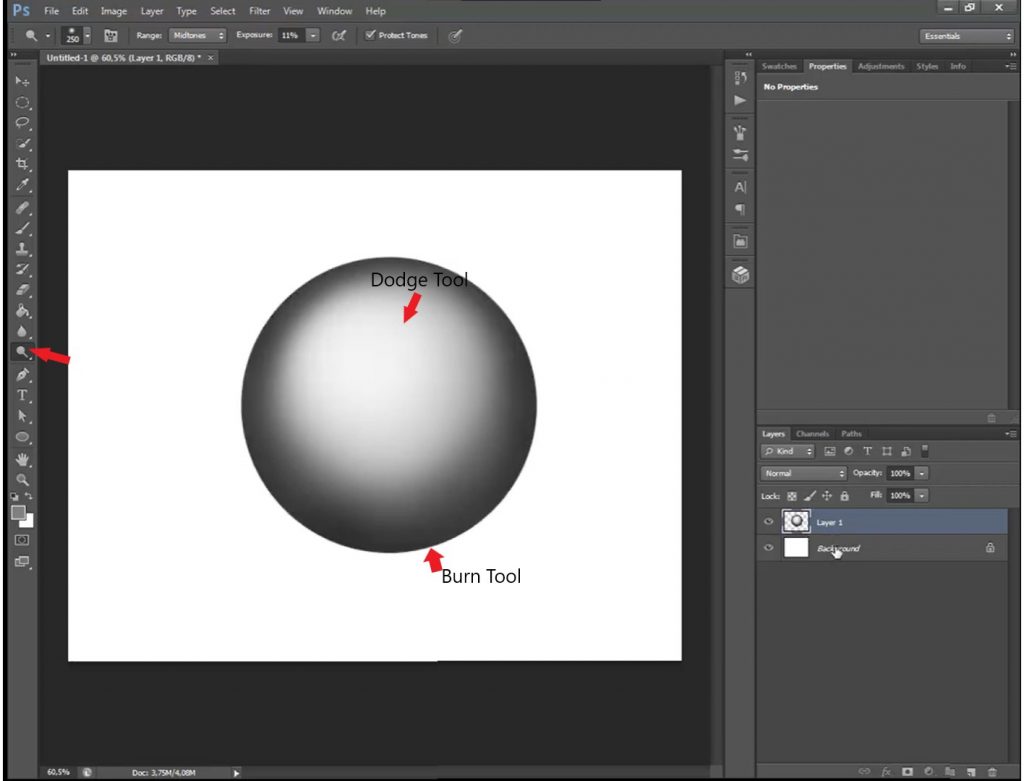
Dodge and Burn Tools
These tools are used to lighten (Dodge) and darken (Burn) specific areas. They’re particularly useful for working with shadows and highlights to add depth and dimension to an image. For example, you can use the Dodge Tool to brighten eyes or cheekbones, and the Burn Tool to darken facial contours or hair. These tools are often used in professional retouching to create more expressive portraits.
Brush Tool
The Brush Tool is the primary tool for adding textures and color adjustments. With low opacity and a soft edge, you can create natural effects. For example, you can use this tool to add blush to cheeks or create soft highlights on hair. The Brush Tool is also frequently used in combination with masks to create complex effects.
Patch Tool
The Patch Tool is another powerful tool for removing objects or defects. It works similarly to the Clone Stamp Tool but allows you to move selected areas. For example, if there’s an unwanted object in the background, you can select it with the Patch Tool and drag it to a suitable area.
Blur and Sharpen Tools
These tools allow you to blur or sharpen specific areas of an image. For example, the Blur Tool is often used to create background blur effects, while the Sharpen Tool enhances details like eyes or skin texture.
Step-by-Step Retouching Tips
1. Removing Skin Imperfections
- How to Remove Pimples and Minor Flaws
- Select the Spot Healing Brush Tool.
- Adjust the brush size so it slightly exceeds the size of the defect.
- Click on the defect—Photoshop will automatically fix it using surrounding pixels.
- For more complex cases, use the Clone Stamp Tool. Select a sample area and apply it to the flaw.
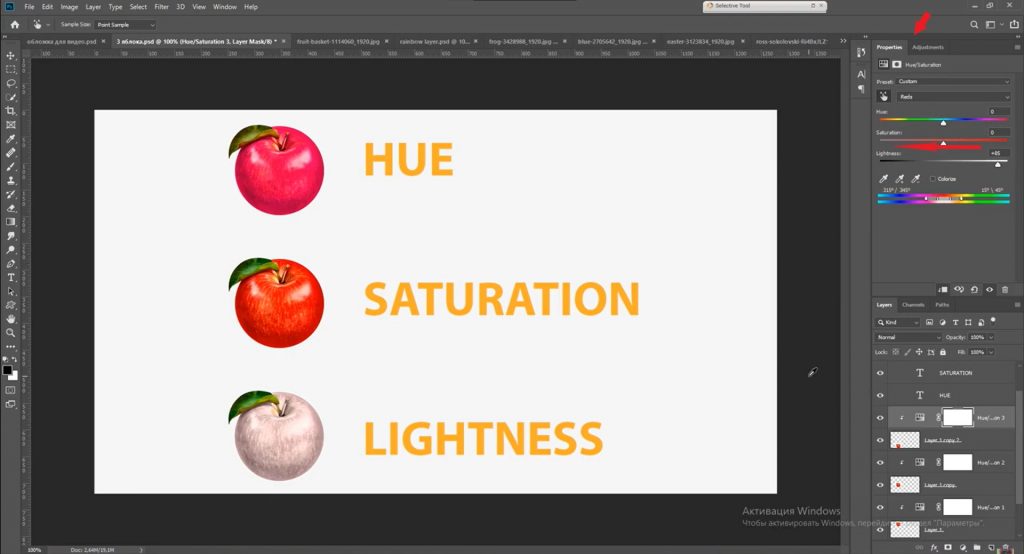
2. Correcting Skin Tone
- How to Achieve a Natural Skin Tone
- Open the Adjustments panel and select Hue/Saturation.
- Adjust the sliders to correct the skin tone. For example, reduce red saturation to eliminate redness.
- Add warmth using Color Balance for a more natural result. For instance, increase yellow and red tones to make the skin appear more vibrant.
3. Enhancing Teeth and Eyes
- How to Whiten Teeth and Add Sparkle to Eyes
- Use the Brush Tool with low opacity and white color to lightly paint over teeth, making them brighter.
- Apply the Dodge Tool to add sparkle to the pupils. You can also use the Brush Tool to highlight reflections.
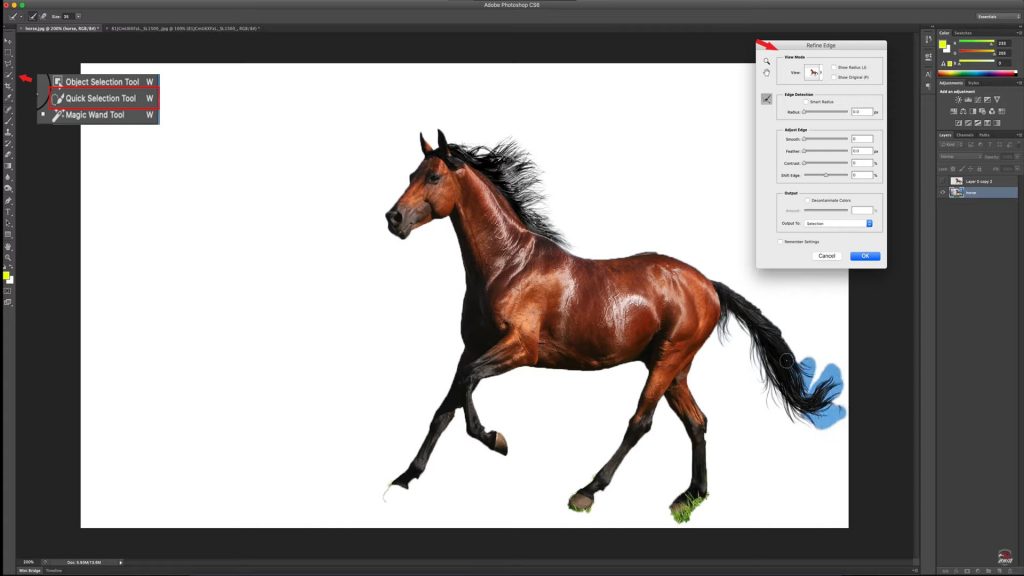
4. Removing the Background
- How to Remove the Background with Quick Selection Tool
- Select the Quick Selection Tool and outline the object.
- Use Refine Edge to improve the edges. For example, increase the radius and add softness for a more natural transition.
- Delete the background by pressing Delete.
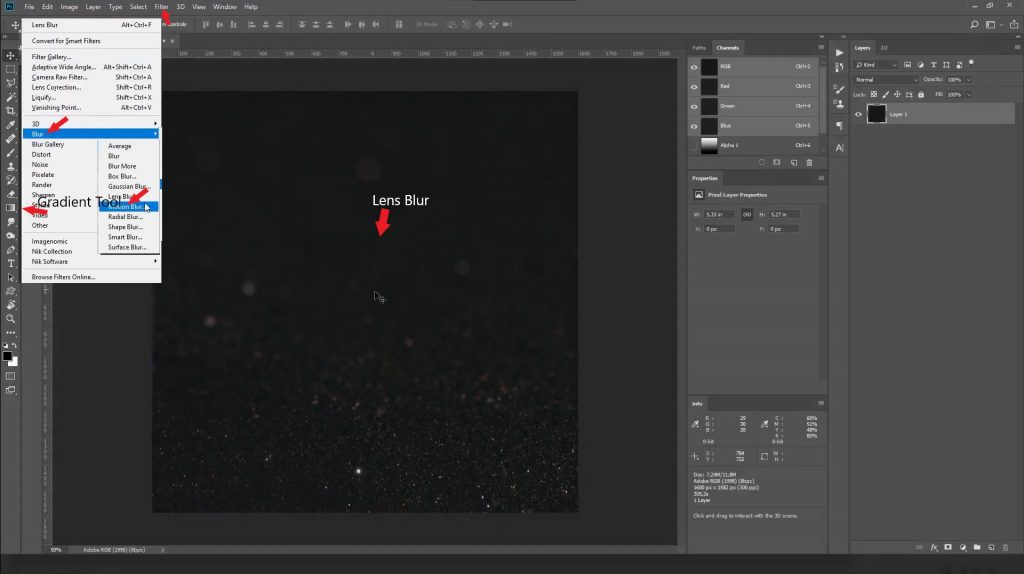
5. Adding Background Blur
- How to Create a Bokeh Effect
- Add a new layer and apply Lens Blur.
- Use the Gradient Tool to create a smooth transition. For example, start from the center of the object and blur the background toward the edges.
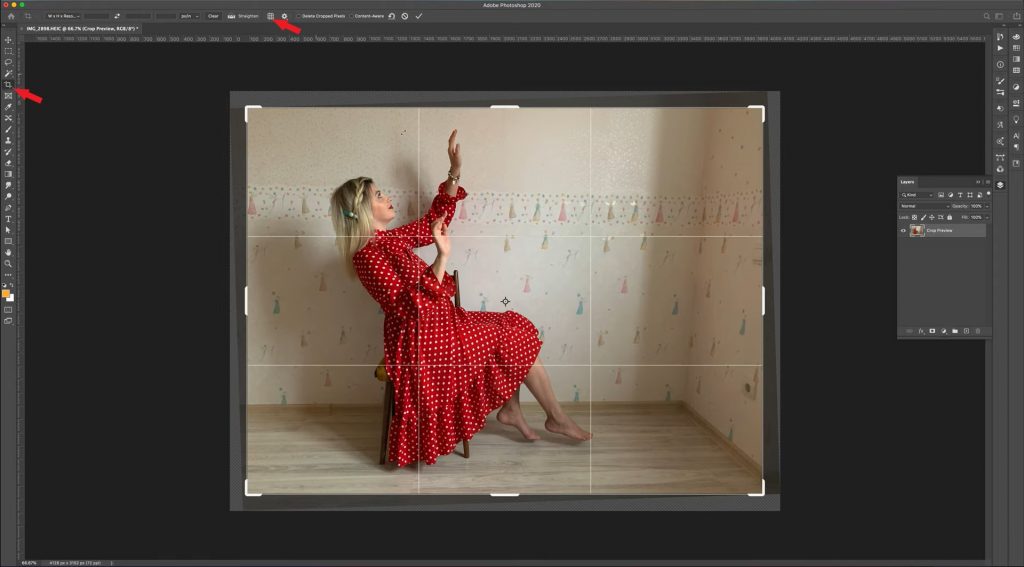
6. Improving Composition
- How to Use Crop Tool to Enhance the Image
- Select the Crop Tool and remove unnecessary elements.
- Focus on the main subject, following the rule of thirds. For example, place the subject at the intersection of grid lines for a more harmonious look.
7. Working with Shadows and Highlights
- How to Use Dodge and Burn Tools
- Select the Dodge Tool to brighten dark areas. For example, lighten cheekbones or eyes.
- Use the Burn Tool to darken light areas. For example, darken facial contours or hair.
8. Adding Textures
- How to Add Textures Using Overlay
- Create a new layer with a texture. For example, add a paper or fabric texture.
- Change the blending mode to Overlay.

9. Correcting Color Balance
- How to Fix Color Balance
- Open the Adjustments panel and select Color Balance.
- Adjust the sliders to correct colors. For example, add more blue for a cool tone or yellow for a warm tone.

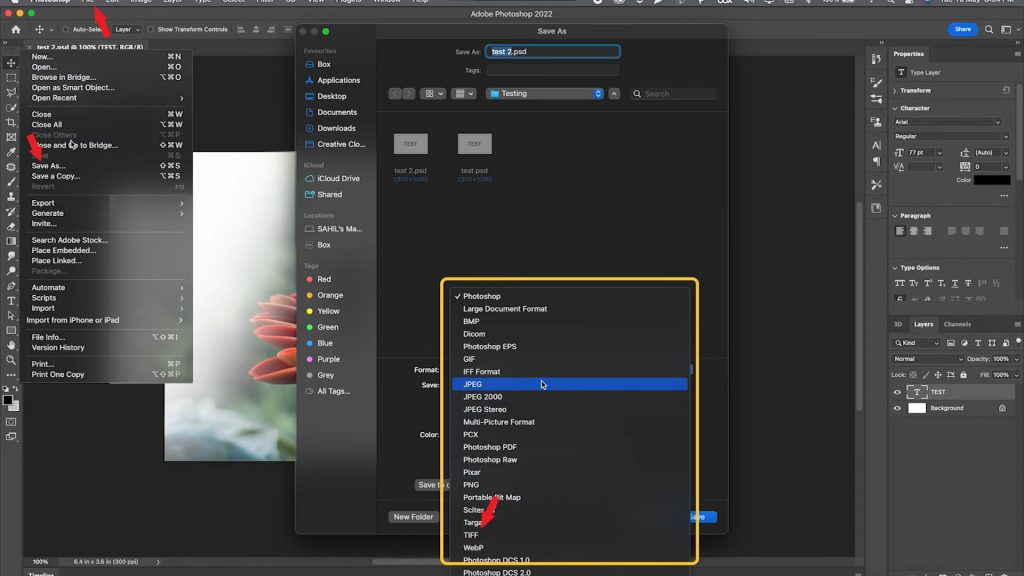
10. Exporting the Final Image
- How to Save the File for Web and Print
- For web, use Save for Web and choose JPEG format.
- For print, save the file in TIFF format with high resolution.
Advanced Techniques for Professionals
High Dynamic Range (HDR):
HDR is used to enhance details in bright and dark areas of an image. For example, you can use this technique for landscapes to highlight clouds in the sky or details in shadows.
Frequency Separation:
Frequency Separation is a powerful technique that separates textures and colors into different layers. This allows you to work on each aspect of the image separately, which is especially useful for skin retouching. For example, you can remove texture flaws without affecting skin color.
Liquify Tool:
The Liquify Tool is used to adjust facial and body contours. For instance, you can make a face more symmetrical or reduce excess volume. However, be careful: excessive use can distort natural facial features.
Advanced Masking:
Advanced Masking allows you to create complex masks for multi-layered retouching. This is particularly important when working with hair or complex backgrounds. For example, you can create a mask for hair to add volume or texture.
Color Grading:
Color Grading is a technique that creates unique color effects. For example, you can add a cool tone for a winter atmosphere or a warm tone for a summer shot.
5 Common Mistakes in Retouching
- Over-Brightening Skin:
Skin that is too bright looks unnatural. Use low opacity tools to maintain realism. - Overloading with Color Effects:
Avoid excessive use of filters and color corrections. - Improper Background Handling:
Ensure the background complements the main subject. - Ignoring Details:
Don’t forget small details like eye reflections or hair texture. - Overusing Liquify Tool:
Excessive contour adjustments can distort natural facial features.
Extra Tips for Effective Retouching
Extra Tips for Effective Retouching
- Work on Separate Layers:
This allows you to make changes without damaging the original image. - Use Keyboard Shortcuts:
Shortcuts significantly speed up your workflow. For example, Ctrl+T for transformation or Ctrl+J to duplicate a layer. - Save Backup Copies:
Regularly save your project to avoid data loss. - Use Layer Masks:
Masks allow you to hide or reveal parts of a layer without deleting them. This is especially useful when working with textures or color corrections. - Experiment with Filters:
Photoshop offers many filters that can be combined to create unique effects.
Ready to Start Retouching in Photoshop?
Now that you know both basic and advanced techniques, it’s time to put them into practice. Photoshop is a powerful tool that opens up endless creative possibilities. Whether you’re working on portraits, landscapes, or advertising shots, you can achieve professional results by following our tips.
Don’t be afraid to experiment and try new techniques. Retouching is not only a technical process, but also a creative one. Every step you take brings you closer to mastery with Photoshop.
Share your work in the comments or tag us on social media—we’d love to see your results!


Leave a Reply