
Masks in Photoshop are a powerful tool that opens up endless creative possibilities. They allow you to experiment with images without affecting the original pixels. This means you can hide or reveal parts of a layer, create smooth transitions, and combine elements while maintaining full control over your project.
If you want to learn how to create professional collages, retouch photos, or add textures to objects, masks will become your go-to solution. In this article, we’ll cover everything you need to know about masks—from basic principles to advanced techniques.
Imagine replacing the background in a portrait or creating a “foggy” effect around an object. All these tasks can be achieved using masks without altering the original image. We’ll explore each step in detail so you can confidently apply masks in your projects.
You’ll find out:
- What masks are and how they work in Photoshop.
- The different types of masks: Layer Masks, Clipping Masks, and Vector Masks.
- How to use essential tools like the Brush Tool, Gradient Tool, and Selection Tools for masking.
- Step-by-step instructions for creating and refining masks.
- Advanced techniques like combining masks and applying textures.
- Real-life examples of mask applications, including photo retouching, collage creation, and texture overlays.
What Are Masks in Photoshop?
Understanding the Magic of Masks
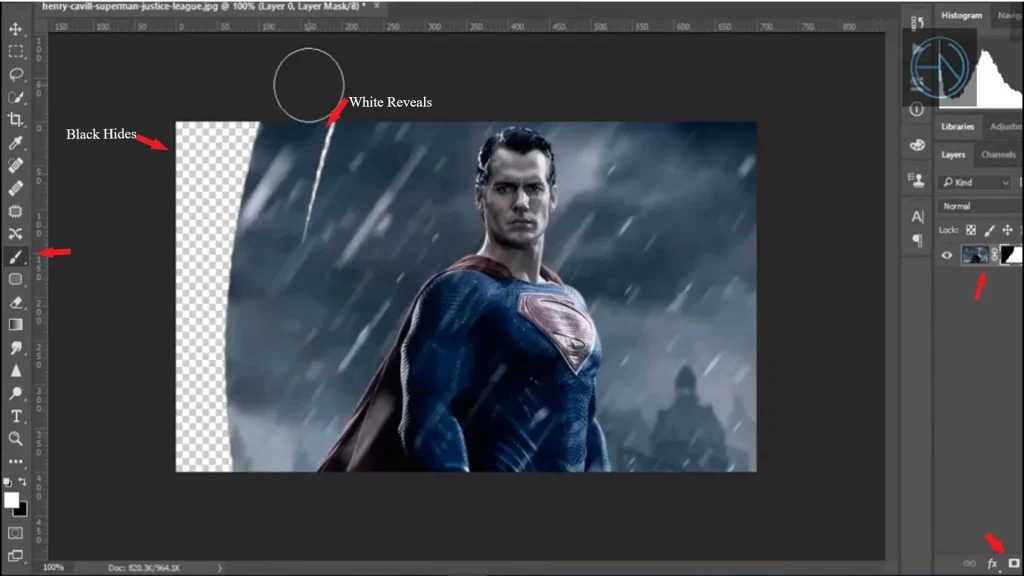
Masks in Photoshop can be compared to invisible stencils that determine which parts of a layer are visible and which are hidden. The principle is simple: white reveals, black conceals, and gray creates transparency. This gives you complete freedom to experiment without risking damage to the original image.
But why are masks so important? Imagine working on a complex project where you need to combine multiple images. Without masks, you’d have to constantly copy and delete parts of layers, which could lead to a loss of quality. Masks, on the other hand, allow you to work “non-destructively,” keeping the original data intact.
Types of Masks
- Layer Masks:
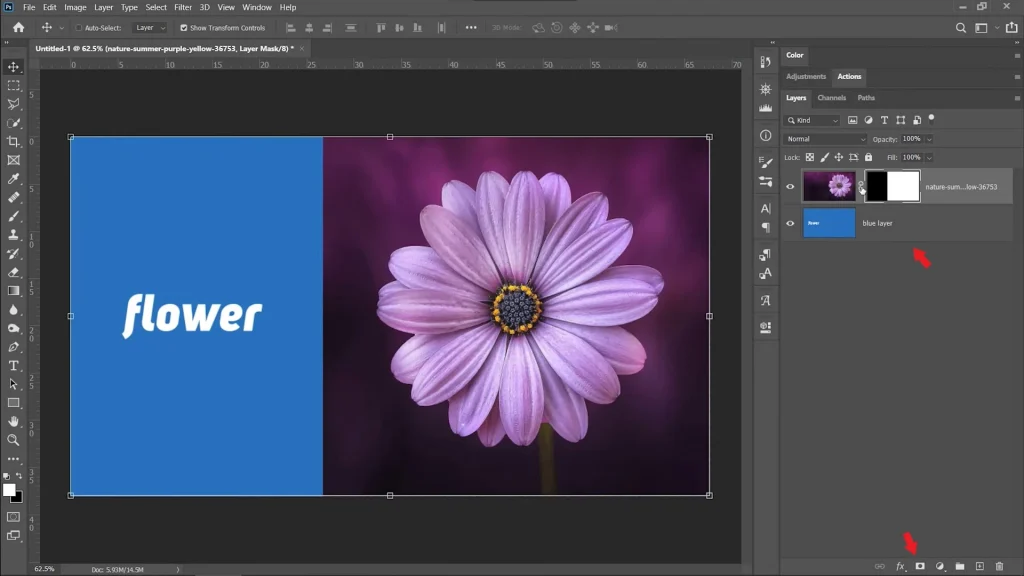
Used to create smooth transitions between layers. For example, you can hide part of an image to reveal the background layer. This is perfect for creating collages or overlay effects.

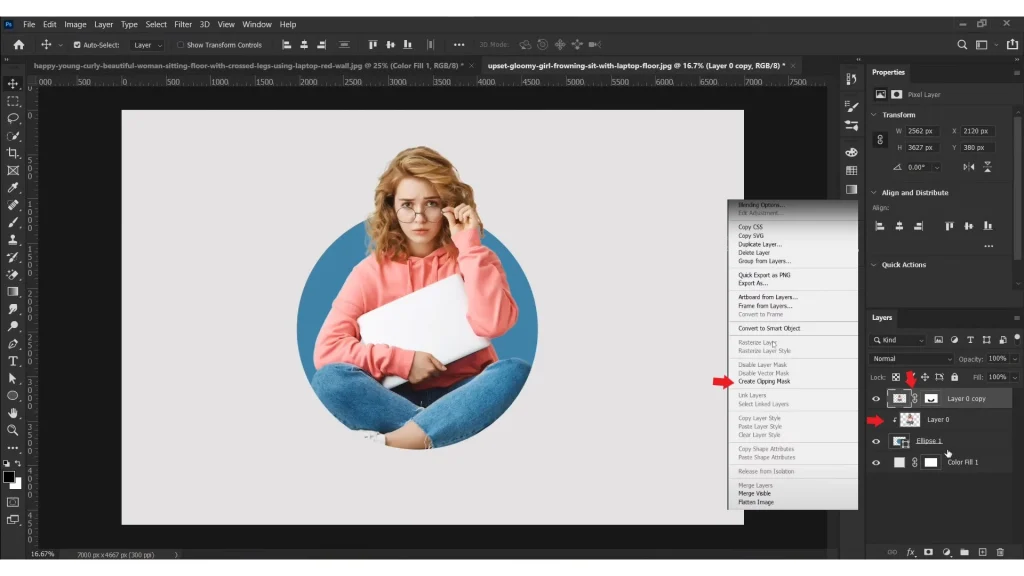
- Clipping Masks:
These masks allow you to “attach” one layer to another. For instance, you can apply a texture to text or a shape. Clipping Masks are especially useful for designers working with typography.
- Vector Masks:
Ideal for working with vector shapes. They create sharp edges that are easily scalable. If you’re designing a logo or icon, Vector Masks are your best choice.

Essential Tools for Working with Masks
Brush Tool
The brush is your primary tool for painting on masks. A black brush hides parts of a layer, while a white brush reveals them. To create soft transitions, use a brush with low hardness. For example, if you want to create a “foggy” effect around an object, choose a soft brush with 20-30% opacity.
Tip: Use the X and Alt keys to quickly switch between black and white. This will speed up your workflow.
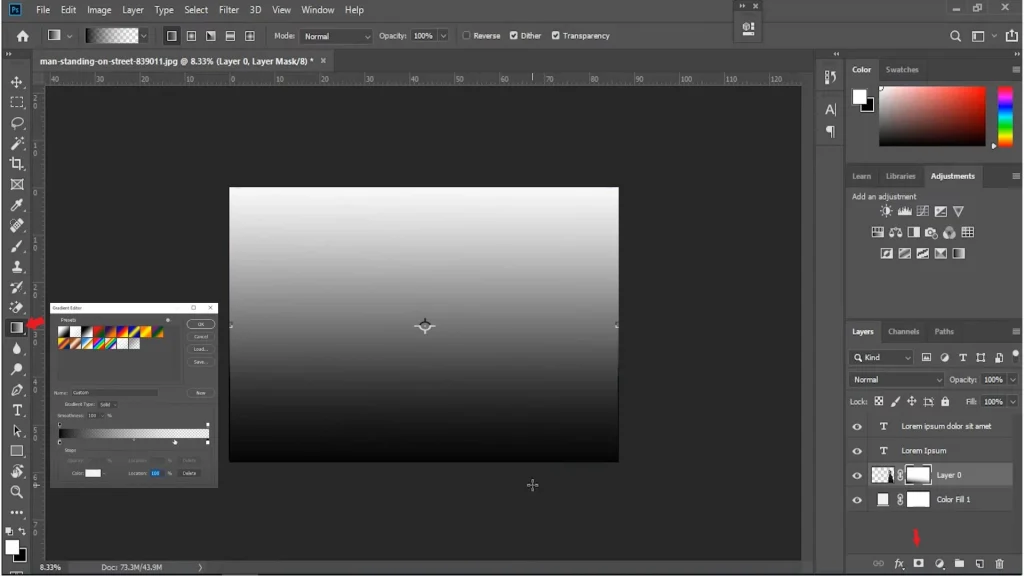
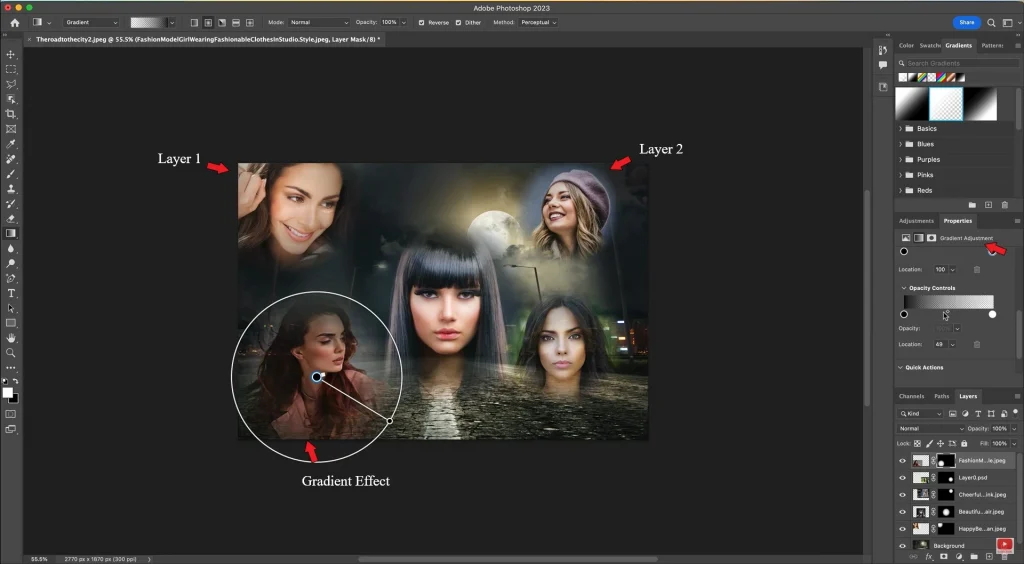
Gradient Tool
The gradient allows you to create smooth transitions between visible and hidden parts of a layer. For example, you can make one image blend seamlessly into another. To do this:
- Select the Gradient Tool.
- Set the gradient from black to white.
- Drag the gradient across the mask to create an overlay effect.
Selection Tools
Selection tools like Quick Selection or Pen Tool help isolate objects for applying masks. After creating a selection, you can convert it into a mask with a single click.
Example: If you want to cut out a model from a photo, use the Pen Tool for precise contouring. Then add a mask to hide the background.

Properties Panel
Mask settings such as opacity, feathering, and density can be adjusted in the Properties panel. This gives you precise control over effects. For example, if the edges of the mask are too sharp, increase the Feathering parameter.

Step-by-Step Guide
Step 1: Adding Your First Mask
- Open an image in Photoshop.
- Select the layer you want to apply the mask to.
- Click the Add Layer Mask icon at the bottom of the Layers panel.
- Grab the Brush Tool and select black. Start painting on the mask to hide parts of the layer.
Example: If you want to hide the background in a photo, use a soft black brush. If you accidentally hide too much, switch to white and restore the desired areas.
Step 2: Isolating Objects
- Use the Quick Selection Tool to select an object.
- Click Add Layer Mask to hide the background.
- If the edges of the selection are too sharp, use Refine Edge to smooth them out.
Example: For portrait retouching, select the model’s face and add a mask to hide the background. Then use Refine Edge to process the hair.

Step 3: Creating a Gradient Mask
- Add a mask to the layer.
- Select the Gradient Tool and choose a gradient from black to white.
- Drag the gradient across the mask to create a smooth transition.
Example: If you want to create a “foggy” effect around an object, drag the gradient across the mask starting from the center of the object.

Step 4: Combining Masks
- Create multiple layers with masks.
- Use different tools (Brush, Gradient) to create multi-layered effects.
- Experiment with opacity and blending modes to achieve the desired result.
Example: Stack several images with masks to create a collage. For instance, combine the horizon of one landscape with the sky of another.
Advanced Techniques for Working with Masks
Clipping Masks
Create a text layer and add an image above it. Then right-click on the image and select Create Clipping Mask . Now the image will only be visible inside the text.
Example: If you’re designing an advertising banner with text, use a Clipping Mask to add a texture or image inside the letters.
Vector Masks
- Create a vector shape using the Shape Tool.
- Add a Vector Mask to hide parts of the shape.
- Use the Path Selection Tool to adjust the contours.
Example: If you’re designing a logo, use a Vector Mask to create clean, scalable borders.
Refinements and Feathering
- Open the Properties panel.
- Adjust the Feathering settings to soften the edges of the mask.
- Use Refine Edge to improve complex selections, such as hair.
Example: For portrait retouching, use Refine Edge to precisely select the model’s hair.
Practical Examples of Using Masks
Portrait Retouching
Use masks to remove skin imperfections while preserving the natural texture of the face. For example, hide parts of the retouched layer to reveal natural details.

Creating a Collage
Combine multiple images using masks. For example, create a smooth transition between the horizons of two landscapes.

Adding Textures
Apply a texture to an object using a Clipping Mask. For example, add a metallic effect to a logo.

Take Stock
Masks in Photoshop are the key to professional image editing. They allow you to work quickly, efficiently, and without losing quality. Now that you know the basics and advanced techniques, it’s time to start practicing. Share your results in the comments—we’d love to see your work!


Leave a Reply